图73
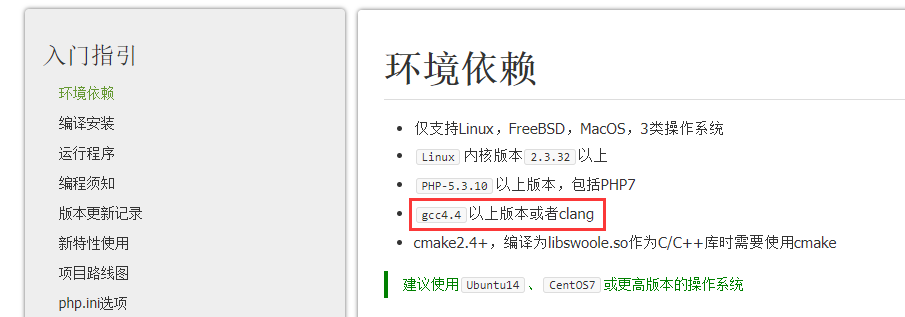
1、打开网址:https://wiki.swoole.com/wiki/page/7.html ,查看环境依赖,如图1
环境依赖
仅支持Linux,FreeBSD,MacOS,3类操作系统
Linux内核版本2.3.32以上
PHP-5.3.10以上版本,包括PHP7
gcc4.4以上版本或者clang
cmake2.4+,编译为libswoole.so作为C/C++库时需要使用cmake
建议使用Ubuntu14、CentOS7或更高版本的操作系统
2、在 VirtualBox 设置端口转发规则,以便于远程连接 CentOS 7 64,如图2
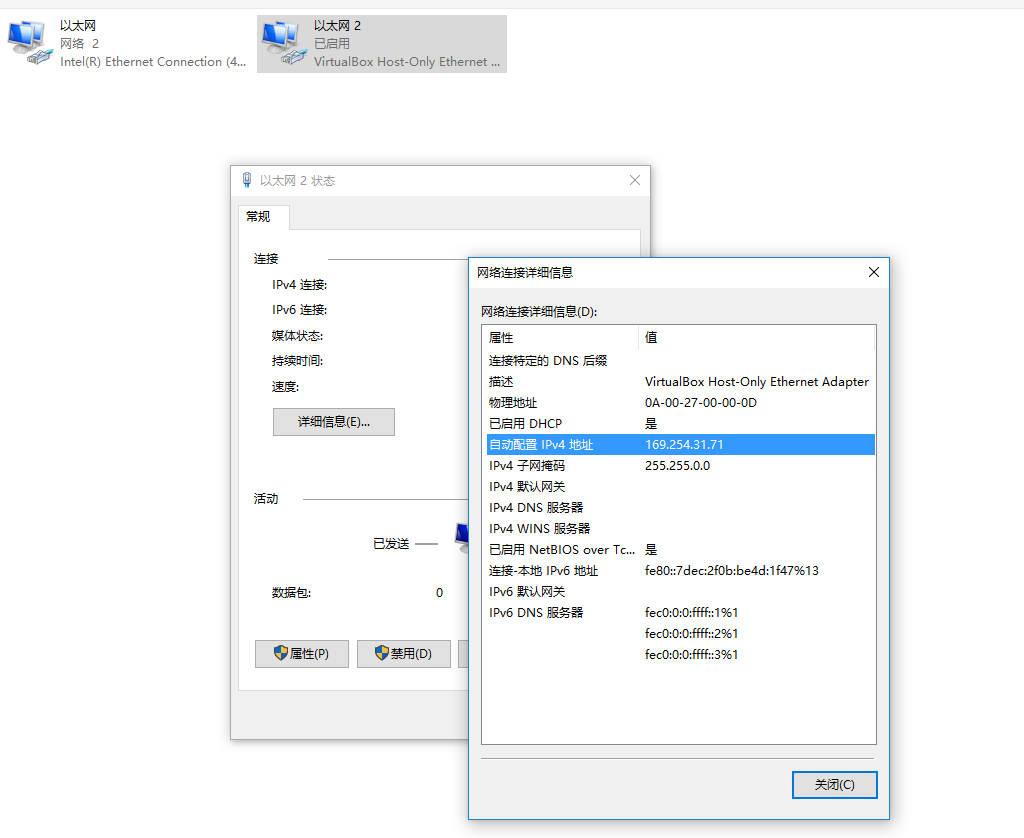
3、查看 VirtualBox 的IP地址,如图3
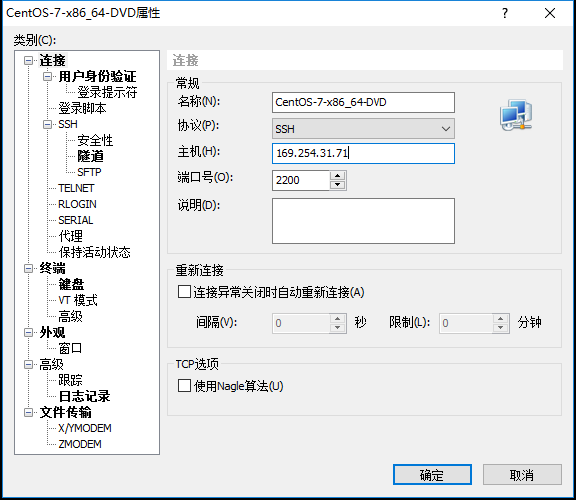
4、通过 Xshell 5 连接 CentOS 7 64,如图4
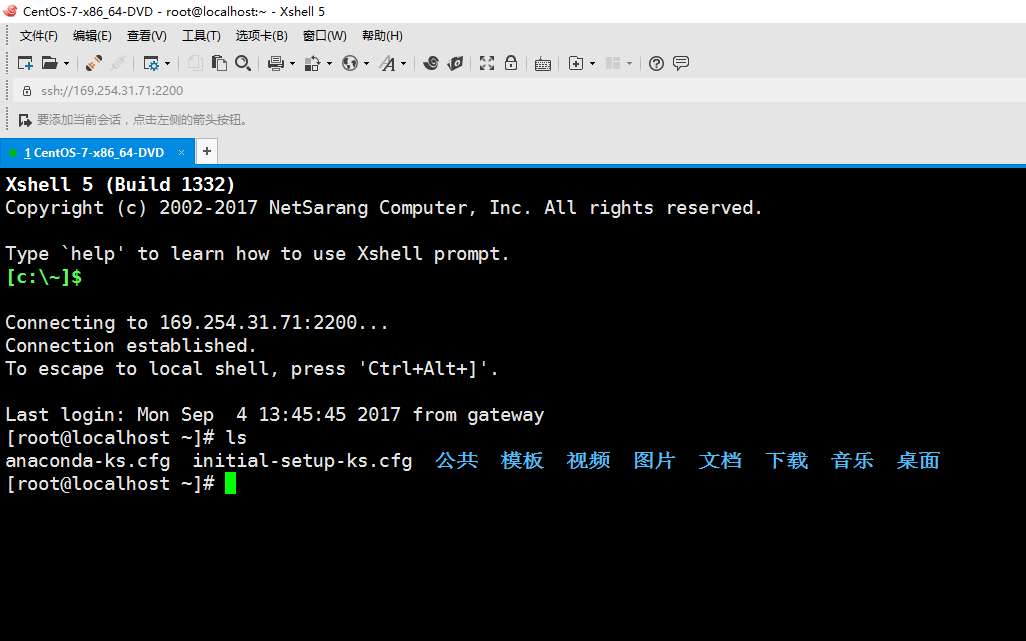
5、ssh 连接成功,如图5
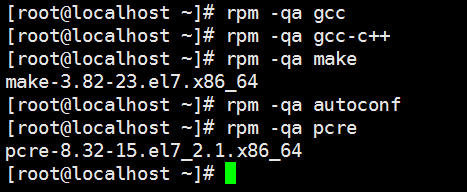
6、环境依赖检查,分别查看gcc、gcc-c++、make、autoconf、pcre的安装情况,未安装的,需要安装,gcc、gcc-c++、autoconf未安装,如图6
rpm -qa gcc
rpm -qa gcc-c++
rpm -qa make
rpm -qa autoconf
rpm -qa pcre
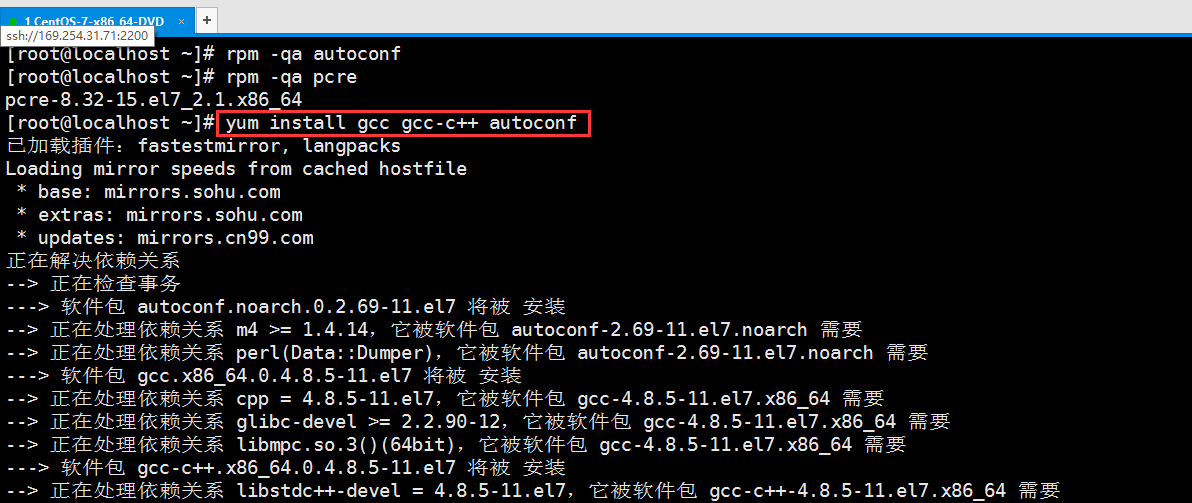
7、安装 gcc、gcc-c++、autoconf,如图7
yum install gcc gcc-c++ autoconf
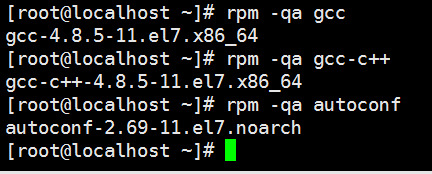
8、再次查看gcc、gcc-c++、autoconf的安装情况,皆已安装成功,如图8
rpm -qa gcc
rpm -qa gcc-c++
rpm -qa autoconf
9、编译安装 php7 之前需要安装对应的编译工具和依赖包,运行如下命令,如图9
rpm -qa libxml2 libxml2-devel openssl openssl-devel curl-devel libjpeg-devel libpng-devel freetype-devel libmcrypt-devel
yum -y install libxml2 libxml2-devel openssl openssl-devel curl-devel libjpeg-devel libpng-devel freetype-devel libmcrypt-devel
10、查看安装情况,libmcrypt-devel未安装,如图10
rpm -qa libxml2 libxml2-devel openssl openssl-devel curl-devel libjpeg-devel libpng-devel freetype-devel libmcrypt-devel
rpm -qa libcurl-devel
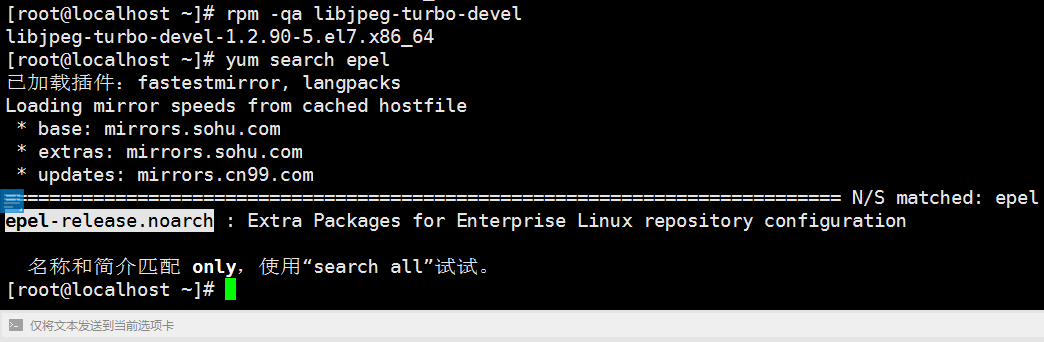
rpm -qa libjpeg-turbo-devel
11、libmcrypt-devel未安装,原因在于:没有可用软件包 libmcrypt-devel,如图11
12、搜索 EPEL 相关的软件包,如图12
yum search epel
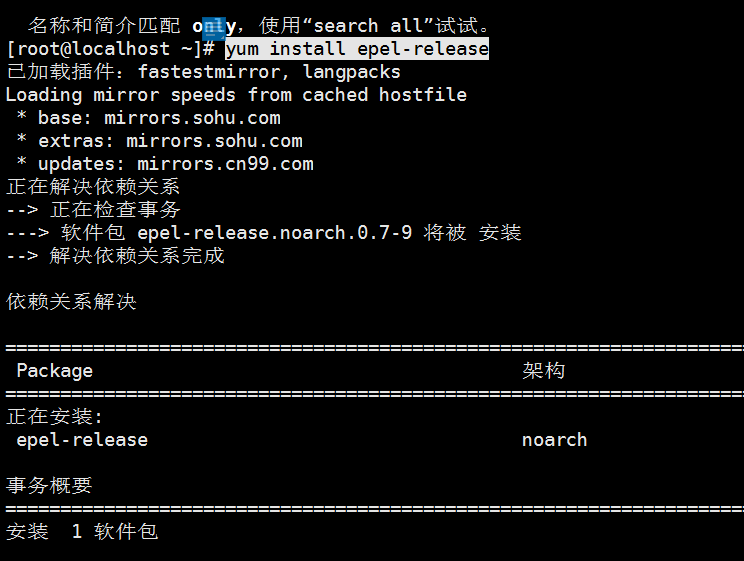
13、安装 EPEL 软件包,如图13
yum install epel-release
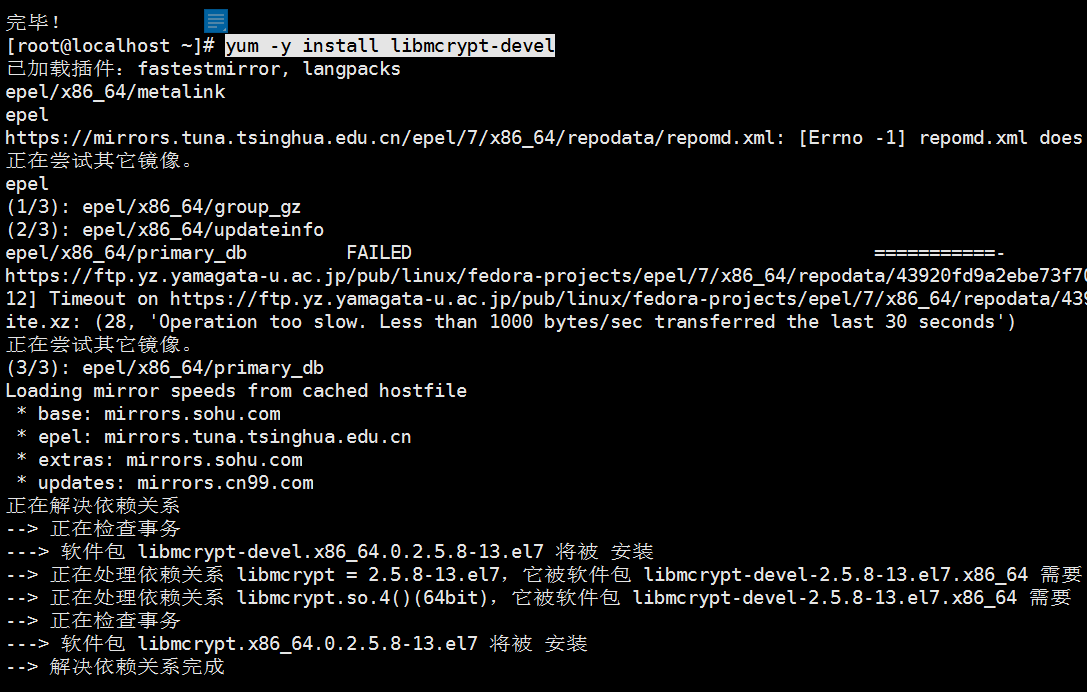
14、再次安装 libmcrypt-devel,如图14
yum -y install libmcrypt-devel
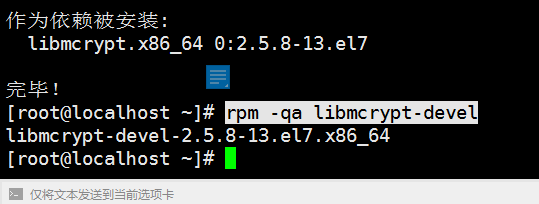
15、查看安装情况,libmcrypt-devel已安装,如图15
rpm -qa libmcrypt-devel
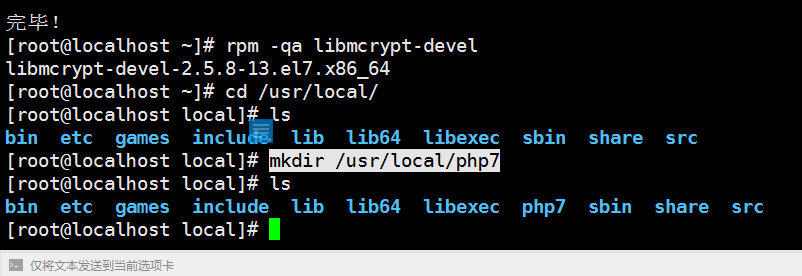
16、参考网址:http://www.shaunfreeman.name/compiling-php-7-on-centos/ ,新建目录:/usr/local/php7,如图16
mkdir /usr/local/php7
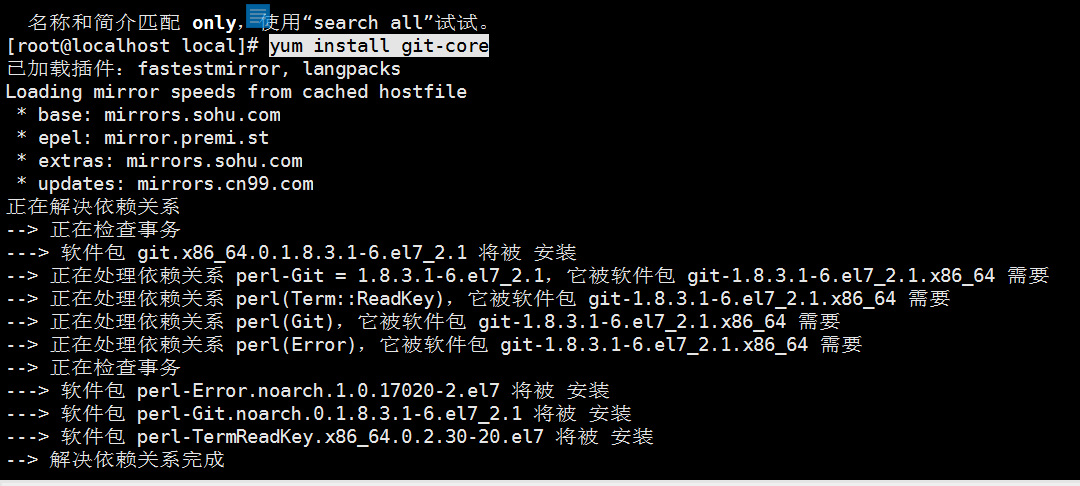
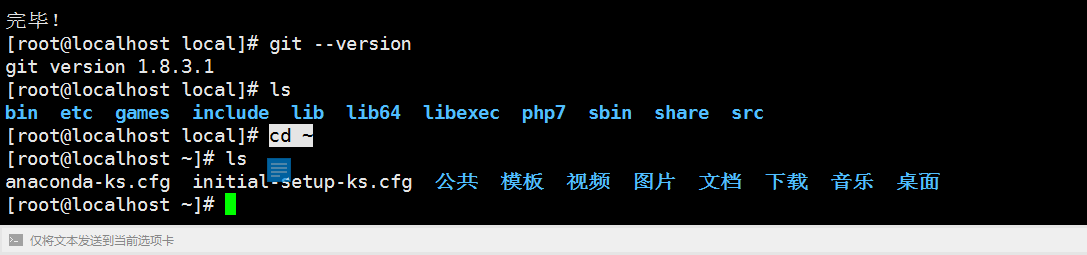
17、安装 Git,如图17
yum install git-core
18、进入用户主目录,如图18
cd ~
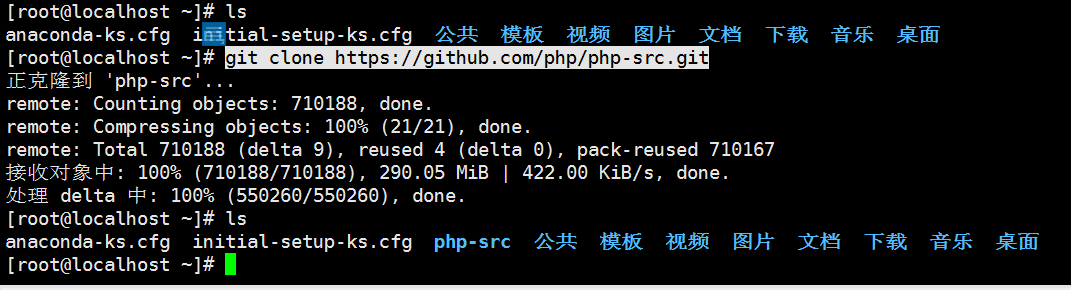
19、从 PHP Github 仓库中获取源代码,如图19
git clone https://github.com/php/php-src.git
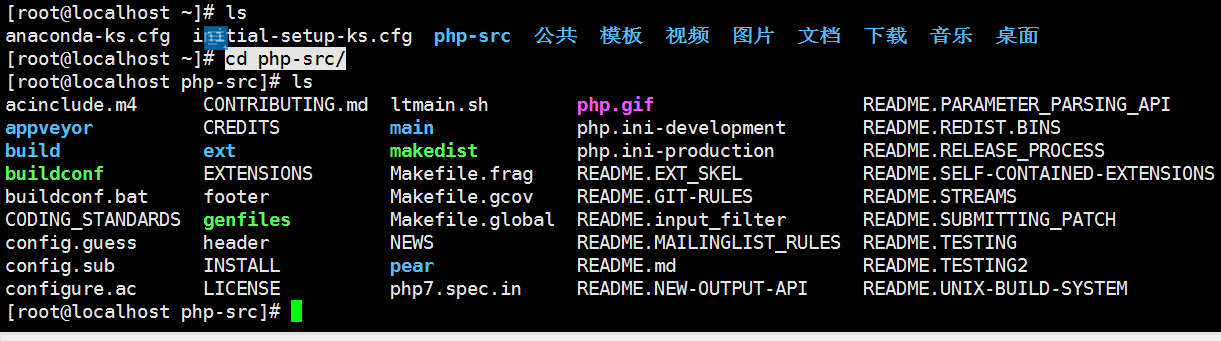
20、进入目录:php-src,如图20
cd php-src/
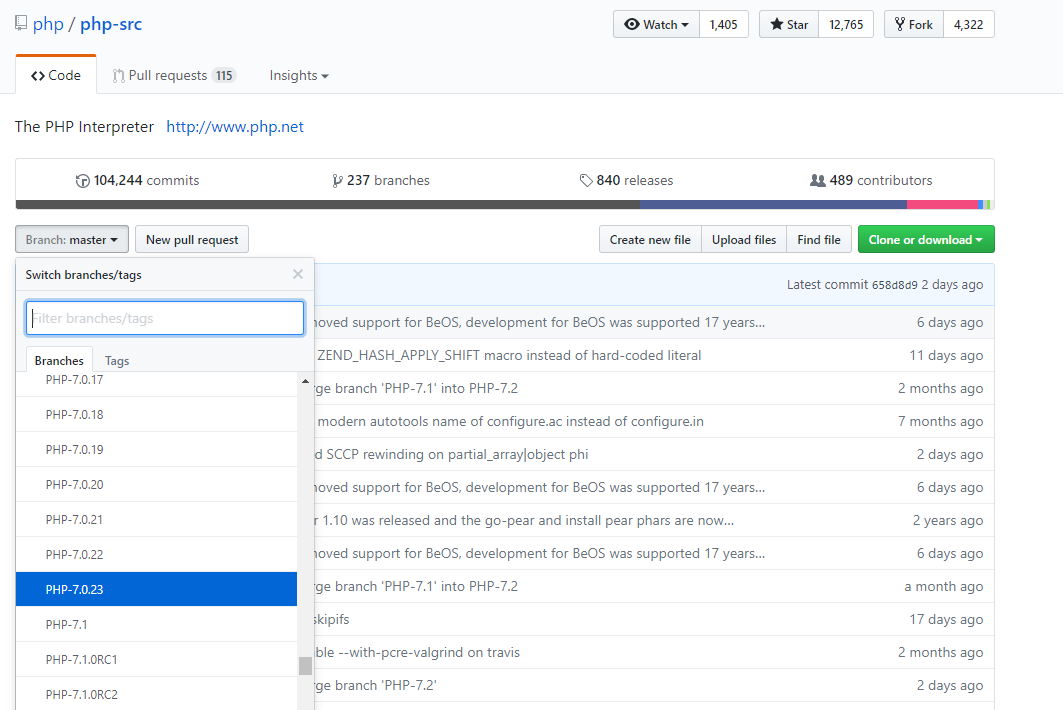
21、打开网址:https://github.com/php/php-src ,当前 7.0.* 的最新分支为 7.0.23,如图21
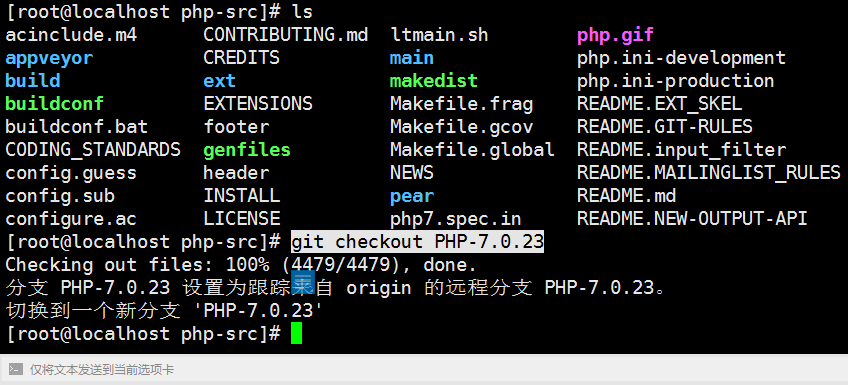
22、切换至 7.0.23,如图22
git checkout PHP-7.0.23
23、生成配置脚本,如图23
./buildconf –force
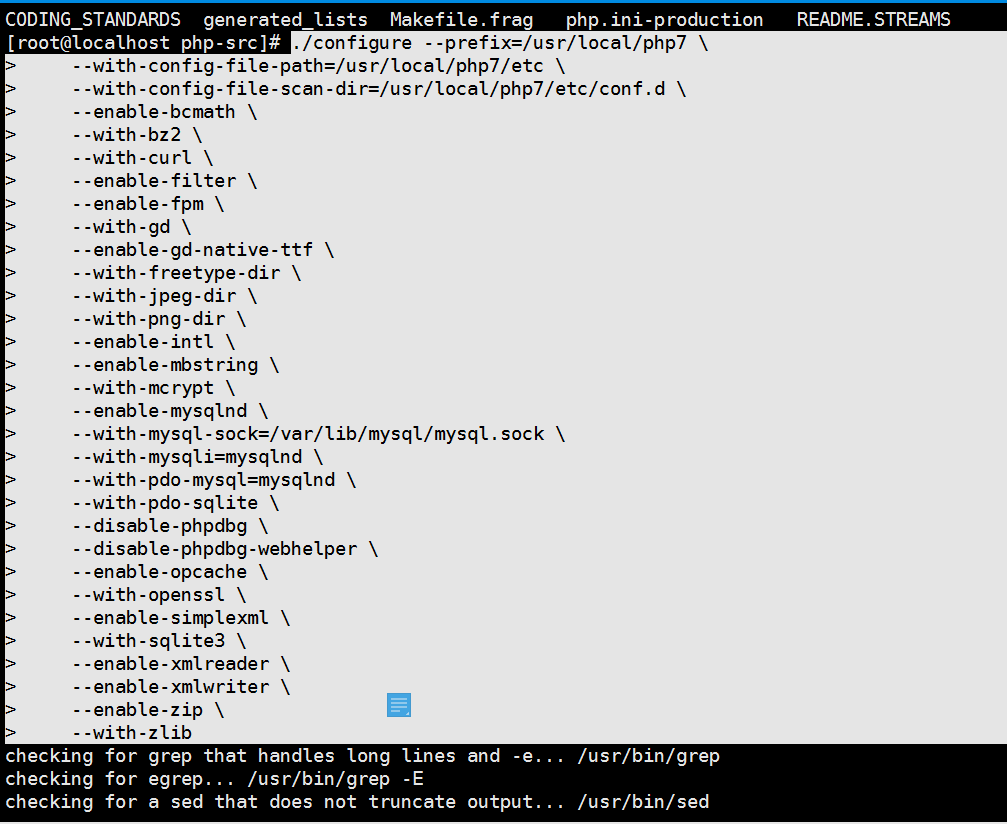
24、使用如下命令编译配置,如图24
./configure –prefix=/usr/local/php7 \
–with-config-file-path=/usr/local/php7/etc \
–with-config-file-scan-dir=/usr/local/php7/etc/conf.d \
–enable-bcmath \
–with-bz2 \
–with-curl \
–enable-filter \
–enable-fpm \
–with-gd \
–enable-gd-native-ttf \
–with-freetype-dir \
–with-jpeg-dir \
–with-png-dir \
–enable-intl \
–enable-mbstring \
–with-mcrypt \
–enable-mysqlnd \
–with-mysql-sock=/var/lib/mysql/mysql.sock \
–with-mysqli=mysqlnd \
–with-pdo-mysql=mysqlnd \
–with-pdo-sqlite \
–disable-phpdbg \
–disable-phpdbg-webhelper \
–enable-opcache \
–with-openssl \
–enable-simplexml \
–with-sqlite3 \
–enable-xmlreader \
–enable-xmlwriter \
–enable-zip \
–with-zlib
25、报错,如图25
configure: WARNING: This bison version is not supported for regeneration of the Zend/PHP parsers (found: none, min: 204, excluded: ).
checking for re2c… no
configure: WARNING: You will need re2c 0.13.4 or later if you want to regenerate PHP parsers.
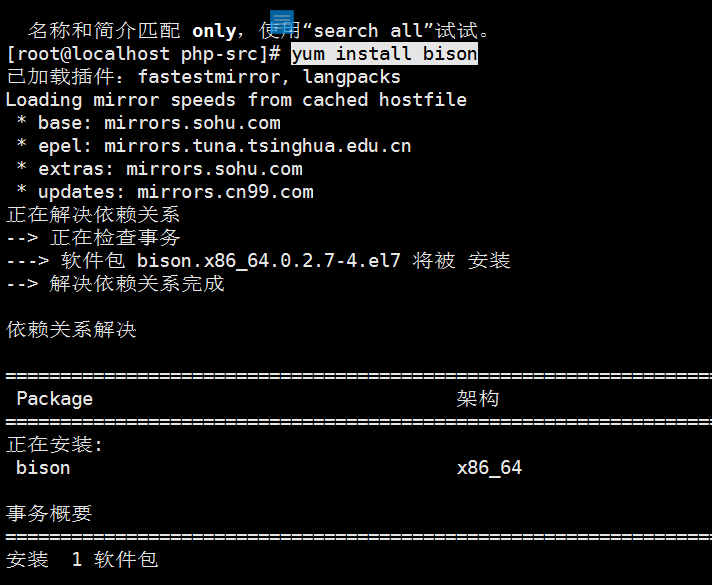
configure: error: bison is required to build PHP/Zend when building a GIT checkout!
26、安装 bison,如图26
yum install bison
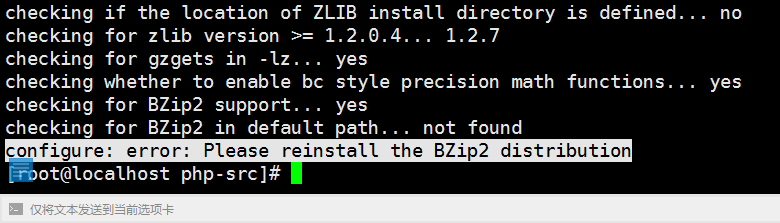
27、再次编译配置,报错,如图27
checking for BZip2 support… yes
checking for BZip2 in default path… not found
configure: error: Please reinstall the BZip2 distribution
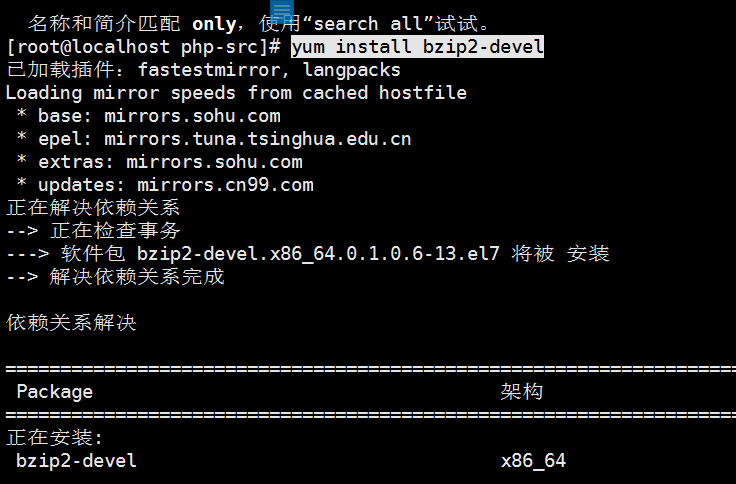
28、安装 bzip2-devel,如图28
yum install bzip2-devel
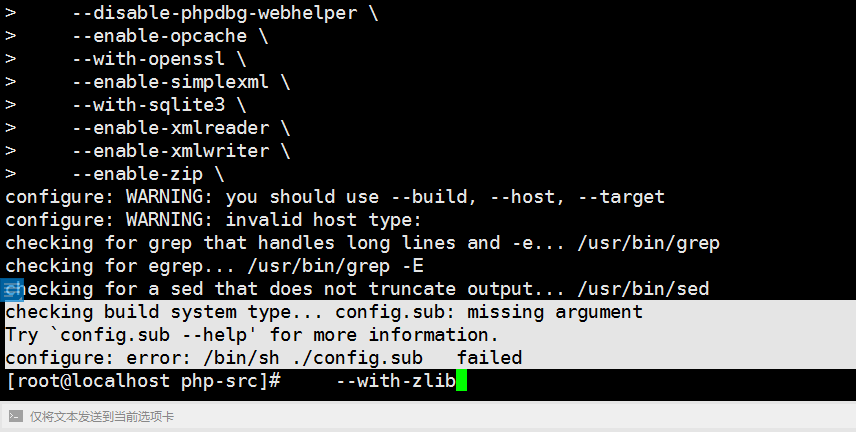
29、再次编译配置,报错,如图29
checking build system type… config.sub: missing argument
Try `config.sub –help’ for more information.
configure: error: /bin/sh ./config.sub failed
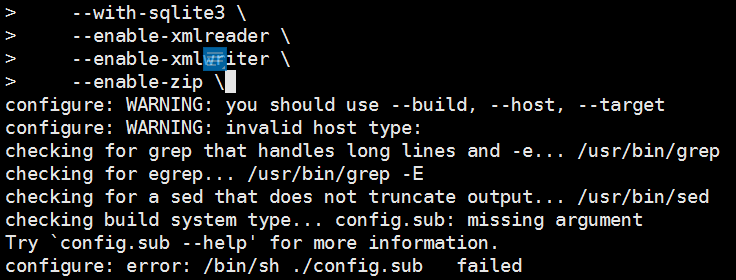
30、检查之后,发现 –enable-zip \ 后面多了一个空格,如图30
31、去掉 –enable-zip \ 后面的空格,再次编译安装PHP,报错,如图31
checking for icu-config… no
checking for location of ICU headers and libraries… not found
configure: error: Unable to detect ICU prefix or no failed. Please verify ICU install prefix and make sure icu-config works.
32、安装 libicu-devel,如图32
yum install libicu-devel
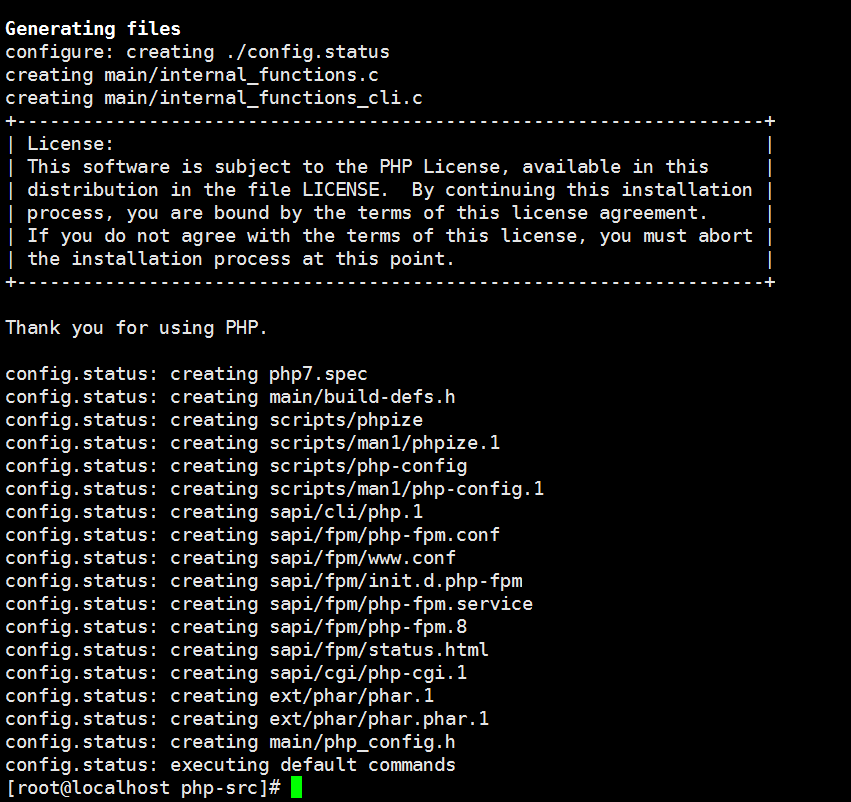
33、再次编译配置,正常,如图33
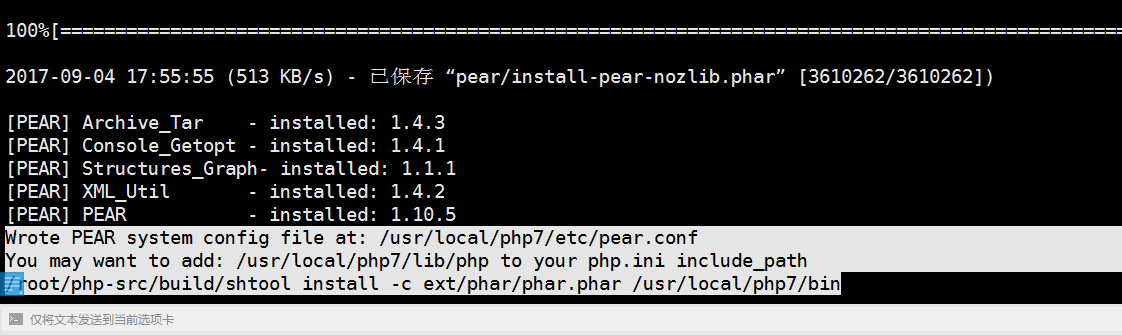
34、正式安装,依次执行,如图34
make
make test
make install
35、添加ini选项,如图35
mkdir /usr/local/php7/etc/conf.d
cp ./php.ini-development /usr/local/php7/lib/php.ini
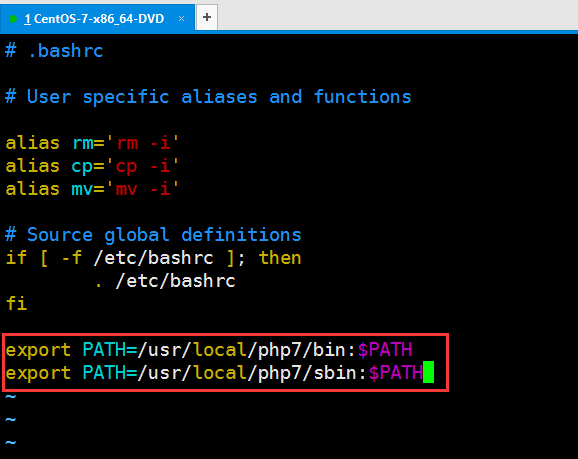
36、将PHP的可执行目录添加到环境变量中,使用 Vim 打开 ~/.bashrc,在末尾添加如下内容:,如图36
vim ~/.bashrc
export PATH=/usr/local/php7/bin:$PATH
export PATH=/usr/local/php7/sbin:$PATH
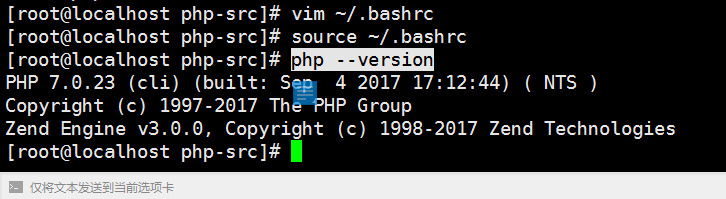
37、保存完毕后,在终端中运行以下命令:如图37
source ~/.bashrc
38、查看 PHP 版本,如图38
php –version
PHP 7.0.23 (cli) (built: Sep 4 2017 17:12:44) ( NTS )
Copyright (c) 1997-2017 The PHP Group
Zend Engine v3.0.0, Copyright (c) 1998-2017 Zend Technologies
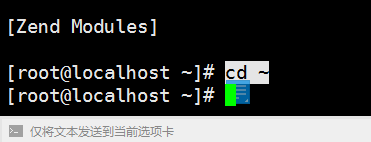
39、进入用户主目录,如图39
cd ~
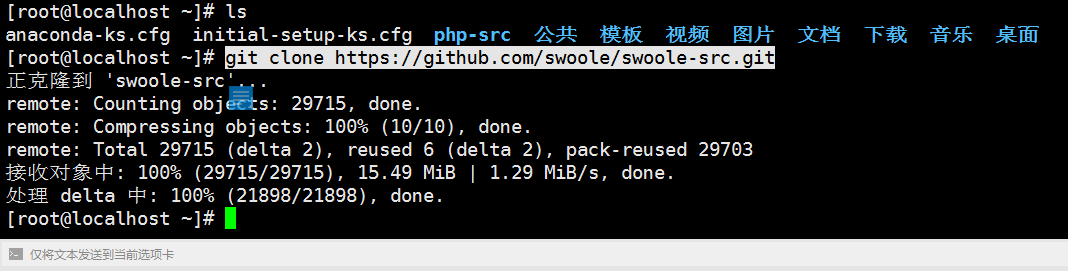
40、从 Swoole Github 仓库中获取源代码,如图40
git clone https://github.com/swoole/swoole-src.git
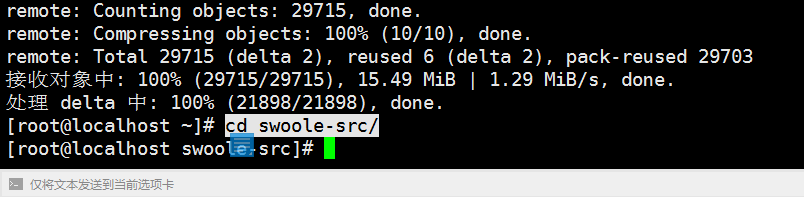
41、进入目录:swoole-src,如图41
cd swoole-src/
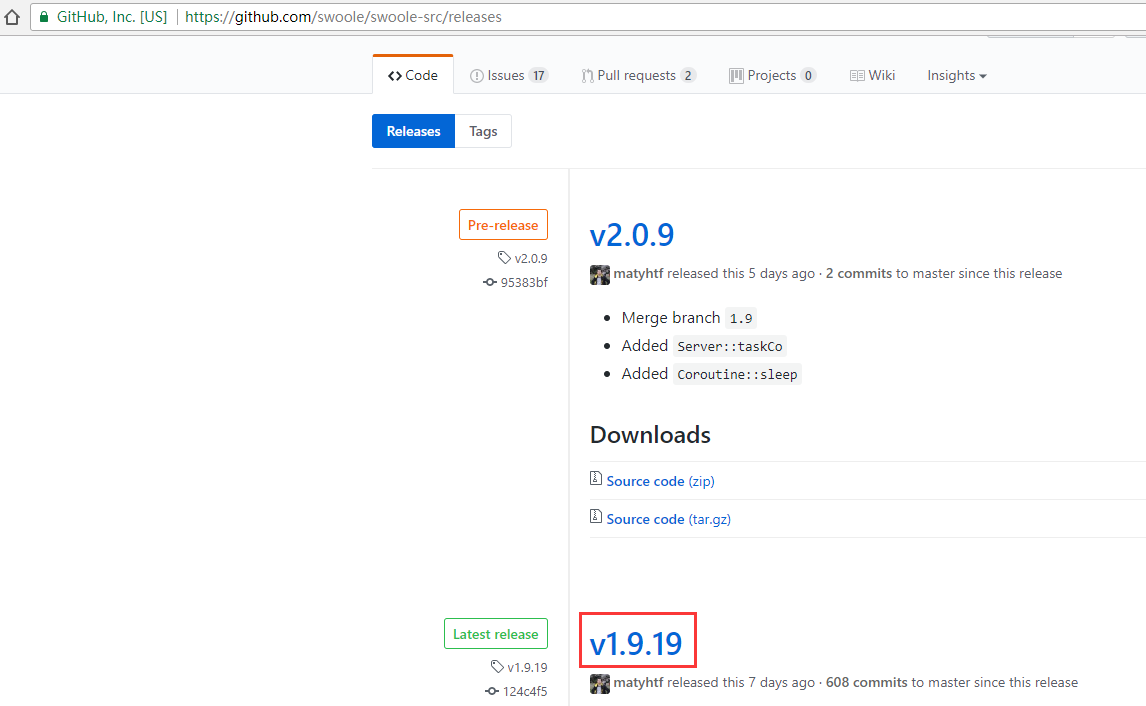
42、打开网址:https://github.com/swoole/swoole-src/releases ,当前最新稳定版为 v1.9.19,如图42
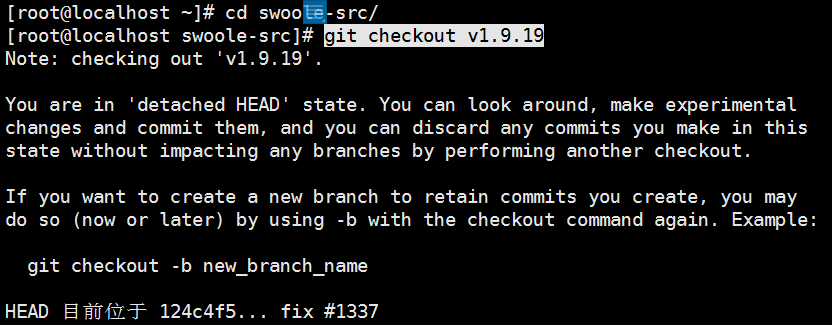
43、切换至 v1.9.19,如图43
git checkout v1.9.19
报错:Note: checking out ‘v1.9.19’.
You are in ‘detached HEAD’ state. You can look around, make experimental
changes and commit them, and you can discard any commits you make in this
state without impacting any branches by performing another checkout.
If you want to create a new branch to retain commits you create, you may
do so (now or later) by using -b with the checkout command again. Example:
git checkout -b new_branch_name
HEAD 目前位于 124c4f5… fix #1337
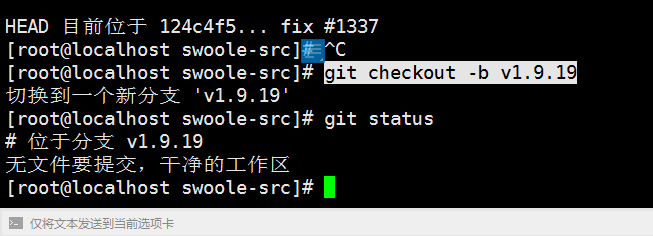
44、切换至 v1.9.19,如图44
git checkout -b v1.9.19
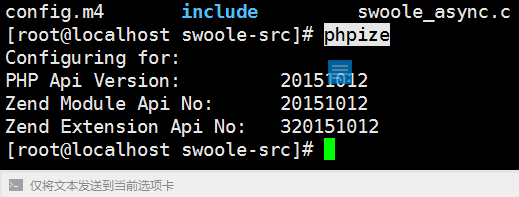
45、使用 phpize 来生成php编译配置,执行命令:如图45
phpize
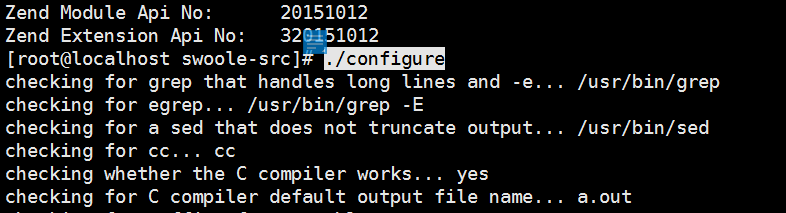
46、使用 ./configure 来做编译配置检测,swoole的./configure有很多额外参数,可以通过 ./configure –help 命令查看,这里均选择默认项,如图46
./configure
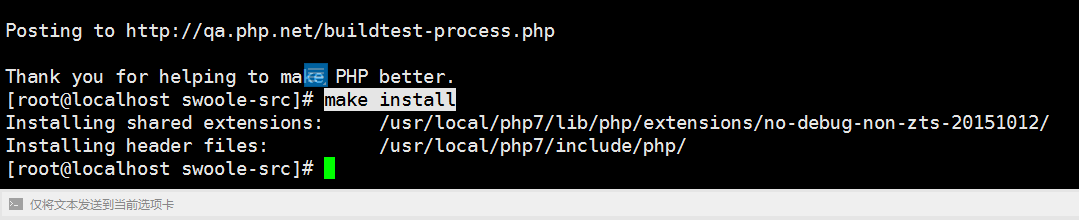
47、编译安装,依次执行,如图47
make
make test
make install
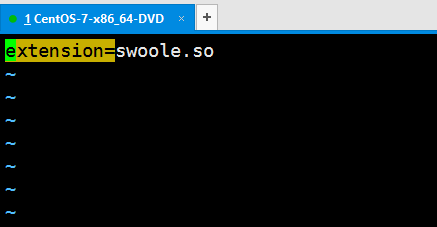
48、安装完成后,编辑 /usr/local/php7/etc/conf.d/modules.ini 文件,如图48
vim /usr/local/php7/etc/conf.d/modules.ini
49、在其中加上如下一句,如图49
extension=swoole.so
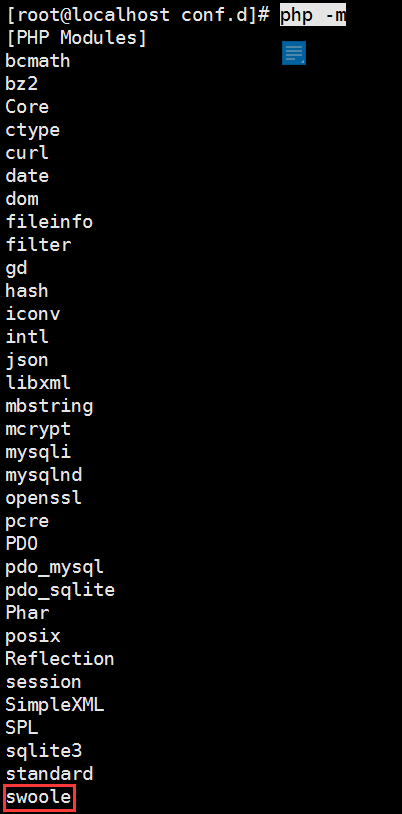
50、输入命令 php -m 查看扩展安装情况,在列出的扩展中看到了 swoole,说明安装成功,如图50
php -m
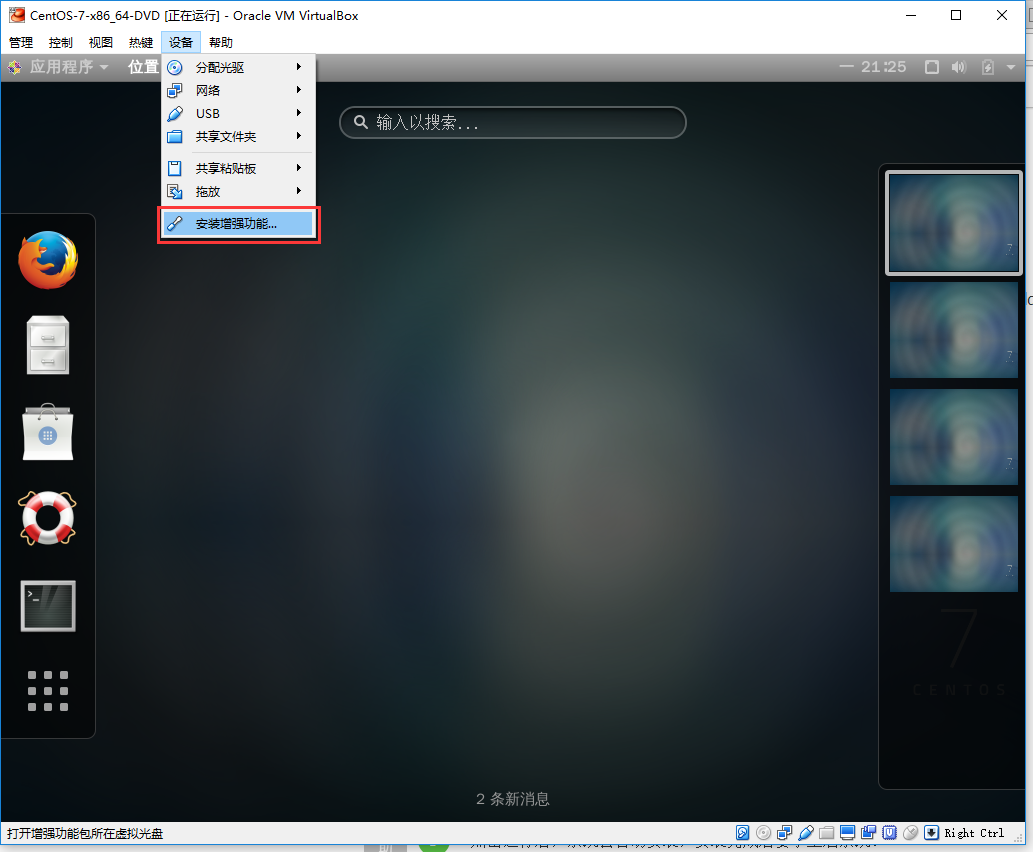
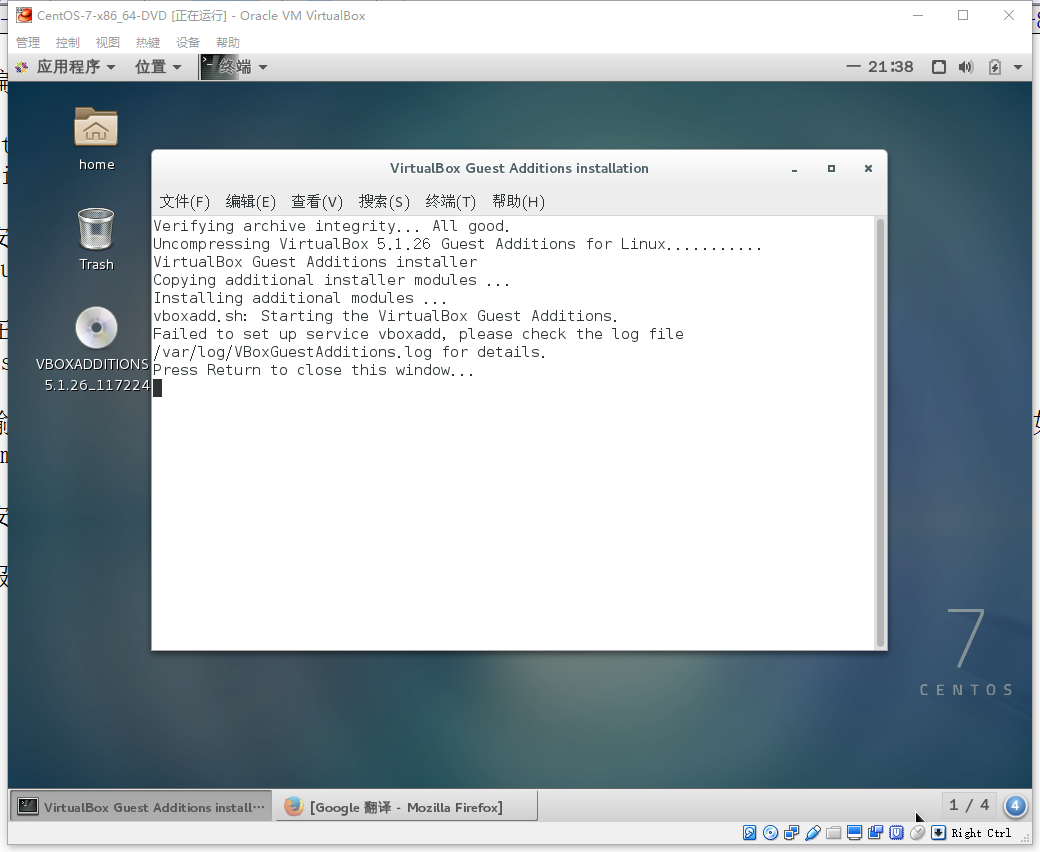
51、安装增强功能,如图51
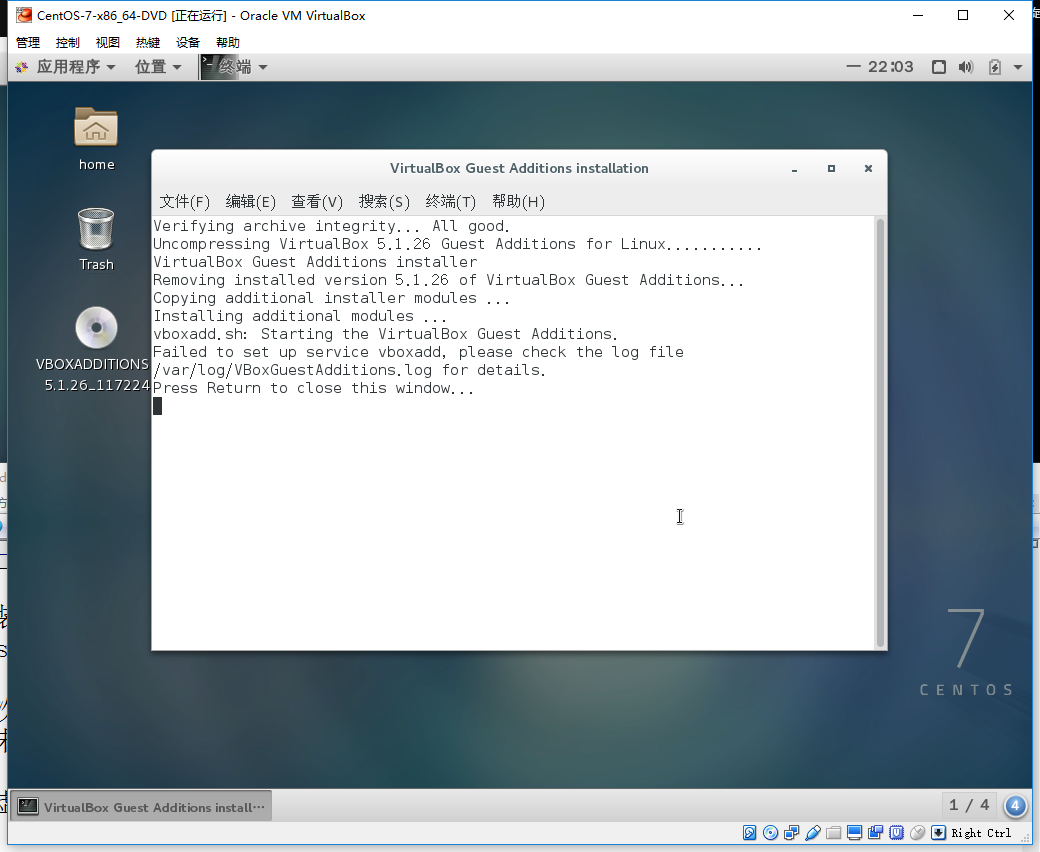
52、报错,如图52
Failed to set up service vboxadd, please check the log file /var/log/VBoxGuestAdditions.log for details.
Press Return to close this window…
53、查看 /var/log/VBoxGuestAdditions.log 文件,如图53
cat /var/log/VBoxGuestAdditions.log
日志:
vboxadd.sh: failed: Look at /var/log/vboxadd-install.log to find out what went wrong.
vboxadd.sh: failed: Look at /var/log/vboxadd-install.log to find out what went wrong.
vboxadd.sh: failed: modprobe vboxguest failed.
54、查看 /var/log/vboxadd-install.log 文件,如图54
cat /var/log/vboxadd-install.log
日志:
/tmp/vbox.0/Makefile.include.header:112: *** Error: unable to find the sources of your current Linux kernel. Specify KERN_DIR=<directory> and run Make again。 停止。
Creating user for the Guest Additions.
Creating udev rule for the Guest Additions kernel module.
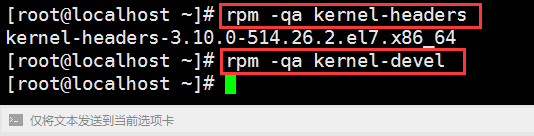
55、查看kernel-headers、kernel-devel的安装情况,kernel-devel 未安装,如图55
rpm -qa kernel-headers
rpm -qa kernel-devel
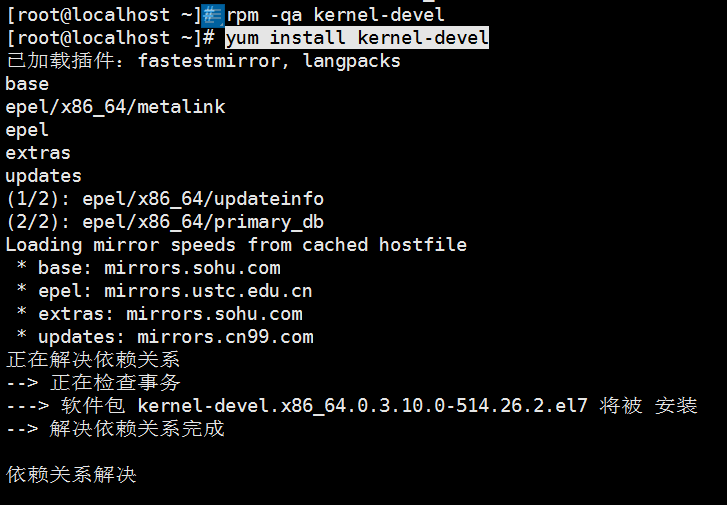
56、安装 kernel-devel,如图56
yum install kernel-devel
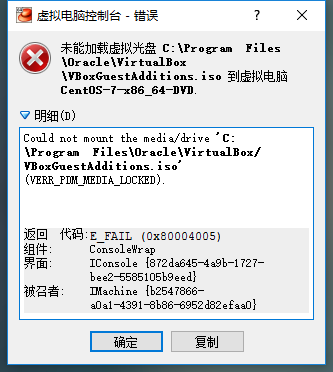
57、基于 VirtualBox 重启虚拟电脑,再次安装增强功能,如图57
报错:未能加载虚拟光盘 VBoxsGuestAdditions.iso 到虚拟电脑
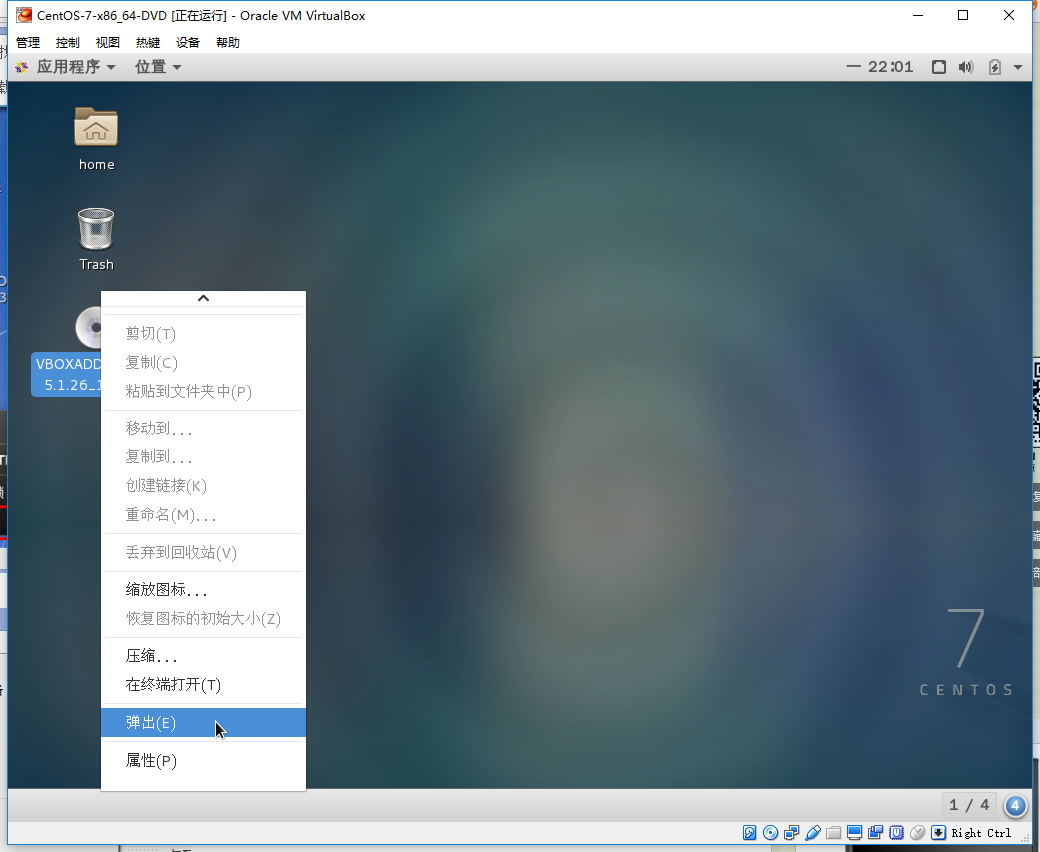
58、将虚拟电脑中的光驱弹出,如图58
59、再次安装增强功能,仍然报错,如图59
60、升级所有包同时也升级软件和系统内核,如图60
yum update
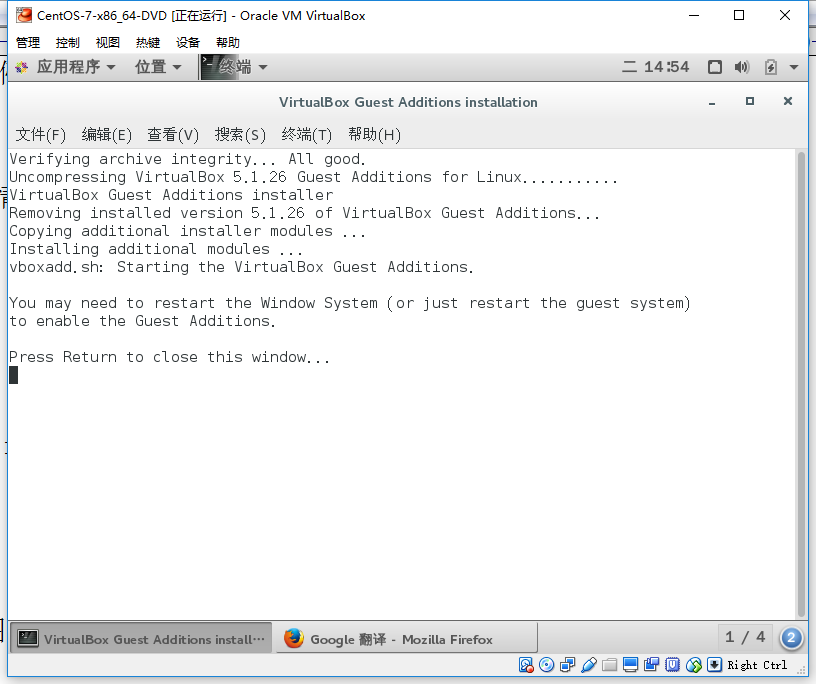
61、基于 CentOS 重启虚拟电脑,再次安装增强功能,安装成功,如图61
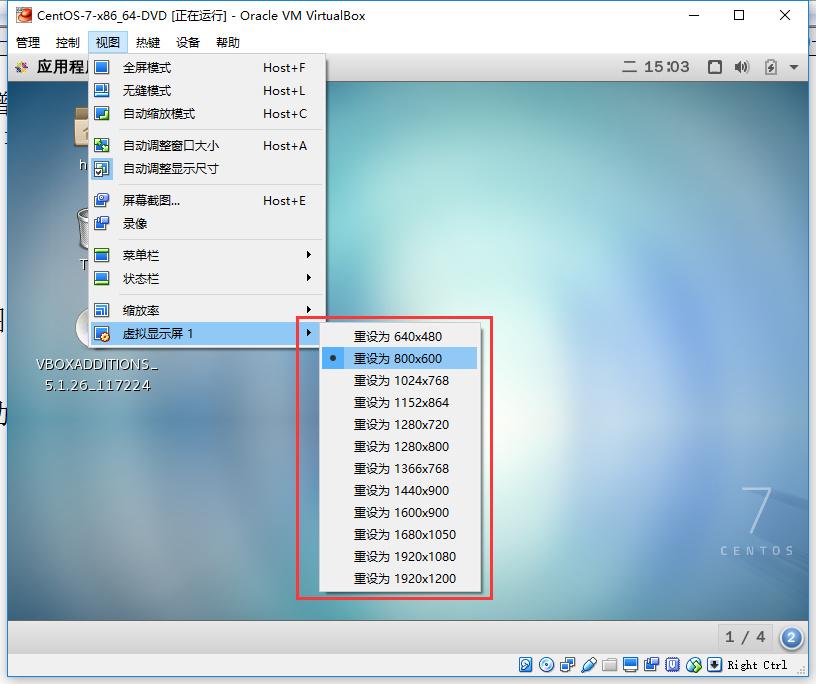
62、根据安装提示,重启 Windows 系统,在 视图 – 虚拟显示屏 中,如果分辩率可选,表示增强功能成功安装,如图62
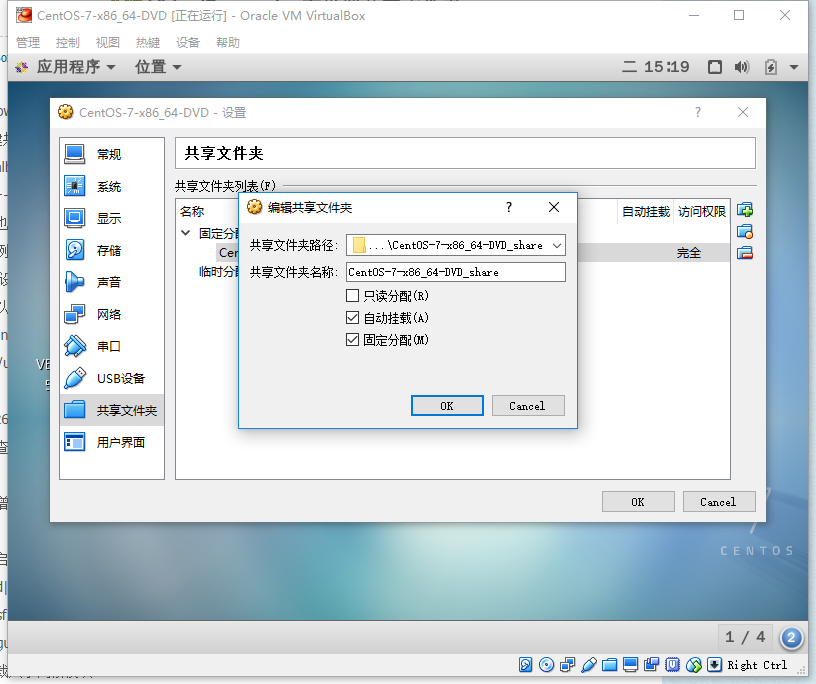
63、新建共享文件夹,E:\wwwroot\CentOS-7-x86_64-DVD_share,如图63
64、在 CentOS 中创建挂载文件夹,如图64
mount -t vboxsf CentOS-7-x86_64-DVD_share /mnt/share
报错:
/sbin/mount.vboxsf: mounting failed with the error: No such file or directory
65、新建目录 /mnt/share,如图65
mkdir /mnt/share
66、在 CentOS 中再次挂载文件夹,正常,如图66
mount -t vboxsf CentOS-7-x86_64-DVD_share /mnt/share
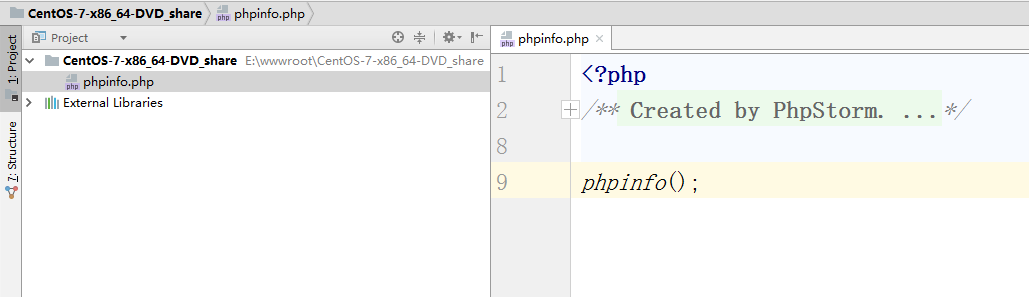
67、在目录 E:\wwwroot\CentOS-7-x86_64-DVD_share 中,新建 phpinfo.php 文件,如图67
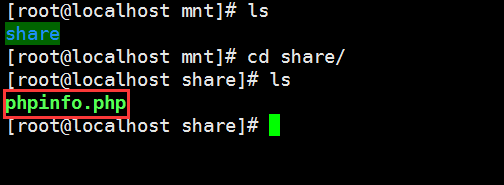
68、查看 /mnt/share ,已经存在 phpinfo.php 文件,共享成功,如图68
69、运行 php phpinfo.php,正常,如图69
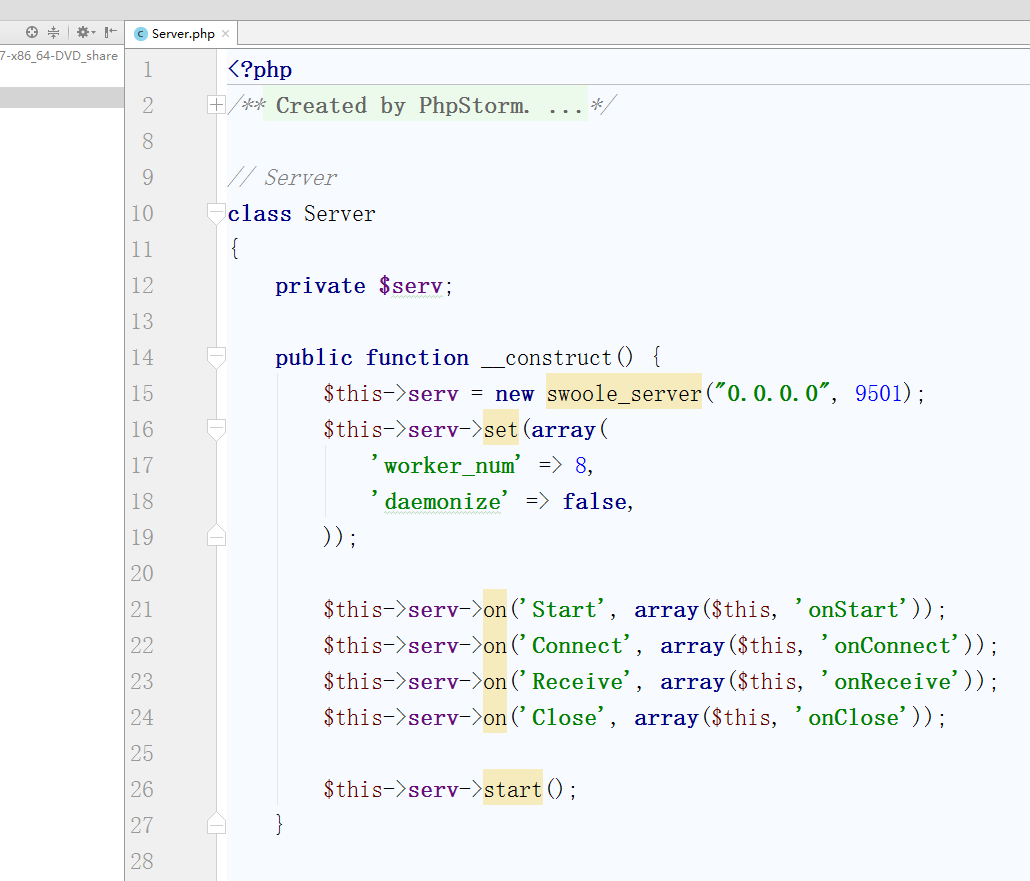
70、搭建Echo服务器,创建一个Server.php文件并输入如下内容:,如图70
<?php
/**
 * Created by PhpStorm.
 * User: Administrator
 * Date: 2017/9/5
 * Time: 15:33
 */
// Server
class Server
{
    private $serv;

    public function __construct() {
        $this->serv = new swoole_server("0.0.0.0", 9501);
        $this->serv->set(array(
            'worker_num' => 8,
            'daemonize' => false,
        ));

        $this->serv->on('Start', array($this, 'onStart'));
        $this->serv->on('Connect', array($this, 'onConnect'));
        $this->serv->on('Receive', array($this, 'onReceive'));
        $this->serv->on('Close', array($this, 'onClose'));

        $this->serv->start();
    }

    public function onStart( $serv ) {
        echo "Start\n";
    }

    public function onConnect( $serv, $fd, $from_id ) {
        $serv->send( $fd, "Hello {$fd}!" );
    }

    public function onReceive( swoole_server $serv, $fd, $from_id, $data ) {
        echo "Get Message From Client {$fd}:{$data}\n";
        $serv->send($fd, $data);
    }

    public function onClose( $serv, $fd, $from_id ) {
        echo "Client {$fd} close connection\n";
    }
}
// 启动服务器 Start the server
$server = new Server();
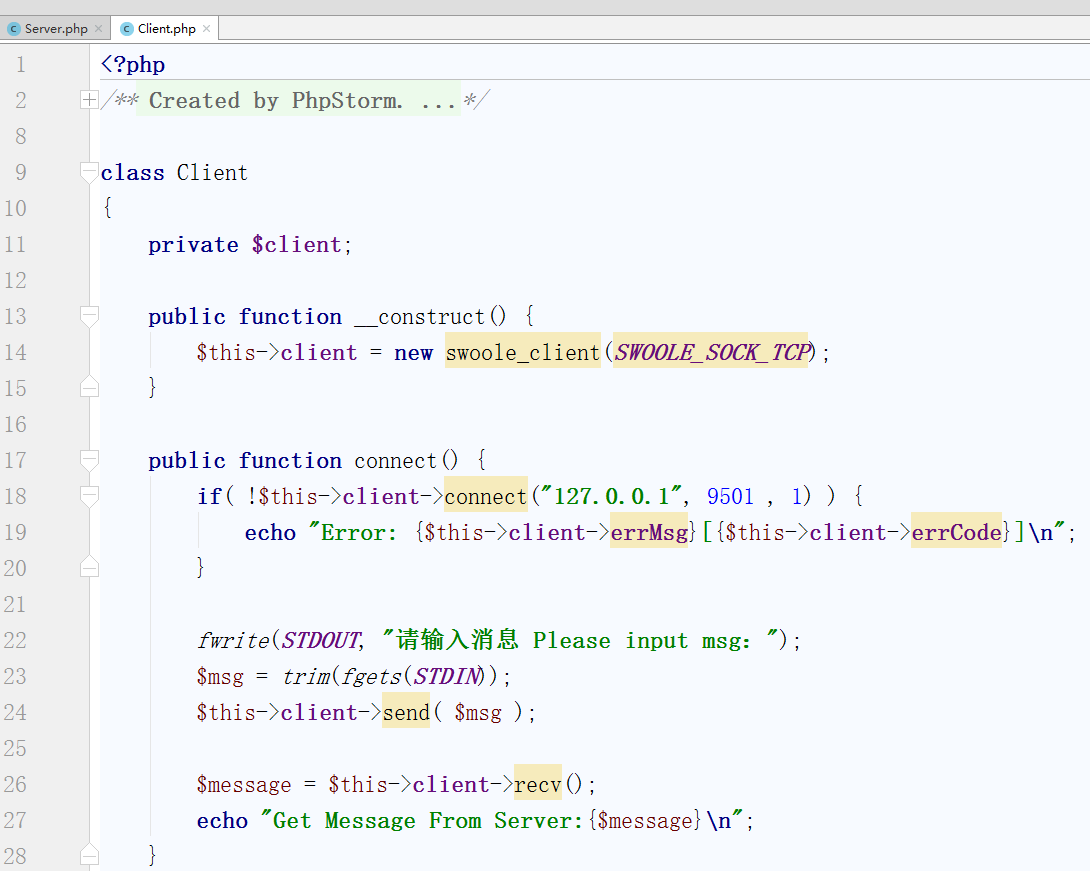
71、创建一个Client.php文件并输入如下内容:,如图71
<?php
/**
 * Created by PhpStorm.
 * User: Administrator
 * Date: 2017/9/5
 * Time: 15:35
 */
class Client
{
    private $client;

    public function __construct() {
        $this->client = new swoole_client(SWOOLE_SOCK_TCP);
    }

    public function connect() {
        if( !$this->client->connect("127.0.0.1", 9501 , 1) ) {
            echo "Error: {$this->client->errMsg}[{$this->client->errCode}]\n";
        }

        fwrite(STDOUT, "请输入消息 Please input msg:");
        $msg = trim(fgets(STDIN));
        $this->client->send( $msg );

        $message = $this->client->recv();
        echo "Get Message From Server:{$message}\n";
    }
}

$client = new Client();
$client->connect();
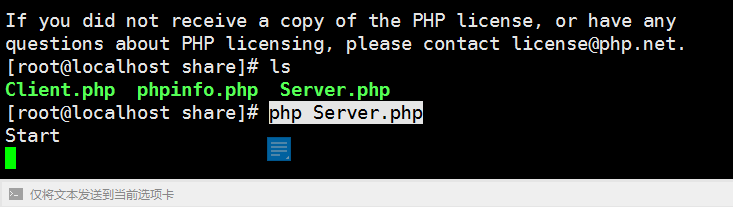
72、在一个 Xshell 终端中运行服务端,如图72
php Server.php
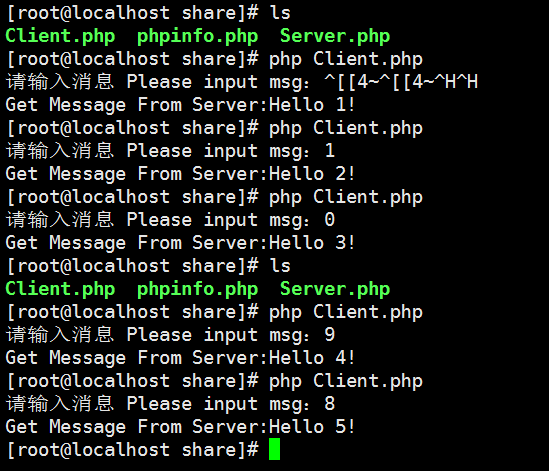
73、在一个 Xshell 终端中运行客户端,如图73
php Client.php