Atomicals-js code in Windows 10 hits a new implementation
1. Reference:Atomicals-JS code to play new tutorial.
2. Node.js has been installed, the current Node version is already the latest LTS version
PS C:\Users\Lenovo> node -v
v20.10.0
3. Git has been installed.
PS C:\Users\Lenovo> git -v
git version 2.37.0.windows.1
4. Enter the D drive, create a new atomicals folder, and double-click to enter this folder. Enter cmd where the path is displayed above and press the Enter key. To enter the terminal, the default path is the current directory. as shown in Figure 1

Figure 1
5. Enter git clone in the terminalhttps://github.com/atomicals/atomicals-js.gitAnd press Enter to download the source code of atomicals-js. as shown in Figure 2
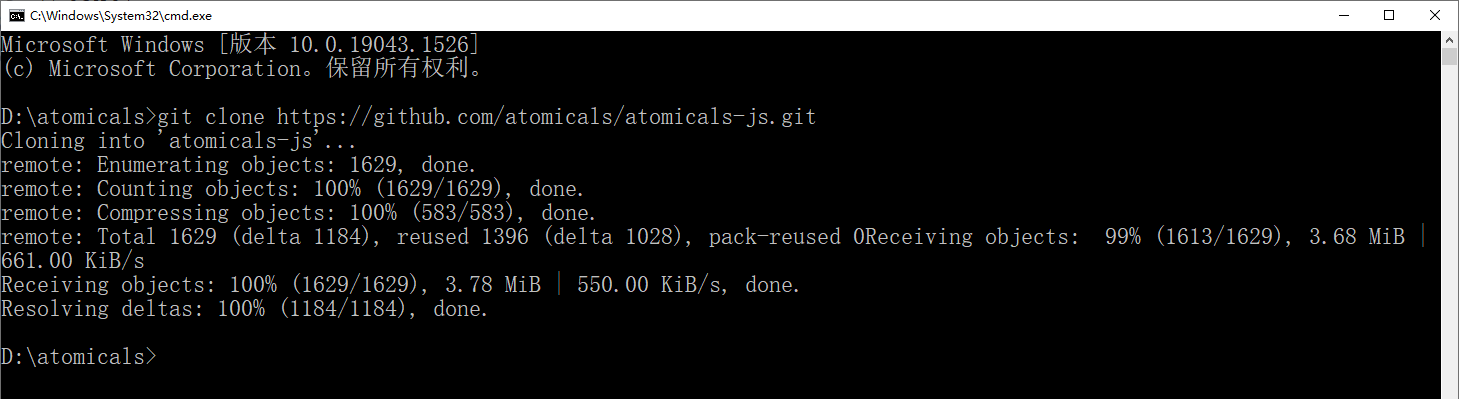
Figure 2
D:\atomicals>git clone https://github.com/atomicals/atomicals-js.git
Cloning into 'atomicals-js'...
remote: Enumerating objects: 1629, done.
remote: Counting objects: 100% (1629/1629), done.
remote: Compressing objects: 100% (583/583), done.
remote: Total 1629 (delta 1184), reused 1396 (delta 1028), pack-reused 0Receiving objects:  99% (1613/1629), 3.68 MiB | 661.00 KiB/s
Receiving objects: 100% (1629/1629), 3.78 MiB | 550.00 KiB/s, done.
Resolving deltas: 100% (1184/1184), done.
6. Execute the following commands in sequence, in which the command: npm install -g yarn, I don’t need to execute it on my computer, because yarn has been installed. as shown in Figure 3

Figure 3
D:\atomicals>cd atomicals-js

D:\atomicals\atomicals-js>yarn -v
1.22.15

D:\atomicals\atomicals-js>yarn install
yarn install v1.22.15
[1/4] Resolving packages...
[2/4] Fetching packages...
info fsevents@1.2.13: The platform "win32" is incompatible with this module.
info "fsevents@1.2.13" is an optional dependency and failed compatibility check. Excluding it from installation.
info fsevents@2.3.3: The platform "win32" is incompatible with this module.
info "fsevents@2.3.3" is an optional dependency and failed compatibility check. Excluding it from installation.
[3/4] Linking dependencies...
[4/4] Building fresh packages...
warning Your current version of Yarn is out of date. The latest version is "1.22.19", while you're on "1.22.15".
Done in 217.51s.

D:\atomicals\atomicals-js>yarn run build
yarn run v1.22.15
$ tsc && gulp build
$ echo '#!/usr/bin/env node:\atomicals\atomicals-js\gulpfile.js
' | cat - dist/cli.js > temp && mv temp dist/cli.js
'#!/usr/bin/env node'build' after 2.12 min
Done in 268.85s.
7. Use Editplus to open the .env file and modify the nodes, mainly to modify the electrumx_proxy_base_url and add a line concurrency=16
# Install your own ElectrumX, Proxy and Service to help decentralization
# https://github.com/atomicals/electrumx-proxy
# https://github.com/atomicals/atomicals-electrumx
#
# PUBLIC ELECTRUMX PROXIES
#
# Bitcoin:
# ELECTRUMX_PROXY_BASE_URL=https://ep.atomicals.xyz/proxy
#
# Bitcoin (Testnet):
# ELECTRUMX_PROXY_BASE_URL=https://eptestnet.atomicals.xyz/proxy

ELECTRUMX_PROXY_BASE_URL=https://ep.atomicalmarket.com/proxy
WALLET_PATH=./wallets
WALLET_FILE=wallet.json
# testnet or livenet or regtest
NETWORK=livenet
DISABLE_DONATE_QUOTE=false
CONCURRENCY=16
8. Note: 54 is the maximum number of threads, which can be modified according to the number of cores of your computer CPU. If the number of cores is greater than 14, you can set 54, and if you are not clear, you can set it to 16 first. Subsequently, it will be resized according to the CPU occupancy. Check the cores of your computer’s CPU. Find performance in Task Manager – CPU , you can see the number of cores 2 , and decide to set it to 6 to avoid severely affecting the performance of the computer. as shown in Figure 4
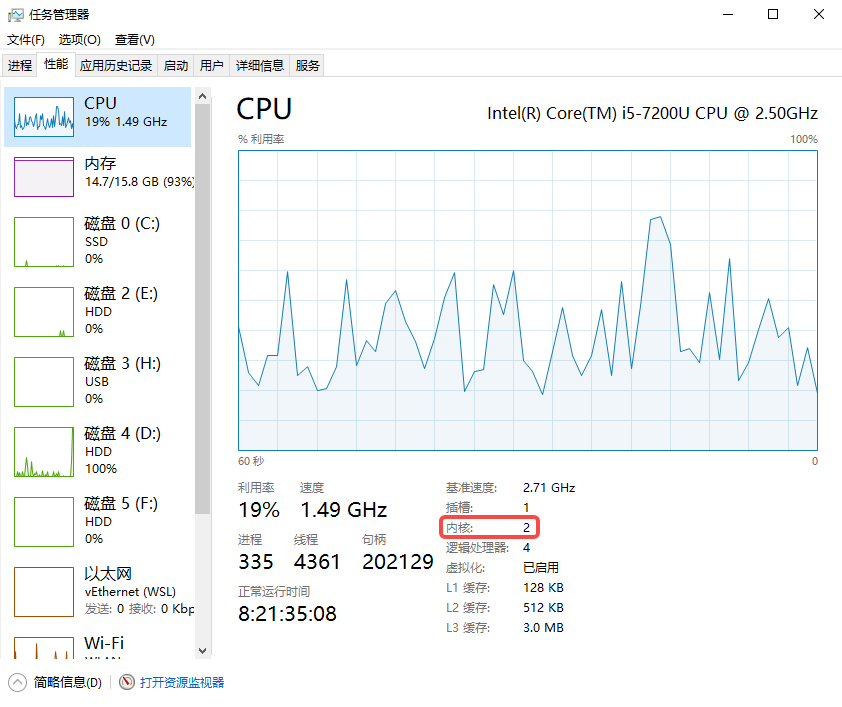
Figure 4
9. Enter YARN CLI Wallet-init in the terminal to create a wallet, and transfer to BTC to the address of FUNDING to pay for new fees. Primary.Address is the wallet address for receiving the inscription. Funding.Address is the wallet address that pays the fee. as shown in Figure 5
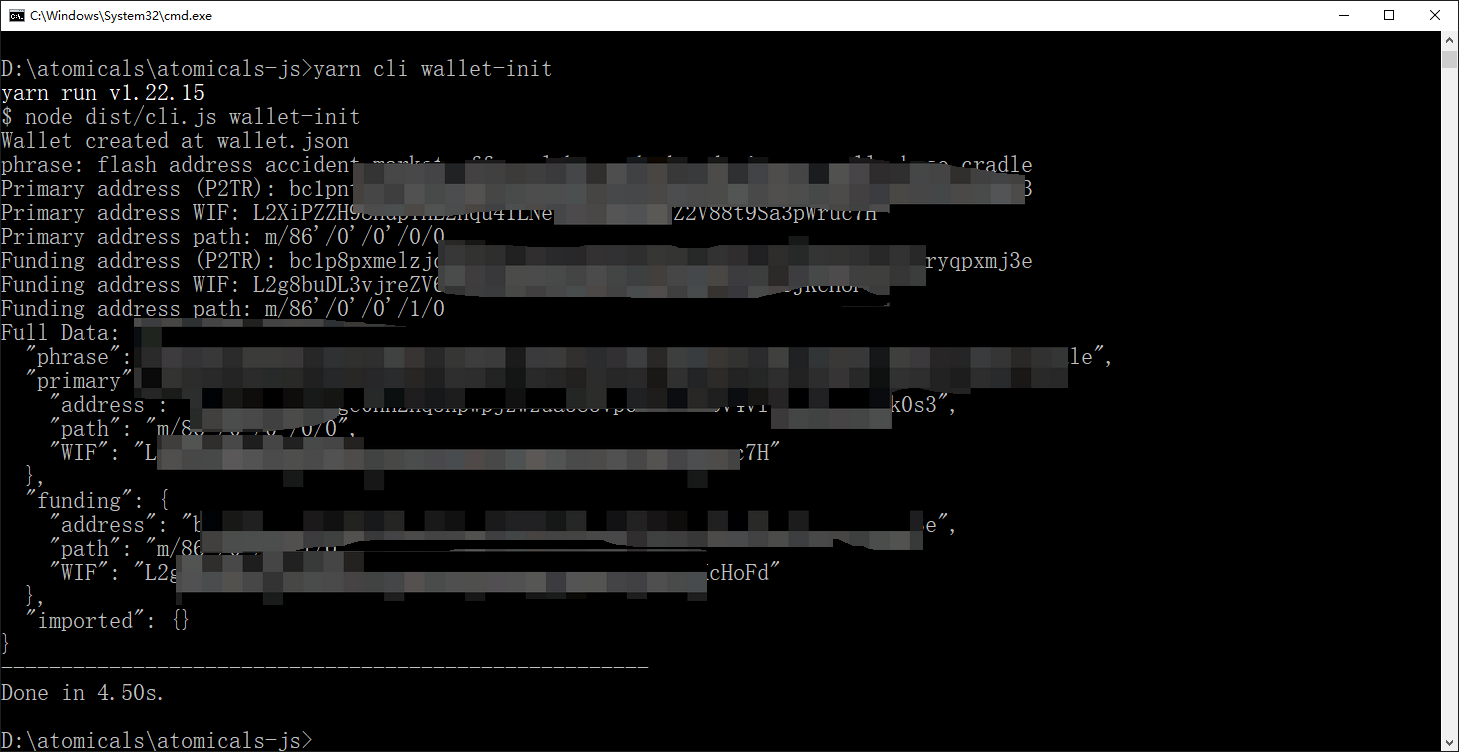
Figure 5
10. You can view the file: D:\Atomicals\atomicals-js\wallets\wallet.json. where WIF is the private key (one address for one private key). Phrase is a mnemonic. In the OKX wallet, add the wallet – import the existing wallet – private key – import the private key. Added up to 2 accounts. as shown in Figure 6
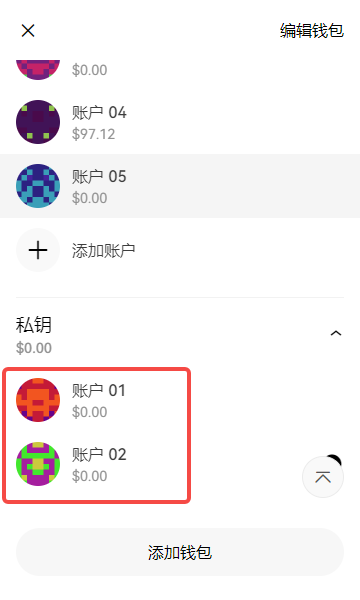
Figure 6
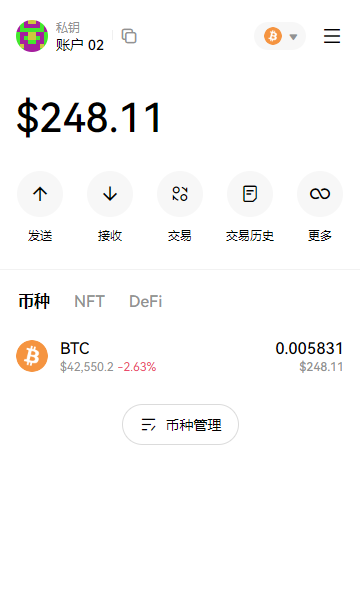
11. The values of Address are the BTC address format Taproot in the account. as shown in Figure 7
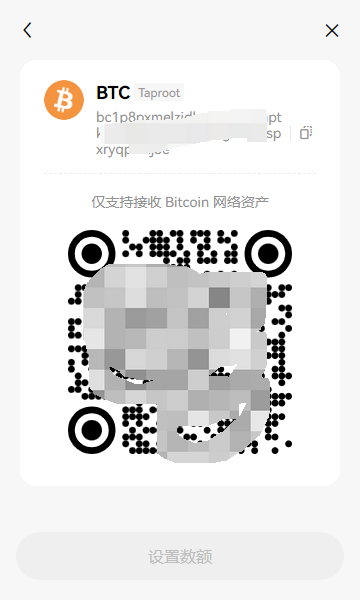
Figure 7
12. Then scan the code to fund the receiving address of the account. Transfer to some BTC and plan to put about 10. Now the cost of 1 sheet is about 30U. Determine the BTC with a recharge value of 300U. Confirm the account. as shown in Figure 8
8
13. To start the mint inscription, the command of mint is: yarn cli mint-dft xxxx –satsbyte xx . XXXX is the name of the inscription and needs to be changed to the real name. –satsByte xx is to set Gas, which is determined according to the situation on the chain. The average value of Gas on the confirmation chain is: 124. as shown in Figure 9
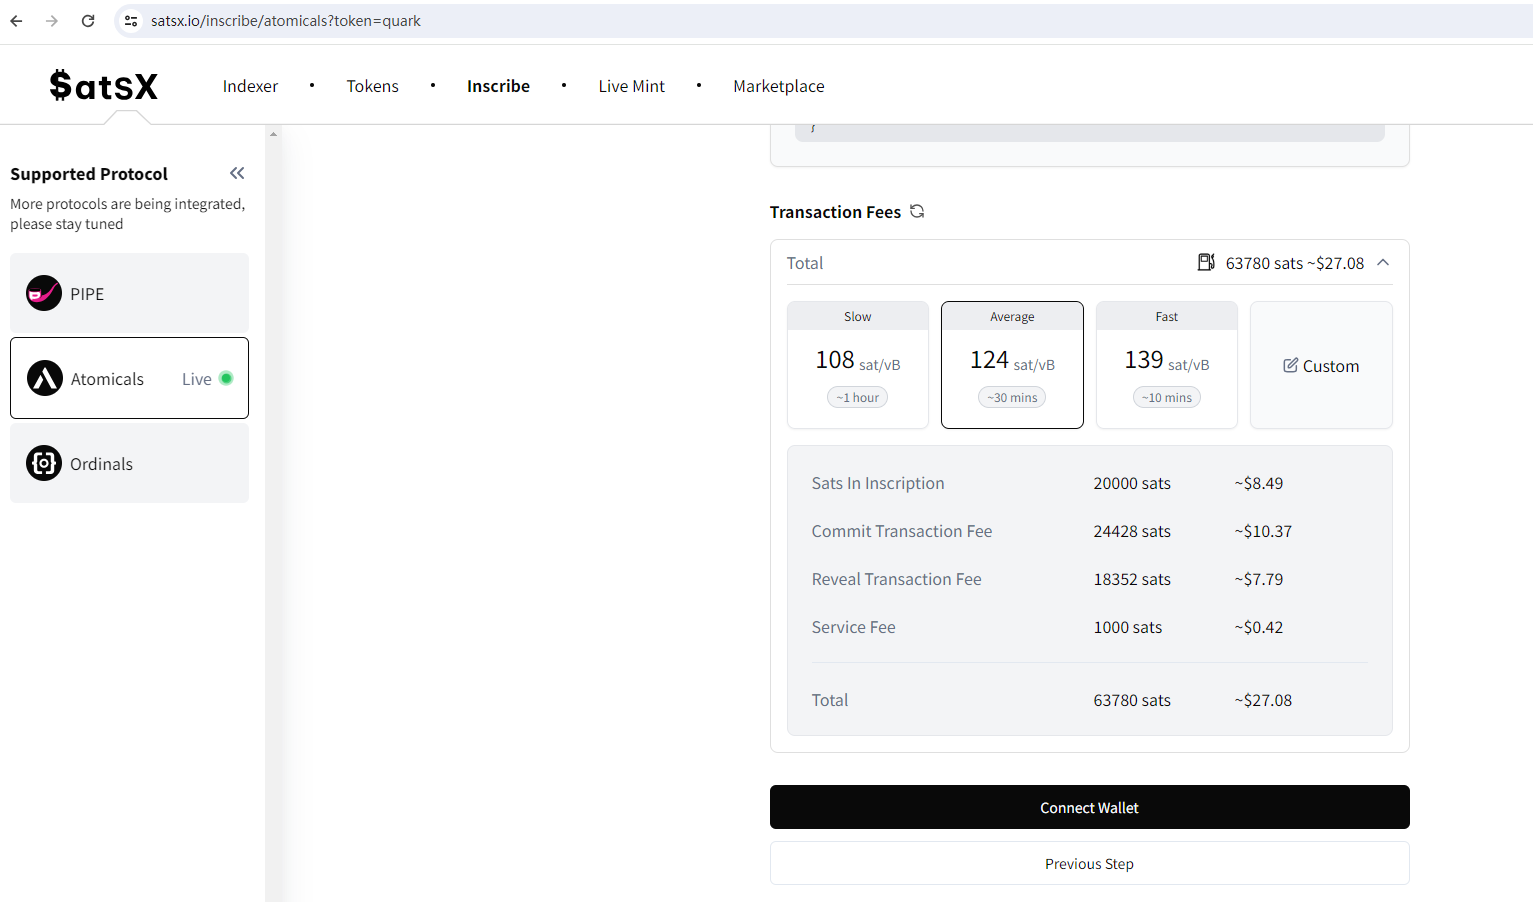
Figure 9
14. This time, the quark is played. The gas on the chain is about 124, so the command of mint is: yarn cli mint-dft quark –satsbyte 124. This is in mint. After mint is completed, you can repeat the mint command to continue mint. As shown in Figure 10
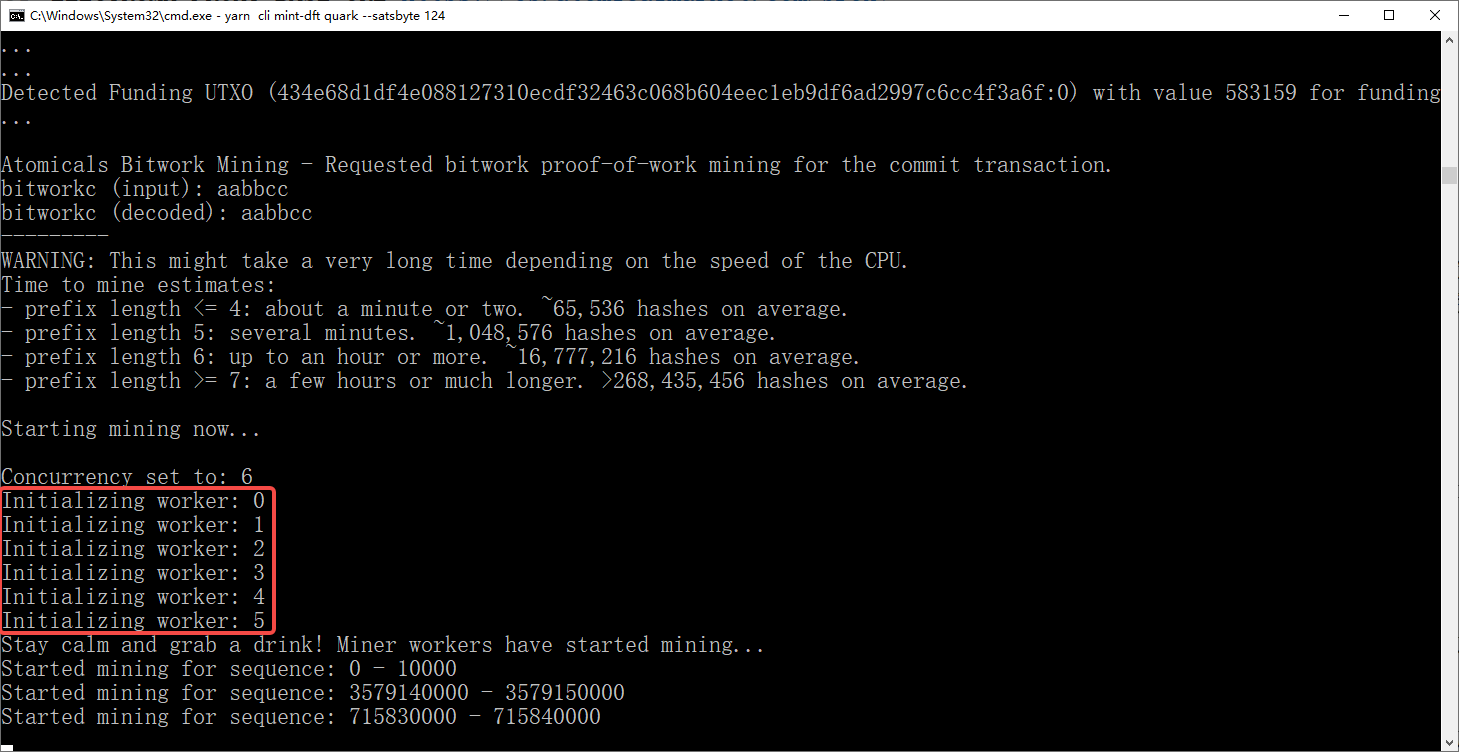
Figure 10