WordPress article pageview statistics practice: import from nginx log to front end display the whole process
I recently wanted to add the function of the article to read on the blog. Add the historical pageview to the old article, and realize automatic counting of new visits at the same time, and there is no need to modify the core code of the theme, and do not rely on complex operations. After many times of stepping on the pit for debugging, the needs are finally perfectly realized. Now the complete process, problems and solutions are organized as follows for the reference of bloggers with the same needs.
1. Demand background
My blog is based on WordPress, and the access data of all previous articles is counted through the nginx log. The format is as follows (the number of visits on the left and the URL of the article on the right):
75 /2026/03/02/9330/
26 /2018/04/04/2559/
25 /2018/04/13/2597/
25 /2018/04/09/2576/
24 /2018/04/03/2530/
20 /2022/02/23/6014/
12 /2026/04/14/9496/
11 /2024/08/16/8771/
9 /2022/06/30/6720/
9 /2020/11/03/4593/
Core requirements:
- Batch import of historical pageviews in Nginx logs into WordPress
- Subsequent natural visitor visits, the number of views can be automatically increased
- No need to modify the theme functions.php, through the plugin
- The front end is displayed in Chinese (such as ‘reading: 75 times’), and the position is moved from the end of the page to the header
2. Tool selection: Post Views Counter plugin
After comparing a variety of pageview statistics plugins, select Post Views Counter (official description: ‘Allows you to collect and display how many times a post, page, or Other content has been viewed in a simple, fast and reliable way’)
- Free, stable, support for batch import of historical data
- Customizable display style and location without modifying the theme core code
- Automatic statistics follow-up access, support setting statistical interval, avoid high data
Installation method: WordPress background → plug-in → install plug-in → search for ‘post views counter’ → install and enable.
3. Core operations: historical pageviews are imported from nginx logs
This is the most critical step, and it is also the easiest place to step on the pit. There is no need to convert the log format for the whole process. First, the data is extracted from the nginx log to generate views.txt, and then imported based on the file operation.
3.1 Generate views.txt files from nginx logs
The default storage path of the nginx log is usually /var/log/nginx/access.log views.txt file.
3.1.1 Prerequisites
The URL format of the blog post is /year/month/date/article ID/ (such as /2026/03/02/9330/), the nginx log will record the URL for each time for access, we filter and count the number of times through the command line.
3.1.2 Specific operation steps (direct operation of server, simple version)
- To connect to the server: log in to the remote connection server through Alibaba Cloud Workbench, enter the account and password to log in; after login, execute the command to copy the nginx log to the WordPress root directory:
cd /data/wwwroot/www.shuijingwanwq.com/
cp /data/wwwlogs/www.shuijingwanwq.com_nginx.log /data/wwwroot/www.shuijingwanwq.com/
- Filter article access records and count the number of times: Execute the following commands to automatically filter records that match the URL format of the blog post, count the number of visits to each article, and export them to the views.txt file:
# 筛选URL格式为 /年份/月份/日期/文章ID/ 的记录,统计次数并生成 views.txt
grep -E 'GET /[0-9]{4}/[0-9]{2}/[0-9]{2}/[0-9]+/ HTTP' www.shuijingwanwq.com_nginx.log | awk '{print $7}' | sort | uniq -c | sort -nr > views.txt
- After the command is executed, the WordPress root directory will automatically generate views.txt, the format is ‘number of visits + article URL’, no manual adjustment is required, the example is as follows:
75 /2026/03/02/9330/
26 /2018/04/04/2559/
25 /2018/04/13/2597/
Supplement
- If there are many log files (such as access.log-20260414 divided by day), you can use the cat access.log* command to merge all logs before filtering;
- If the URL format of the blog post is different (such as no date prefix), you need to modify the regular expression in the command (replace /[0-9]{4}/[0-9]{2}/[0-9]{2}/[0-9]+/ is your own blog url format);
- Windows server: You can open the Nginx log through Notepad++, use the ‘Find and Replace’ function to filter the URL, and then manually count the number of times, or use PowerShell to execute similar filter commands.
3.2 Preparation
- Upload the views.txt file generated in the previous step to the WordPress root directory (same directory as wp-config.php);
- Create a new php script (named make_sql.php), which is used to read views.txt and generate a sql file that can be directly imported. The code is as follows (no need to modify, copy directly):
<?php
require_once('./wp-config.php');
$lines = file('views.txt', FILE_IGNORE_NEW_LINES | FILE_SKIP_EMPTY_LINES);
$sql_lines = [];
foreach ($lines as $line) {
$line = trim($line);
// 匹配 访问次数 + 文章URL
if (preg_match('/(\d+)\s+(\/.*\/)/', $line, $m)) {
$count = intval($m[1]);
$url = $m[2];
// 根据URL获取文章ID
$post_id = url_to_postid($url);
if ($post_id) {
// 直接使用日志原始数据,不打折(避免少量访问文章数据失真)
$final = $count;
// 关键:插件真正读取的type=4(文章类型),period=total(总浏览量)
$sql_lines[] = "($post_id, 4, 'total', $final)";
}
}
}
if (!empty($sql_lines)) {
$sql = "REPLACE INTO wp_post_views (id, type, period, count) VALUES\n";
$sql .= implode(",\n", $sql_lines);
$sql .= ";";
// 生成SQL文件
file_put_contents('views_import.sql', $sql);
echo "✅ SQL已生成(适配Post Views Counter插件)";
echo "<a href='views_import.sql' target='_blank'>下载views_import.sql</a>";
} else {
echo "❌ 未匹配到有效文章数据";
}
3.3 Generate and import SQL
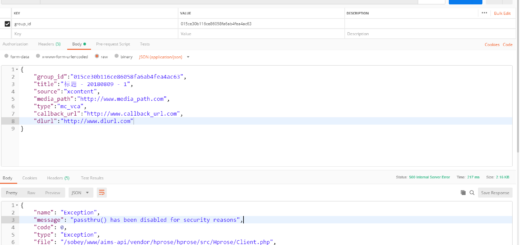
- Browser access script address:https://www.shuijingwanwq.com/make_sql.php,会自动生成views_import.sql file, download the file;
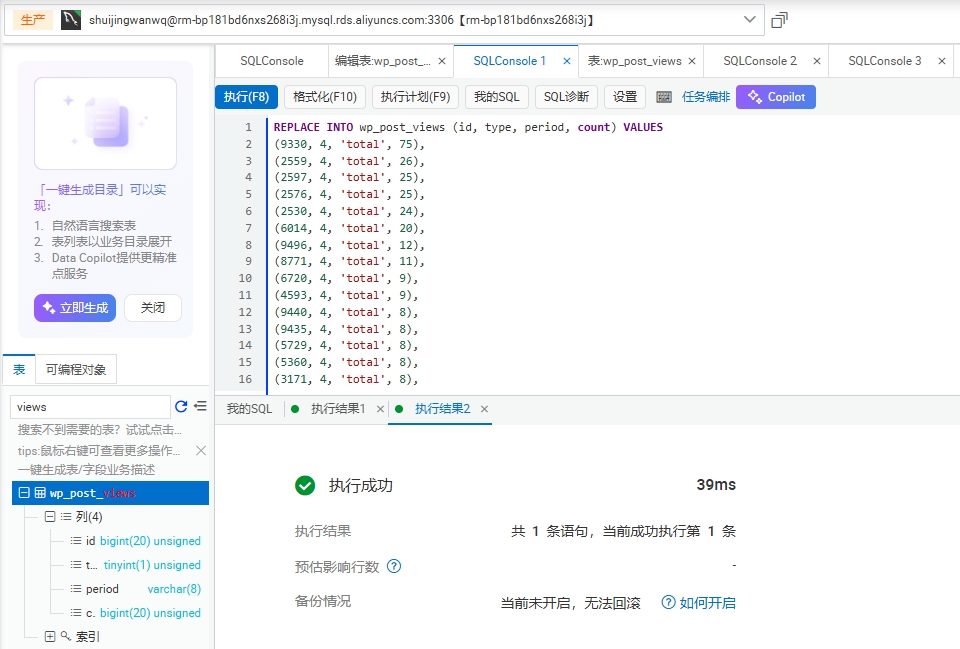
- Enter the dms of Alibaba Cloud, find the WordPress database, open a new SQL window, paste the contents of views_import.sql, and execute the import; as shown in Figure 2
- To clean up the wrong junk data (due to the previous step, the invalid data of type=1 may be generated), and the following SQL is executed:
DELETE FROM wp_post_views WHERE type = 1 AND period = 'total';
4. Troubleshooting common problems (must see!)
After importing data, you may encounter the problem of abnormal display of pageviews. The following are the pits and solutions I have stepped on to help you save debugging time.
Question 1: The page shows that the pageviews are 1 after importing, not 75 in the log
Reason: The plugin has two data storage locations, and the _post_views_count cache value in the WP_POSTMETA table is preferred, not the real data of the WP_POST_VIEWS statistical table; TYPE=1 (the plugin is not recognized), the default count of the plugin is stored in TYPE=4.
Solution:
- Execute SQL clean cache: delete from wp_postmeta where meta_key =_post_views_count;
- Ensure that type=4 (the article type recognized by the plugin) in the imported sql, and then execute the import sql again.
Problem 2: There are multiple records of the same article appearing in the WP_POST_VIEWS table
Reason: The plugin will automatically count the number of views of the daily, month and year (Type=0 is the daily statistics, Type=2 is the month statistics, and Type=3 is Yearly statistics), which is a normal phenomenon; just make sure that the record of TYPE=4 and period=total is the correct historical data.
Solution: There is no need to delete other Type records, just clean the invalid data of type=1 (as shown in step 3.2), which does not affect the normal counting of the plugin.
Question 3: After clearing the cache, the number of views still does not display the correct value
Reason: In the imported sql type error (such as type=1), the plugin reads the total record of type=4 by default.
Solution: Re-execute the correct import sql (type=4), no need to clear the cache again, refresh the page to display the correct data.
5. Follow-up optimization: display settings and statistical interval
After importing historical data, it is necessary to make simple settings to make the display volume display more in line with the Chinese blog style, and the statistics are more accurate.
5.1 Custom Chinese display (replace ‘Post views: ‘)
- Enter the WordPress background → Views → Settings → Display;
- Find the ‘Show’ → Views Label option, change the default ‘Post views: ‘ to Chinese, the recommended options:
- Simplified version: read:
- Full version: Views:
- After saving the settings, the front end is displayed as ‘views: 75 times’, which is suitable for Chinese reading habits.
5.2 Adjust pageview display position (move from the end of the page to the header)
The plug-in has its own display position settings (Display targets), no need for complicated operations, it is recommended to use the plug-in that comes with function adjustment, specific instructions: display The core role of targets is ‘selecting counter insertion position and associated content type’ (official description: choose where the counter is inserted and which content types it attaches To), the default insertion position is ‘After the Content’ (after the content, that is, the end of the page), we only need to change it to ‘Before the Content’ (before the content, that is, the header), you can quickly realize the position adjustment, without modifying the code. as shown in Figure 3
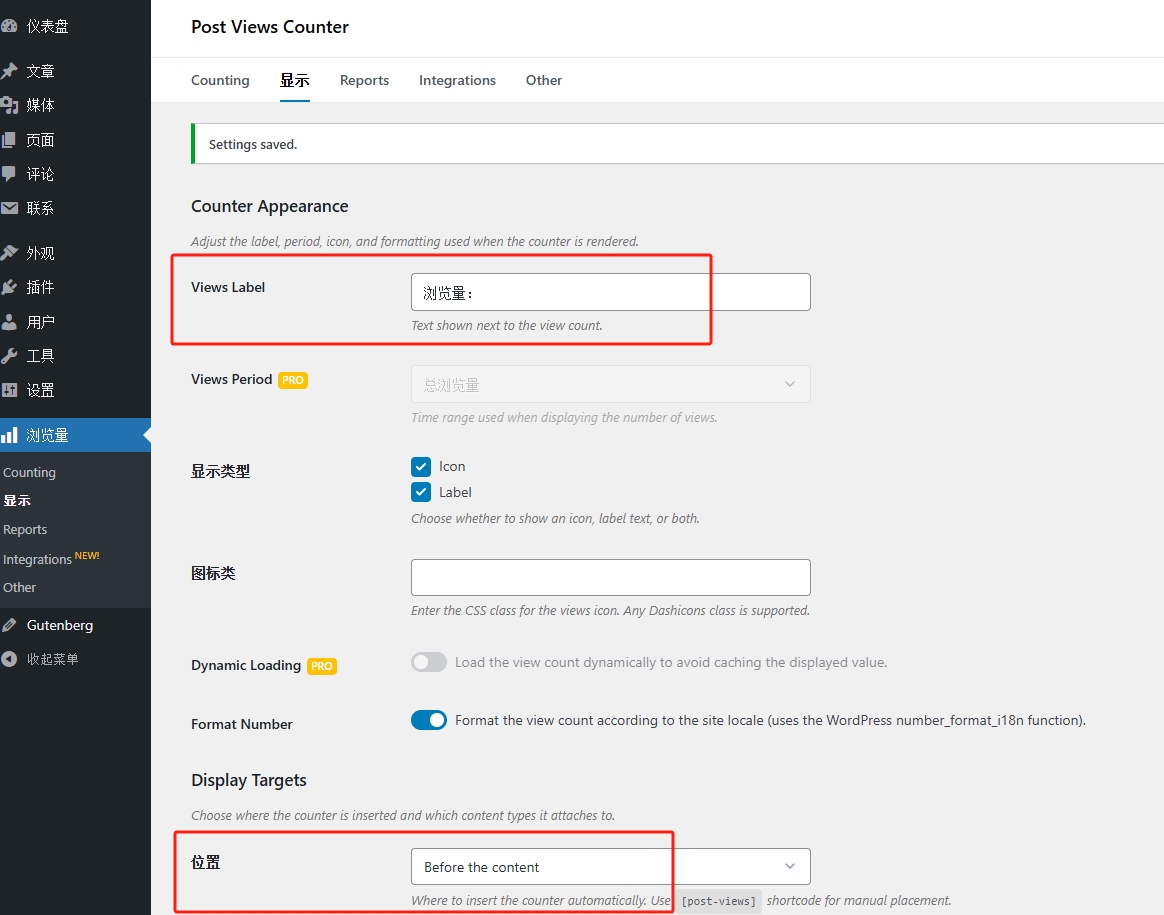
- Enter the WordPress background → Views → Settings → display;
- Find the ‘Display targets’ option (corresponding position settings);
- In the ‘Location’ drop-down menu, select ‘Before the content’;
- After saving the settings, the number of views will be automatically displayed at the beginning of the article content (page header), without additional actions.
Supplementary note: This setting will be applied to all articles synchronously, without adjustments, and you can select the associated content type in Display Targets (such as only for articles, not pages), and adapt to blog operation requirements.
5.3 Set statistical intervals (avoid high data virtual)
The default statistical interval of the plugin is 24 hours (the same visitor can only count once for multiple visits in a day), which can be adjusted according to the number of blog visitors:
- Go to pageviews → Settings → Counting, find ‘Counting interval’ (unit: hours);
- Recommended settings: 1 hour (fill in 1), the reason:
- Avoid the same visitor to refresh the repeated count for a short time, and the data is more realistic;
- Visit again after 1 hour, normal counting, no effective access is omitted;
- If you pursue statistical agility (counted every visit), it can be set to 0 (not recommended, easy to virtual high).
The final effect and summary
After completing the above operations, the blog pageview will be realized:
- Historical data: Batch import from Nginx logs, accurately display the past visits of each article;
- Automatic counting: subsequent visitor visits, the number of views is automatically increased, no manual intervention is required;
- Display effect: Chinese style (views: 75 times), the location is at the beginning of the article, concise and beautiful;
- Clean data: no junk data, accurate statistics, no regular maintenance.
The core of the whole process is to identify the data storage rules (Type=4, period=total) of the Post Views Counter plugin, avoid the pits of cache and data types, and do not need to modify the theme core code for the whole process, which is suitable for all non-technical bloggers. If your blog also needs to complete the historical pageviews, you can follow the process of this article directly. If you have any questions, you can leave a message in the comment area to communicate.