Ecovacs sweeping robot mop is not cleaned
As a long-term user of the EcoVacs sweeping robot, it has always relied on it to free our hands, especially the self-cleaning function of the mop, which saves the trouble of manual disassembly and washing. However, I found a difficult problem recently. After mopping the floor, there is no water mark on the floor. At first, I thought it was too dry. Now, the underside of the robot is abnormally dry, and there is no water trace when cleaning the mop. It is speculated that the self-cleaning function of the mop has been ineffective for a long time.
In the first step of the investigation, I first checked the clean water tank – confirm that the water tank is completely full, there is no shortage of water or water leakage, and the problem of the water tank cover is not tightly covered. This is very confusing: the water is sufficient, why does the mop cleaning function fail? Is there a malfunction inside the machine?
Considering that I don’t want to contact the after-sales easily (after all, the repair time is long, and there may be additional costs), I decided to check the simple fault point by myself first, after all, many scans The glitches of the ground robot are all related to the lack of daily cleaning – just like the problem of decreasing cleaning effects encountered before, most of them are caused by winding brushes or base station debris.
Troubleshooting & Solving Process (Pro-test is effective)
Combined with my own experience and common troubleshooting ideas for sweeping robots, I did two simple operations, but I didn’t expect to solve the problem directly. The whole process is less than 10 minutes, and there is no need for any tools.
Step 1: Clean up the accumulation of garbage under the chassis
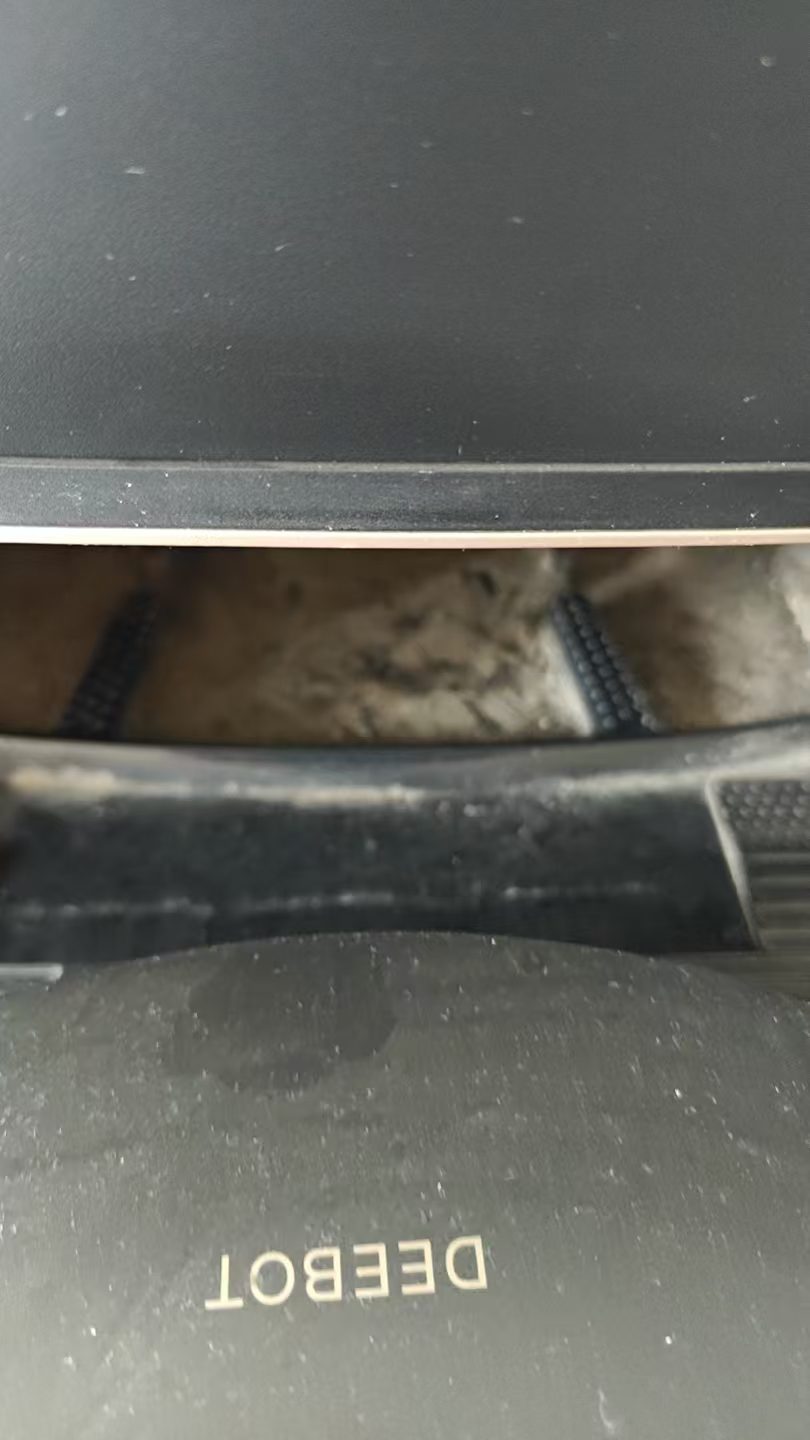
First, take the robot out of the base station and carefully observe the bottom of the chassis (especially the interface of the mopping area and the interface of the base station). Although it has been cleaned, it can be clearly seen how serious the previous dirt accumulation has been – unfortunately, the cleaning I forgot to take pictures before. At that time, there were not only dust and hair below the chassis, but even cobwebs. It was speculated that these debris accumulated for a long time, blocking the passage of clear water circulation, so that the water could not be transported to the mop normally, and the self-cleaning function was invalid. as shown in Figure 1
The cleaning method is very simple: use a dry cloth or a small brush, gently wipe all the gaps, mop brackets and docking parts below the chassis, clean all the accumulated dust, hair, cobweb, etc., and focus on cleaning the interface of water circulation. In this case, avoid the residual blocking of debris and block the pipeline (here, I remind everyone that the interface under the chassis of the sweeping robot and the interface of the base station are the cleaning dead corners that are easily overlooked.
This is the situation below the chassis after cleaning the garbage, there is no debris, and there is no residual dirt at the interface:
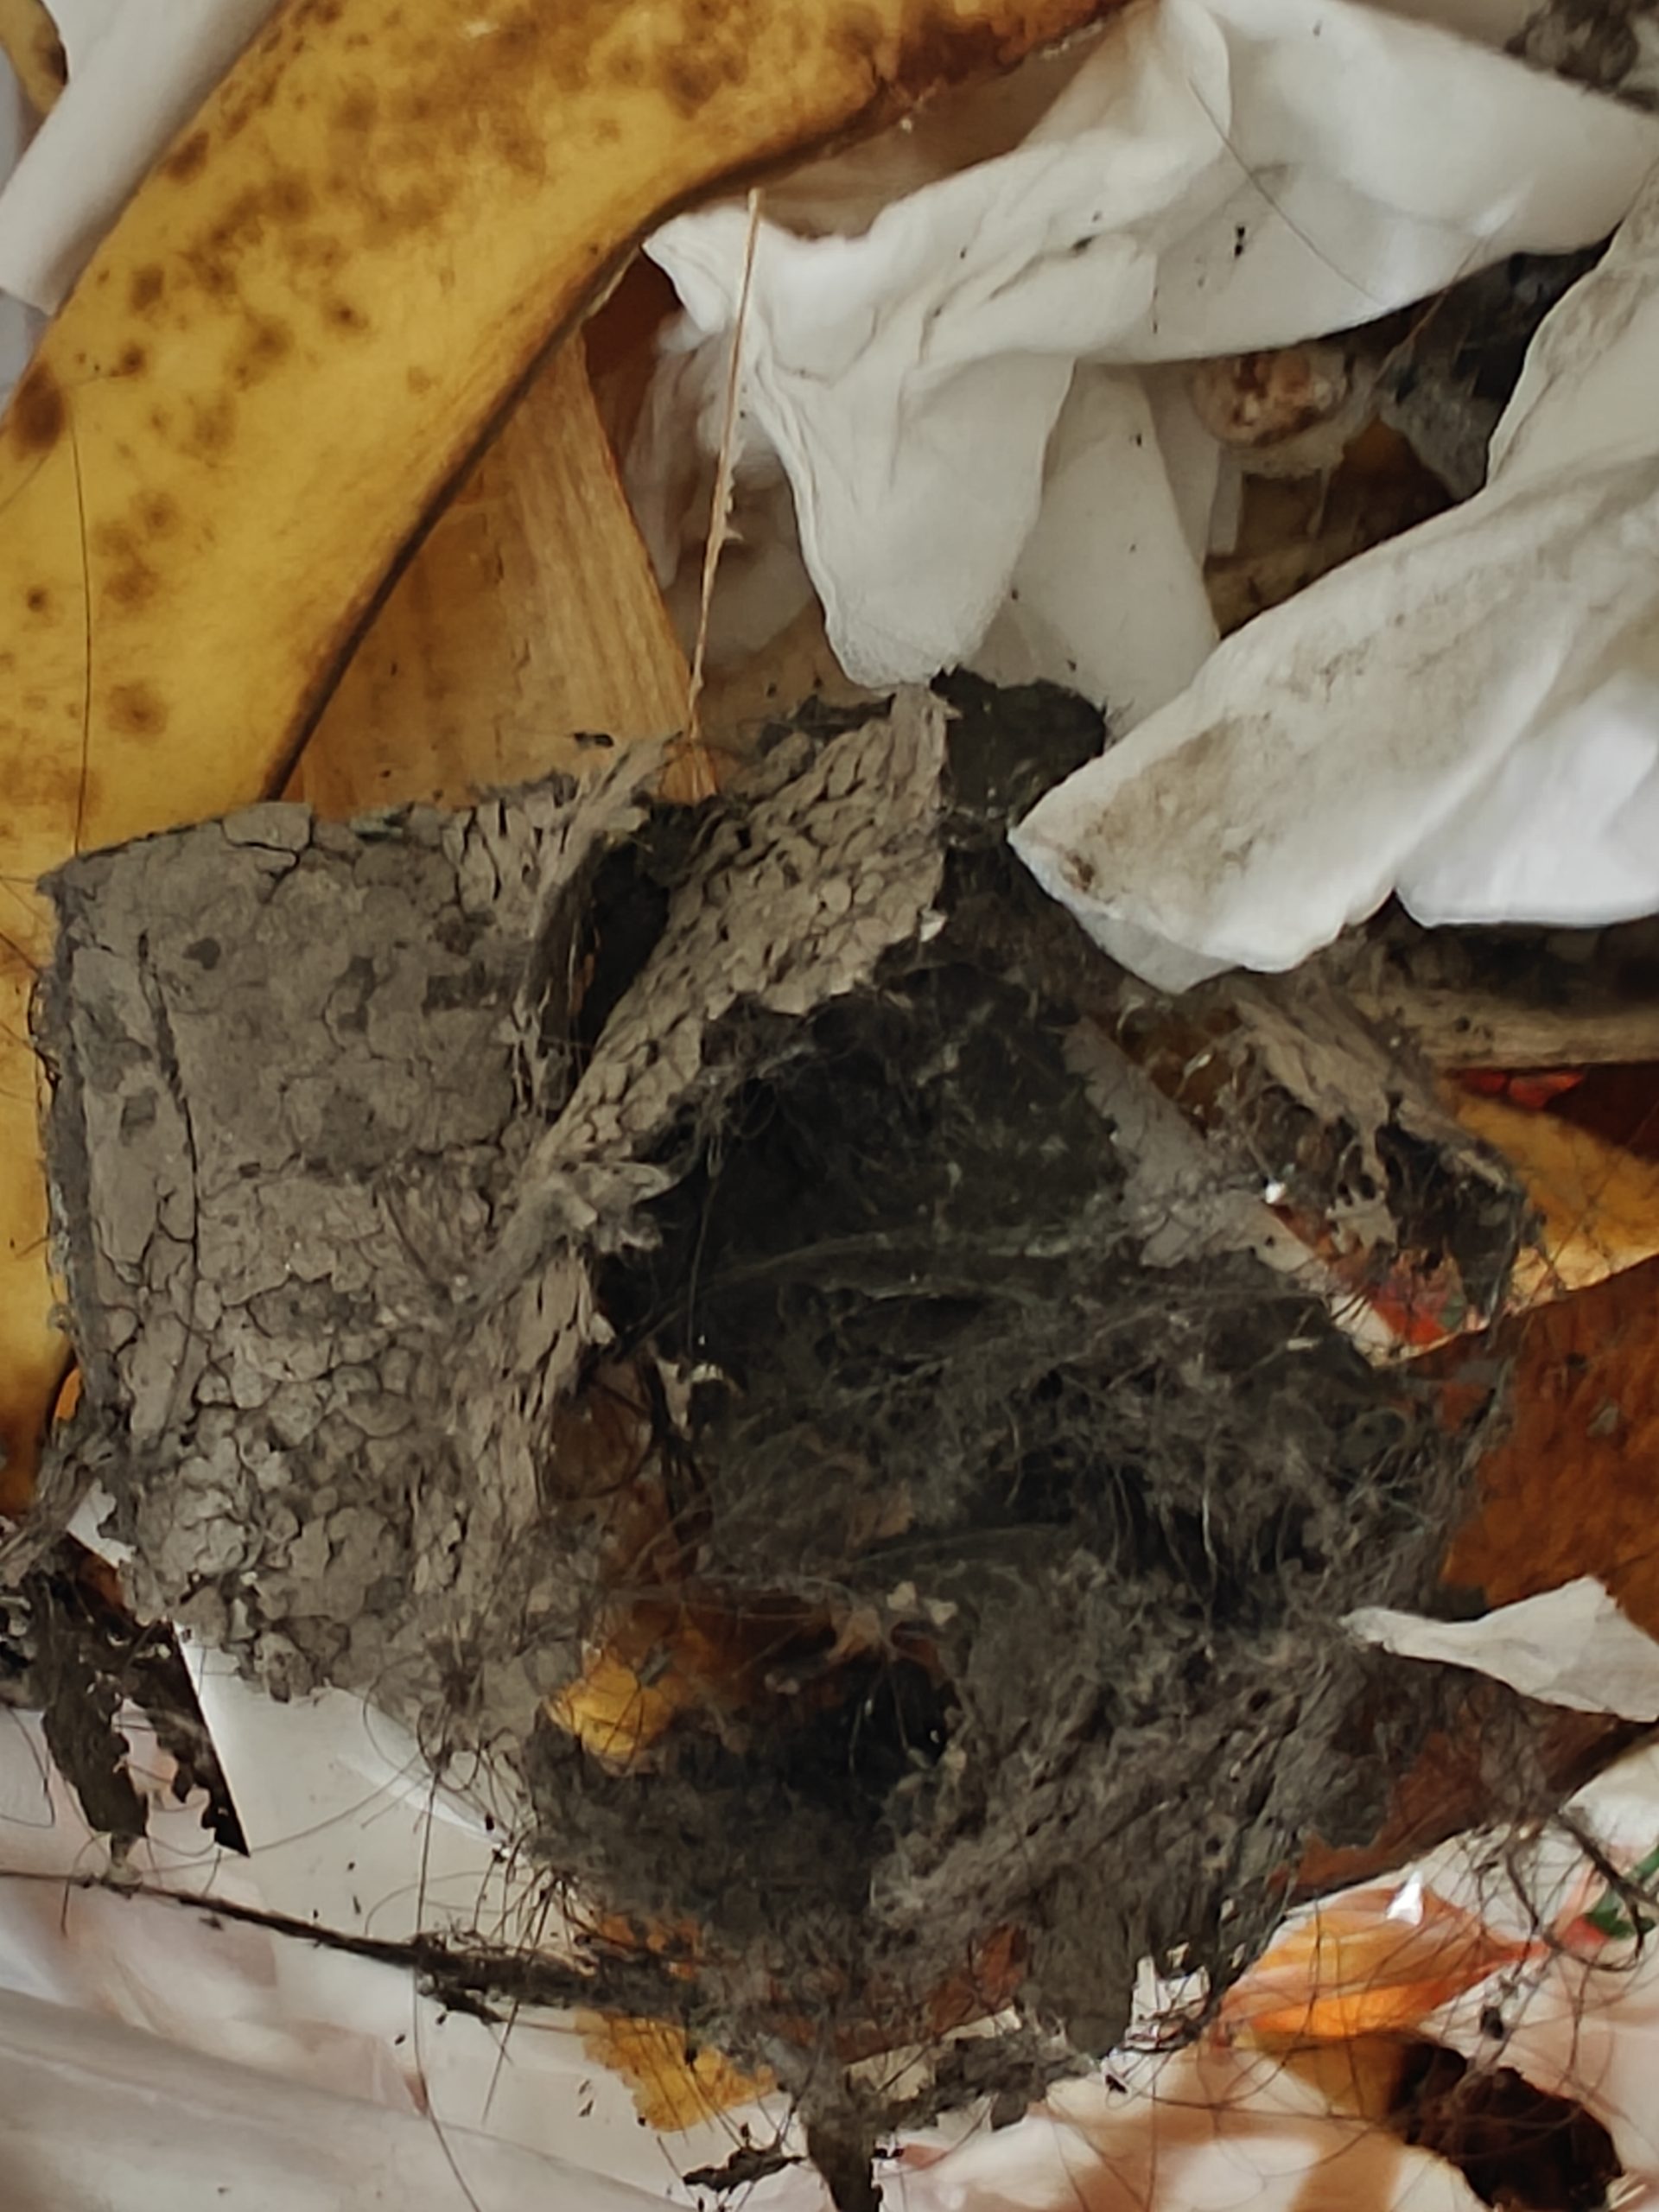
This is the garbage cleaned up this time, including hair, dust and a few cobwebs. I didn’t expect these inconspicuous debris to be the ‘culprit’ that caused the mop to not clean: as shown in Figure 2
Step 2: Re-place the water tank to make sure that the docking is in place
After cleaning the chassis, I did not immediately put it back to the base station, but checked the water tank again – although the water tank is full, it may be that the water tank is not placed in place, so that the water cannot flow out normally. So I gently lifted the clean water tank to check whether there is a blockage of debris at the outlet of the water tank (this is also a common problem that the clean water of the sweeping robot cannot be transported. One of the reasons), after confirming that the water outlet is clean and not blocked, then align the water tank to the card slot, and press gently to ensure that it is fully locked and connected in place.
This is a close-up of the water outlet of the clear water tank in the chassis. After cleaning, there is no debris blockage to ensure that the water can flow normally:
Troubleshooting: The self-cleaning function of the mop is back to normal
After completing the above two operations, I put the robot back to the base station and activates the self-cleaning function of the mop. I was pleasantly surprised to find that there is finally a normal water trace below the chassis, and the mop can also be fully soaked and cleaned with clean water, which is no longer the dry state before. In the future, the robot is used to mop the floor, and the floor has also returned to its normal humidity, and there is no water mark, which perfectly solves the problem.
Failure Cause Analysis & Use Reminders
Combined with this solution experience and related troubleshooting knowledge, I will summarize the core reasons for this mop:
- The debris below the chassis accumulates, blocking the clear water circulation channel, so that the clear water cannot be transported to the mop, which is the main reason. After a long-term use of the sweeping robot, debris such as hair, dust will accumulate at the bottom and interface of the chassis, especially if it is not often cleaned, it is easy to form. It is blocked, which affects the normal operation of the self-cleaning function – this is basically the same as the problem that many users encounter that the mop disk is not wet and the cleaning effect is reduced.
- The water tank is not placed in place. Although the water tank is full, the docking is not tight, so that the water cannot flow out normally. This situation is easily overlooked, and many times it is not a machine failure, but a simple placement problem.
Tips for daily use (guide to avoid the pit) - Regularly clean the interface between the chassis and the base station. It is recommended to clean it every 1-2 weeks to avoid the accumulation of debris and blocking the pipeline.
- Every time you add water, you can check the water outlet of the water tank by the way.
- If the mop is not cleaned and the water tank is full but no water flows out, don’t rush to contact the after-sales service first, you can give priority to the two simple problems of ‘congestion of debris’ and ‘water tank placement’, which has a high probability that you can solve it by yourself, saving time and energy.
- After long-term use, in addition to cleaning the chassis and interface, you can also check the mop status regularly.
Summary
The failure of the ecovacs sweeping robot mop that is not cleaned has made me realize how important the daily cleaning and maintenance of the sweeping robot is. Many seemingly complicated failures are actually caused by ignoring the dead corners of cleaning, not the serious problems of the machine itself.
The whole solution process is very simple, no professional tools and no repairs are required. Only through the two steps of ‘cleaning up the chassis and re-placing the water tank’, the mop and self-cleaning function is restored. I hope that my experience can help ecovacs users who encounter the same problem, avoid everyone taking detours, let the sweeping robot continue to play a role, and truly liberate their hands.