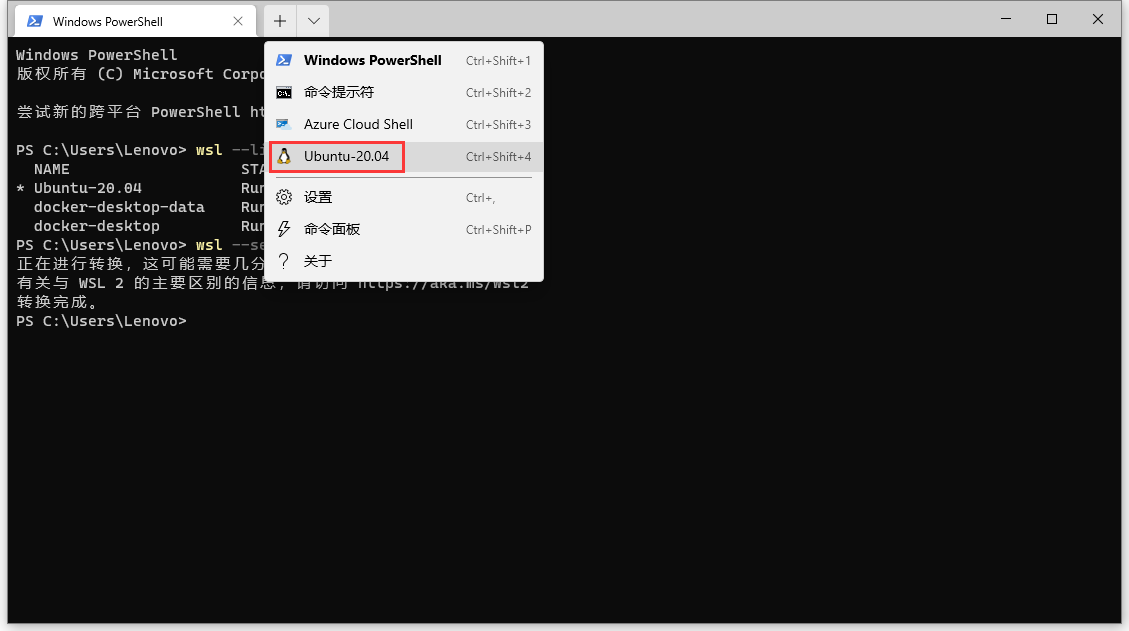
1. Install Nginx Proxy Manager, open the Windows Terminal command line, and follow the instructions below to enter the Ubuntu system. as shown in Figure 1
Figure 1
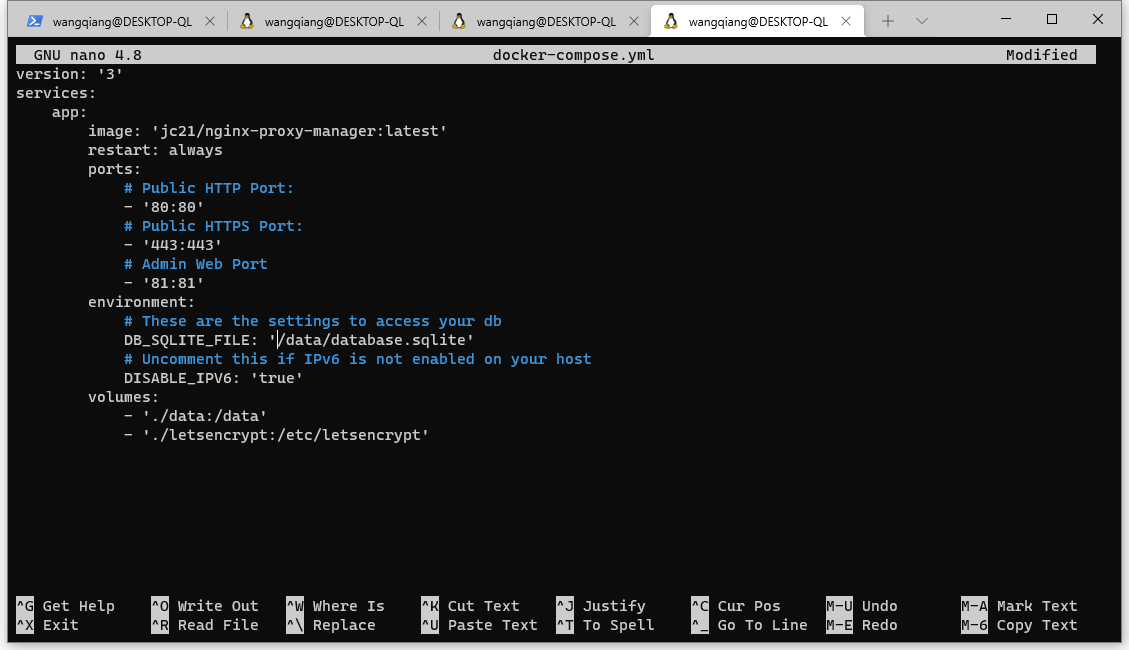
2. Enter the user root directory, create a new directory: proxy-manager, enter the directory: proxy-manager, create a file: docker-compose.yml. as shown in Figure 2
Figure 2
wangqiang@DESKTOP-QLPK8QM:/mnt/c/Users/Lenovo$ cd ~
wangqiang@DESKTOP-QLPK8QM:~$ mkdir proxy-manager
wangqiang@DESKTOP-QLPK8QM:~$ ls
proxy-manager
wangqiang@DESKTOP-QLPK8QM:~$ cd proxy-manager/
wangqiang@DESKTOP-QLPK8QM:~/proxy-manager$ nano docker-compose.yml
3. Edit the file: docker-compose.yml, save and exit the nano, press Ctrl+O, and then press Enter. Press Ctrl+X again. HTTP & HTTPS all use preset values. POST 81 is used for the admin page, so that we can set up the Proxy of Laravel SSIL. If you have a small number of projects, it is enough to use sqlite. I generally disable IPv6 for development environment. Save and then start the container. as shown in Figure 3
Figure 3
version: '3'
services:
    app:
        image: 'jc21/nginx-proxy-manager:latest'
        restart: always
        ports:
            # Public HTTP Port:
            - '80:80'
            # Public HTTPS Port:
            - '443:443'
            # Admin Web Port:
            - '81:81'
        environment:
            # These are the settings to access your db
            DB_SQLITE_FILE: '/data/database.sqlite'
            # Uncomment this if IPv6 is not enabled on your host
            DISABLE_IPV6: 'true'
        volumes:
            - './data:/data'
            - './letsencrypt:/etc/letsencrypt'
4. Run the command: docker-compose up -d , report an error: error: yaml.scanner.ScannerError. The final decision is to re-edit and save using VI. as shown in Figure 4
Figure 4
wangqiang@DESKTOP-QLPK8QM:~/proxy-manager$ docker-compose up -d
ERROR: yaml.scanner.ScannerError: while scanning for the next token
found character '\t' that cannot start any token
  in "./docker-compose.yml", line 5, column 1
wangqiang@DESKTOP-QLPK8QM:~/proxy-manager$ vi docker-compose.yml
wangqiang@DESKTOP-QLPK8QM:~/proxy-manager$ docker-compose up -d
Creating network "proxy-manager_default" with the default driver
Pulling app (jc21/nginx-proxy-manager:latest)...
latest: Pulling from jc21/nginx-proxy-manager
72a69066d2fe: Pull complete
6aacc5ddb486: Pull complete
e7c90551cea0: Pull complete
f3fbe2c2c4ff: Pull complete
4437e5607361: Pull complete
ac0af67384ba: Pull complete
70e9cf3ce040: Pull complete
20ca9bfa0d5d: Pull complete
3d5ed869606f: Pull complete
3d8d02d01e35: Pull complete
eb6a6398e23f: Pull complete
44ce8be92956: Pull complete
df1a765de003: Pull complete
a59ede055db9: Pull complete
536e2fa9b52d: Pull complete
a83af78253da: Pull complete
75e669cb8e7a: Pull complete
1dcb53004e40: Pull complete
d96b3a386f37: Pull complete
59e305e29011: Pull complete
3bbeaee21d7f: Pull complete
b65ab8da1424: Pull complete
fac215856462: Pull complete
6aaf9d409d6a: Pull complete
09b699c9559f: Pull complete
0d0f50cd276a: Pull complete
Digest: sha256:09316a7c425270f62600552d3d3115a2a98ea55397e26b43bdfd4b138f9a2ac2
Status: Downloaded newer image for jc21/nginx-proxy-manager:latest
Creating proxy-manager_app_1 ... done
wangqiang@DESKTOP-QLPK8QM:~/proxy-manager$
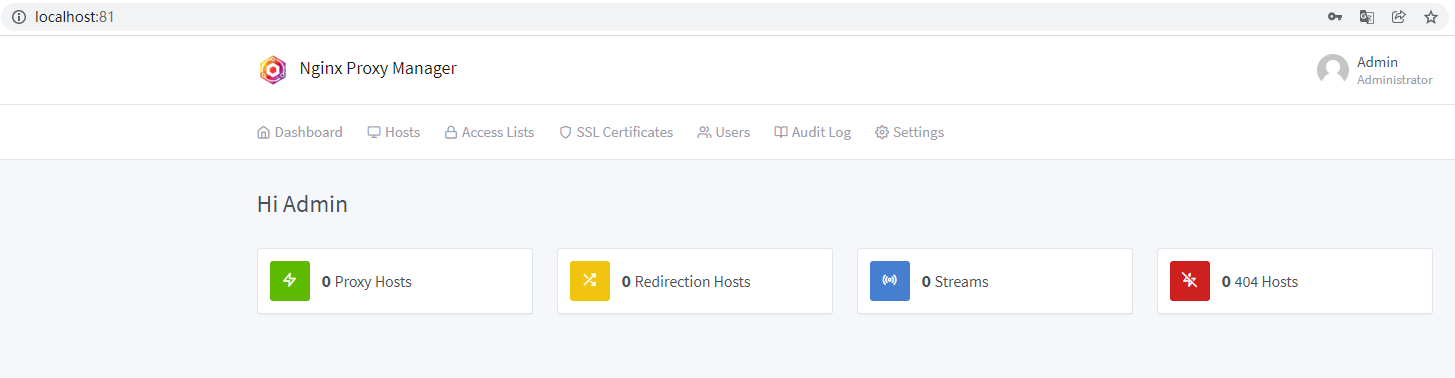
5. Seeing the last prompt is green, indicating that the container was created successfully. Now open the URL: http://localhost:81 . Email: admin@example.com Password: changeme . Login is successful, as shown in Figure 5
Figure 5
6. Create a Laravel Sail project 1, execute the command: curl -s https://laravel.build/sail-project-1 | bash
7. Open the editor, edit the .env file, and add the following configuration items. These are all Sail’s preset services, and their ports cannot be repeated and cannot be repeated with other containers. Generally speaking, ports 49152 to 65535 are idle and can be used. as shown in Figure 6
Figure 6
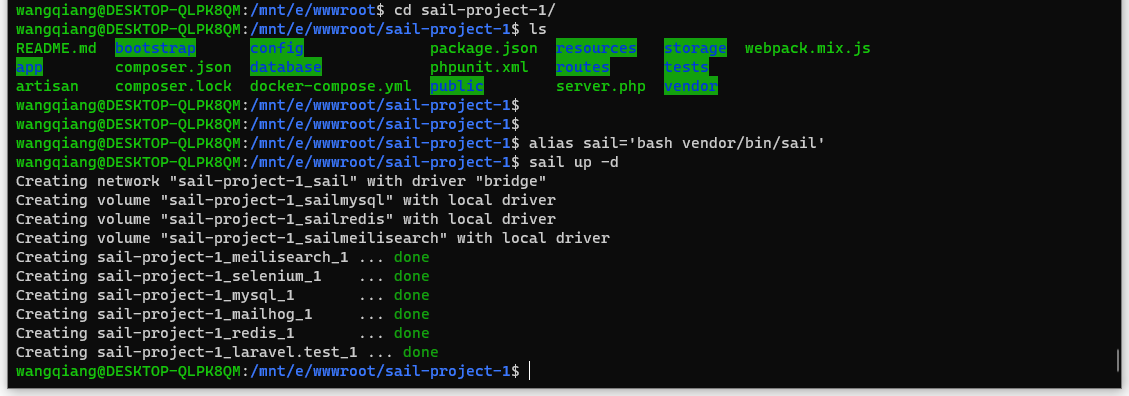
8. Enter the directory: Sail-Project-1, execute the command: Sail up -d. as shown in Figure 7
Figure 7
wangqiang@DESKTOP-QLPK8QM:/mnt/e/wwwroot$ cd sail-project-1/
wangqiang@DESKTOP-QLPK8QM:/mnt/e/wwwroot/sail-project-1$ ls
README.md  bootstrap      config              package.json  resources   storage  webpack.mix.js
app        composer.json  database            phpunit.xml   routes      tests
artisan    composer.lock  docker-compose.yml  public        server.php  vendor
wangqiang@DESKTOP-QLPK8QM:/mnt/e/wwwroot/sail-project-1$
wangqiang@DESKTOP-QLPK8QM:/mnt/e/wwwroot/sail-project-1$
wangqiang@DESKTOP-QLPK8QM:/mnt/e/wwwroot/sail-project-1$ alias sail='bash vendor/bin/sail'
wangqiang@DESKTOP-QLPK8QM:/mnt/e/wwwroot/sail-project-1$ sail up -d
Creating network "sail-project-1_sail" with driver "bridge"
Creating volume "sail-project-1_sailmysql" with local driver
Creating volume "sail-project-1_sailredis" with local driver
Creating volume "sail-project-1_sailmeilisearch" with local driver
Creating sail-project-1_meilisearch_1 ... done
Creating sail-project-1_selenium_1    ... done
Creating sail-project-1_mysql_1       ... done
Creating sail-project-1_mailhog_1     ... done
Creating sail-project-1_redis_1       ... done
Creating sail-project-1_laravel.test_1 ... done
wangqiang@DESKTOP-QLPK8QM:/mnt/e/wwwroot/sail-project-1$
9. The start of the first Sail project is completed. as shown in Figure 8
8
10. Then start the second Sail project and execute the command: curl -s https://laravel.build/sail-project-2 | bash. The steps are the same, except that the content of the .env file is different. All port numbers are added by 1, and no port conflict error is reported. as shown in Figure 9
Figure 9
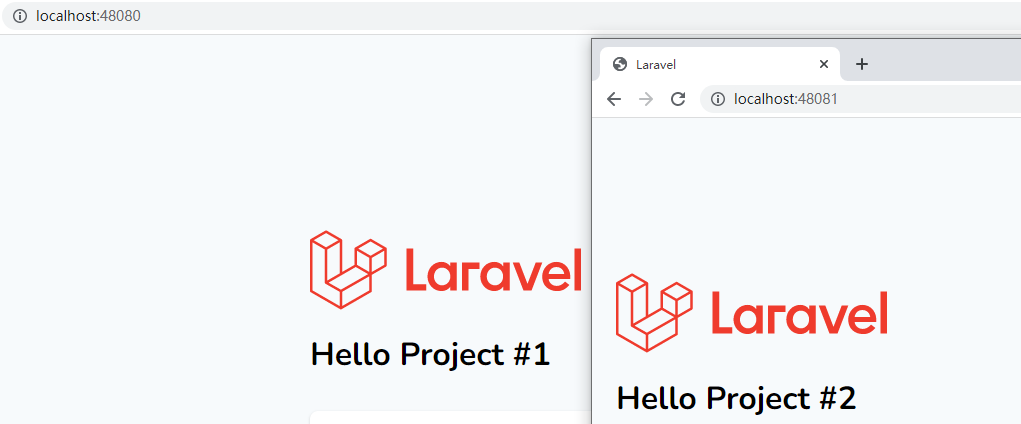
11. In both projects, edit the view file to make no distinction. http://localhost:48080/ , http://localhost:48081/ . As shown in Figure 10
Figure 10
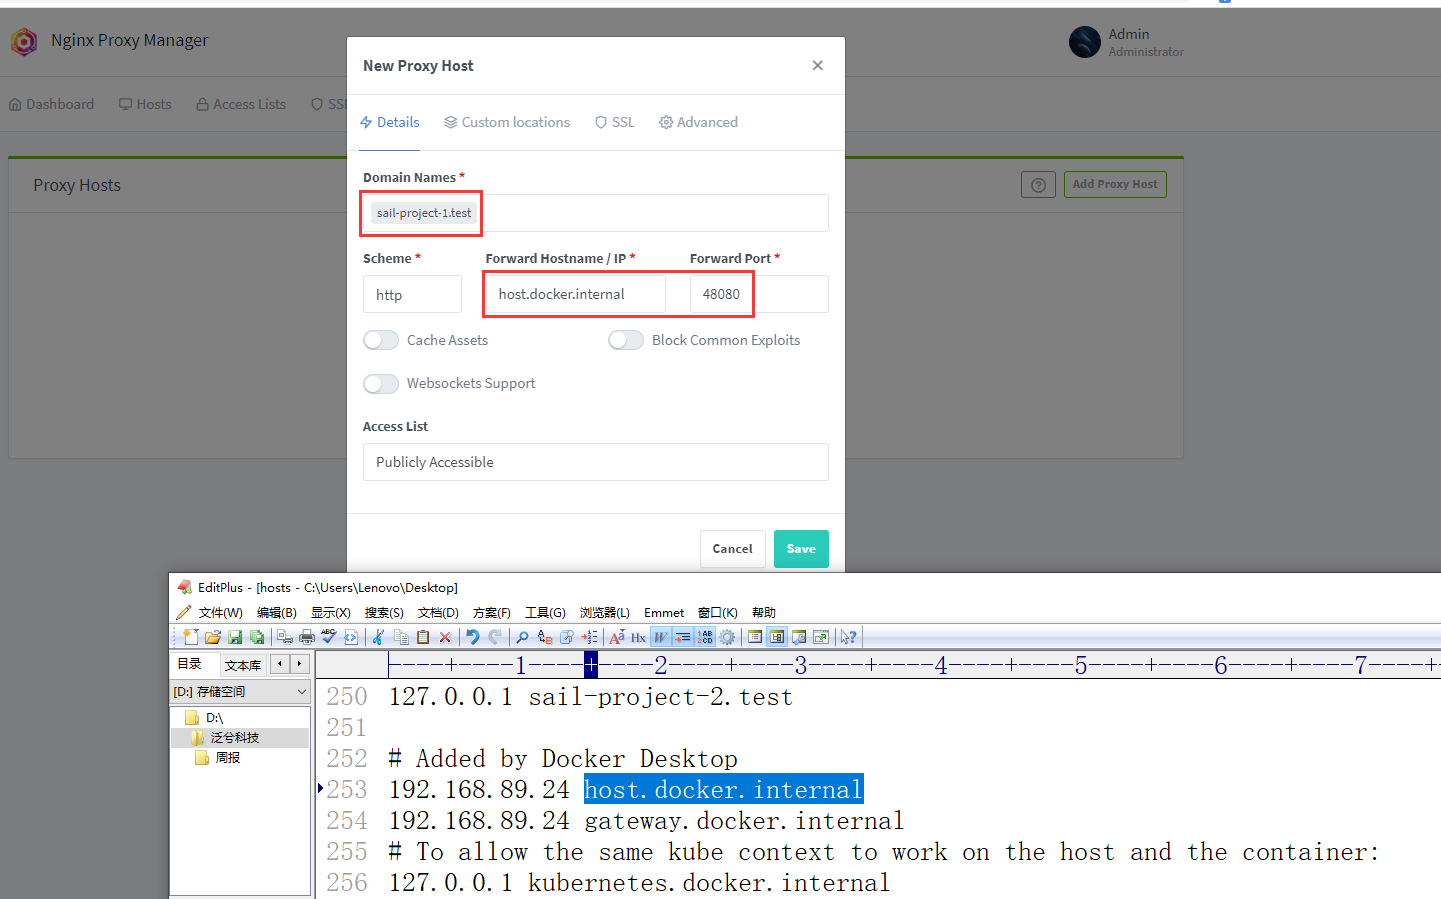
12 Now set the domain names of the two projects respectively. Edit the C:/Windows/System32/Drivers/etc/hosts file to specify the mapping relationship between IP and domain name.
13. Open Nginx Proxy Manager, hosts – proxy hosts – add proxy host. as shown in Figure 11
Figure 11
14. Added
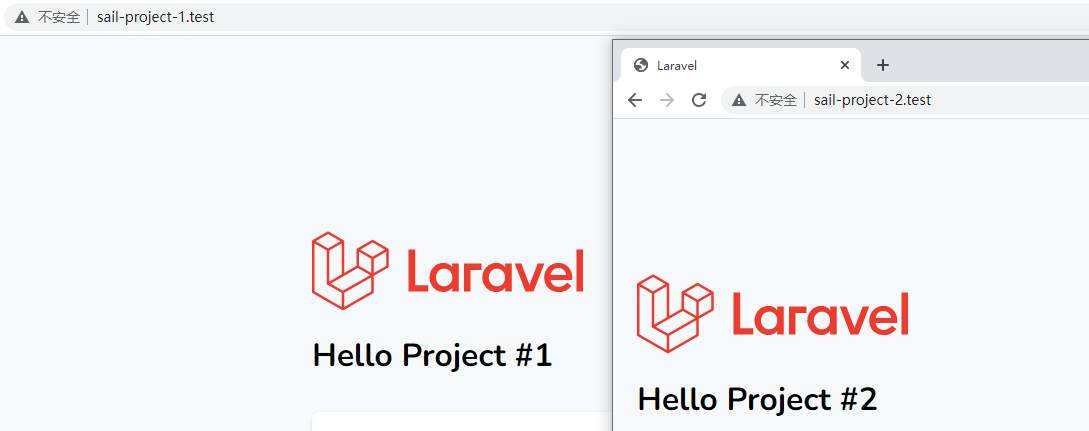
15. Open them separately: http://sail-project-1.test , http://sail-project-2.test , as shown in Figure 12
Figure 12
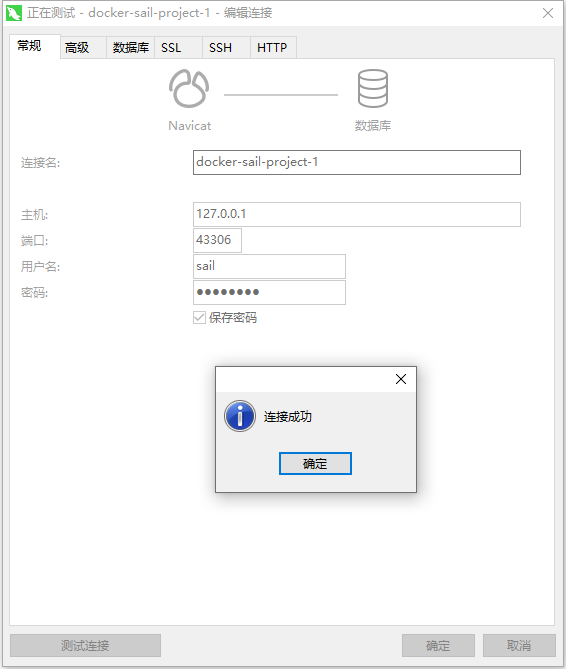
16. To connect to the MySQL database from the local host, you can directly connect to the MySQL database container through ports 127.0.0.1 and 43306. as shown in Figure 13
Figure 13


Leave a Reply