





![[截图 2:浏览器 Network 中直接请求 translate.yandex.net]](https://media.shuijingwanwq.com/2026/07/2-16-1024x568.png)


As a blogger who has been operating a technology blog for a long time, he plans to gradually translate 1,000 Chinese original articles on the website into English versions in the near future to expand the scope of the audience. After comparing a variety of WordPress multi-language plug-ins, I finally chose Polylang (free version), with Chrome Built-in AI for fast translation. The whole process is from plug-in settings, synchronous configuration, to single article translation, page translation, to problem troubleshooting, stepping on some small pits, and also summarizing a set of efficient and reusable implementation The operation process, combined with 18 actual screenshots, will review the whole process in detail, for the reference of bloggers with the same multi-language translation needs.
First explain the core premise: my blog is in Chinese as the default language, and it is planned to translate Chinese articles into English one by one, and only publish them after translation, and do not edit any Chinese and English articles in the future. The core needs are ‘ The translation is efficient, time synchronization, normal language switching, and no errors in sorting’, and finally realizes the corresponding Chinese and English versions. Users can switch freely through the language switcher, and the articles are arranged in reverse order of release time. At present, many articles have been translated, and all functions are running normally. The following is the complete practical process.
1. Preliminary preparation: plug-in installation and basic configuration
If you want to do a good job, you must first sharpen your tools. The core of the early stage is to do a good job of the basic configuration of the Polylang plug-in, which is the key to smooth subsequent translation and normal functions.
1.1 Plug-in installation and activation
Operation path: WordPress background → plug-in → install plug-in → search ‘polylang’ → install and activate.
Corresponding to the scene: the plugin search result page, the Polylang plug-in is clearly marked. After clicking ‘Install’, wait for the installation to complete, and then click ‘Activate’. After activation, the ‘Language’ option will appear on the left side of the background, and enter the language setting interface.
Note: There is no need to install the Polylang Pro version, the free version has fully met the translation needs of personal blogs, and supports core functions such as multi-language switching, article translation association, and basic metadata synchronization, without additional charges.
1.2 Language Addition and Default Settings
Operation path: background → language → language (languages) → add a new language.
Corresponding scene: main interface of language setting, the added Chinese (Simplified) is displayed by default, click ‘Add New Language’, and select ‘English (Uniteded) in the drop-down menu. states)’, Polylang comes with 132 predefined languages, no need to manually create, click ‘Add a new language’ to complete the English addition.
Corresponding scenarios: After adding English, the language list displays Chinese (default language) and English, and can set language sorting, display name, and URL structure (I select ‘language code as subdirectory’ mode , that is, the Chinese path is xxx.com/xxx, the English path is xxx.com/en/xxx, SEO is friendly and easy to distinguish), and click ‘Save Changes’ after the setting is completed.
Key settings: The default language is kept in Chinese, English is the secondary language, the URL structure is selected ‘directory name’, and the subdomain name is avoided (complex operation, not suitable for personal blog), and the language code is ‘en’ by default, no need to modify.
1.3 Synchronization settings (core! As shown in Figure 17)
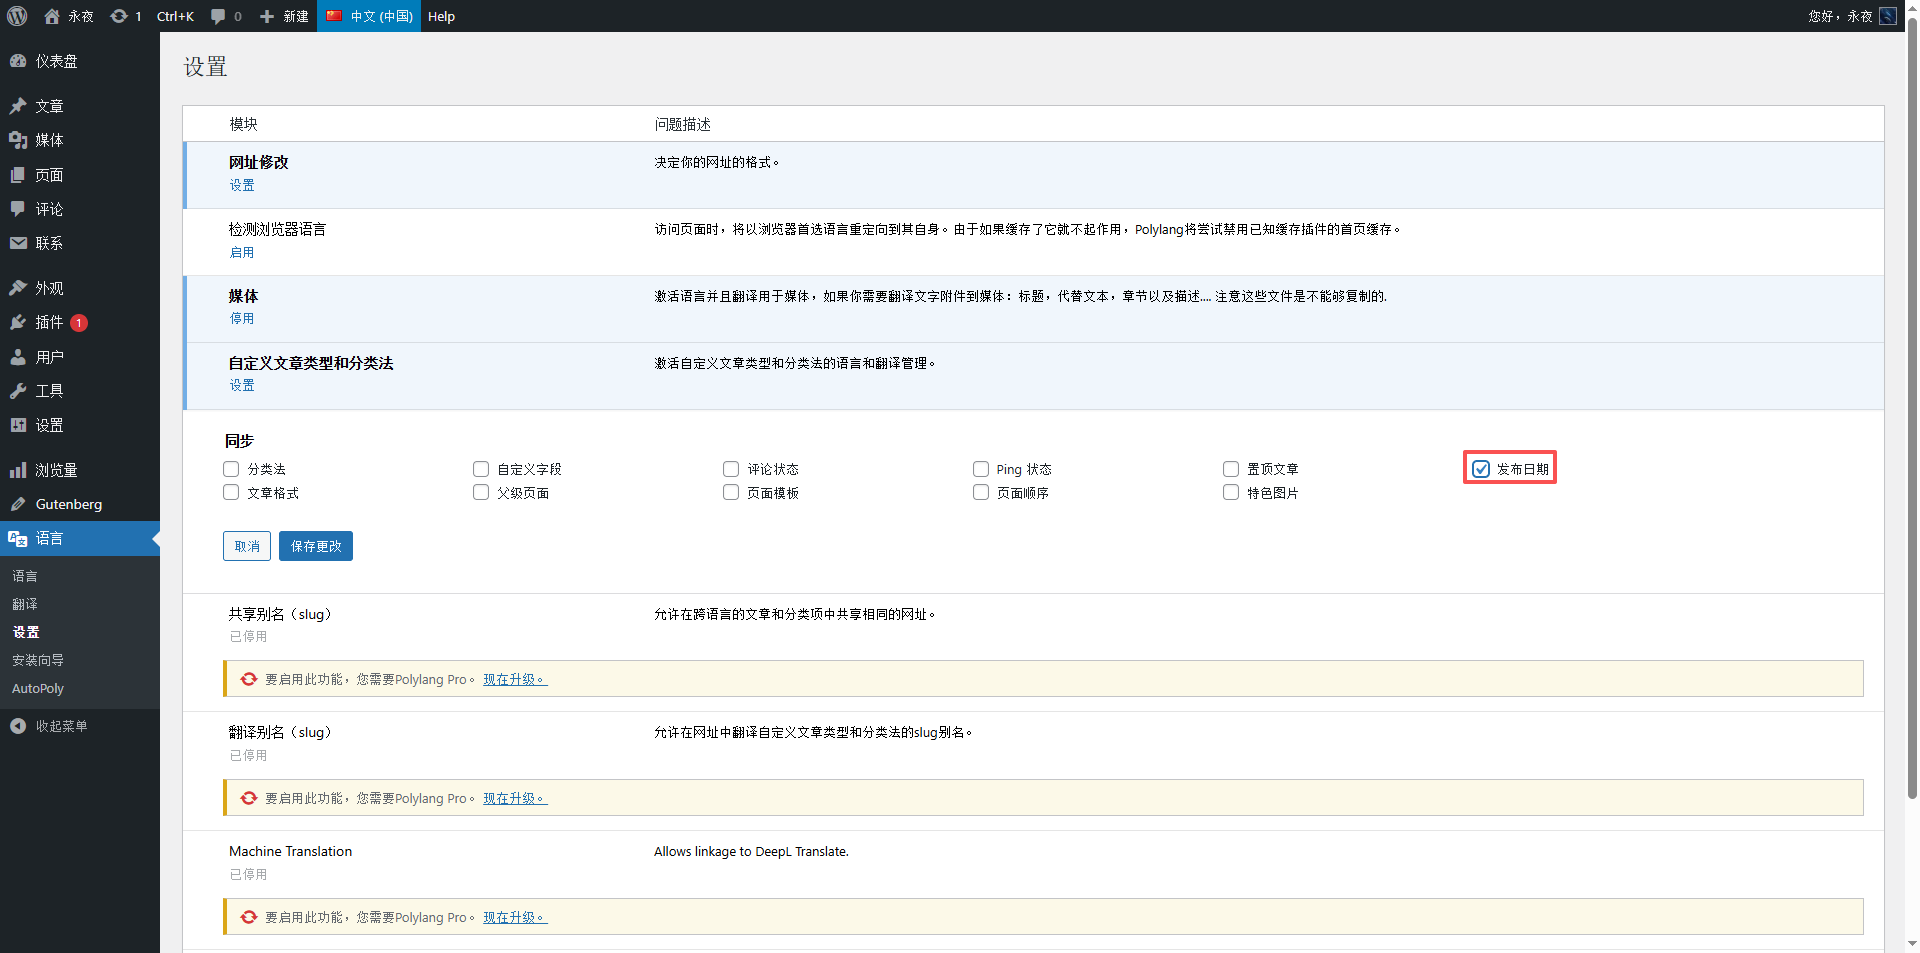
This is the most critical step, which directly affects the time synchronization, classification synchronization and other issues of the post-translation article. Combined with my ‘only create and not edit’ scenarios, the synchronization settings are as follows (you can copy them directly, no need to change):
Operation path: Background → Language → Settings → Synchronization.
As shown in Figure 17, the corresponding scenario: Synchronization setting interface, only the following items are checked, and all other options are not checked:
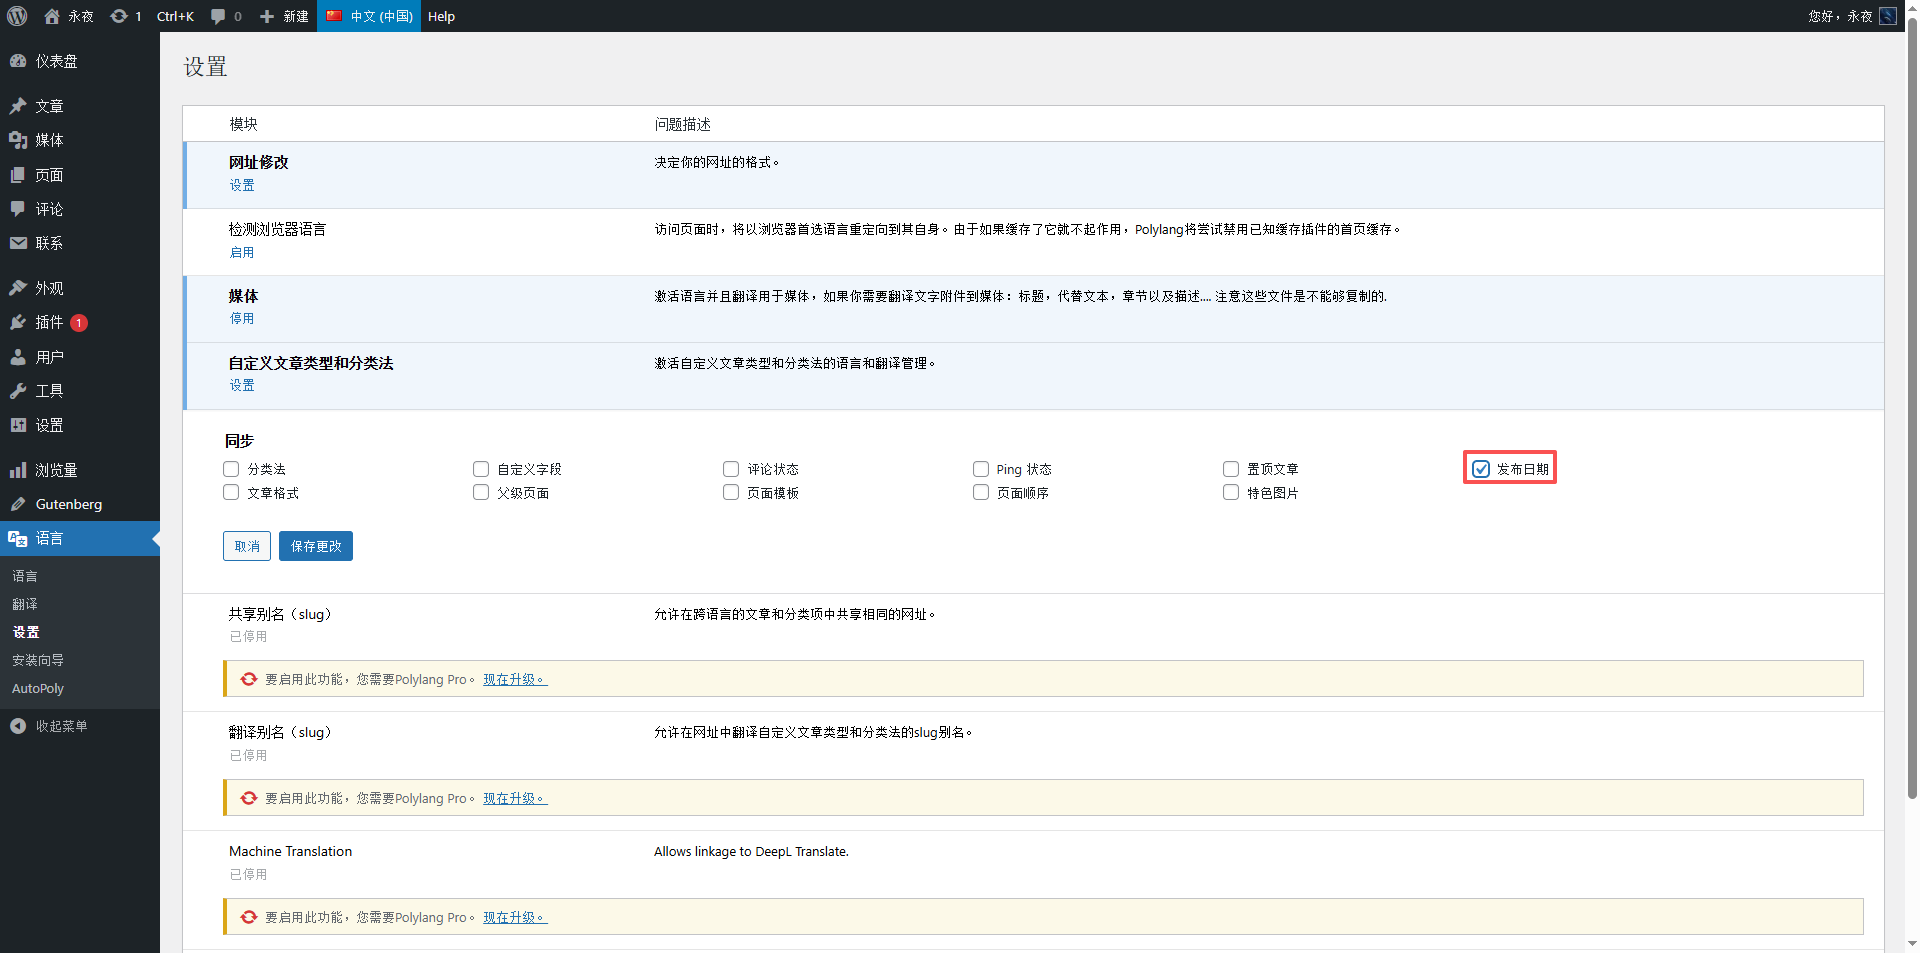
- ✅ Published Date: The key check! It’s the only option I checked. Combined with my usage scenario, when a new English translation is created after checking, the release time of the original Chinese original text will be automatically inherited, and there is no need to manually modify it, and the article will not be edited in the future, and there will be no two-way coverage problem.
- ❌ Taxonomies: Not checked, although it can be synchronized and labeled, but I don’t need this synchronization function, I don’t check on demand.
- ❌ Custom fields: Unchecked, no need to synchronize article custom metadata, avoid unnecessary synchronization associations.
- ❌ Comment status (Comment status): Not checked, no need to keep the comment status of Chinese and English articles consistent, and can be set independently.
- ❌ Ping Status (Ping Status): Not checked, no need to synchronize the ping settings of the article, and the separate configuration is more flexible.
- ❌ Sticky Posts: Not checked, Chinese and English articles can be pinned to the top to avoid mutual influence.
- ❌ Post format: Unchecked, no need to synchronize the article format, it can be independently adjusted according to the needs of English audiences.
- ❌ Parent page: Unchecked, no need to synchronize the parent page association, the page hierarchy can be set independently.
- ❌ Page template: Unchecked, no need to synchronize the page template, you can adjust the English page layout as needed.
- ❌ Page Order: Unchecked, there is no need to synchronize page sorting, you can set the English page structure independently.
- ❌ Featured image (Featured Image): Not checked, no need to synchronize the featured picture, it can be uploaded or adjusted independently according to the needs of the English version.
After the setting is completed, click ‘Save Changes’, the key point is here: many bloggers are worried that checking ‘Release Date’ will lead to two-way overwriting in subsequent editing, but I clearly ‘do not edit any articles after translation’, so I only checked This is only the benefit – automatic inheritance time, no need to manually adjust, and there will be no coverage problems, and the actual measurement is effective; the rest of the options are not checked, avoid unnecessary synchronization connections, and are more suitable for my actual use needs.
2. Core practice: the whole process of article translation
Article translation is the core link. I adopt the model of ‘sort by pageview, translation one by one’, and give priority to translating high-traffic articles to ensure that the translation efficiency and value are maximized. The whole process is divided into ‘Chinese article selection → new English translation → AI translation → details check → release’, each step has the corresponding as shown in the figure, and the details are full.
2.1 Filter to translate articles to be translated
Operation path: background → article → all articles → select ‘views’ (from high to low) for sorting.
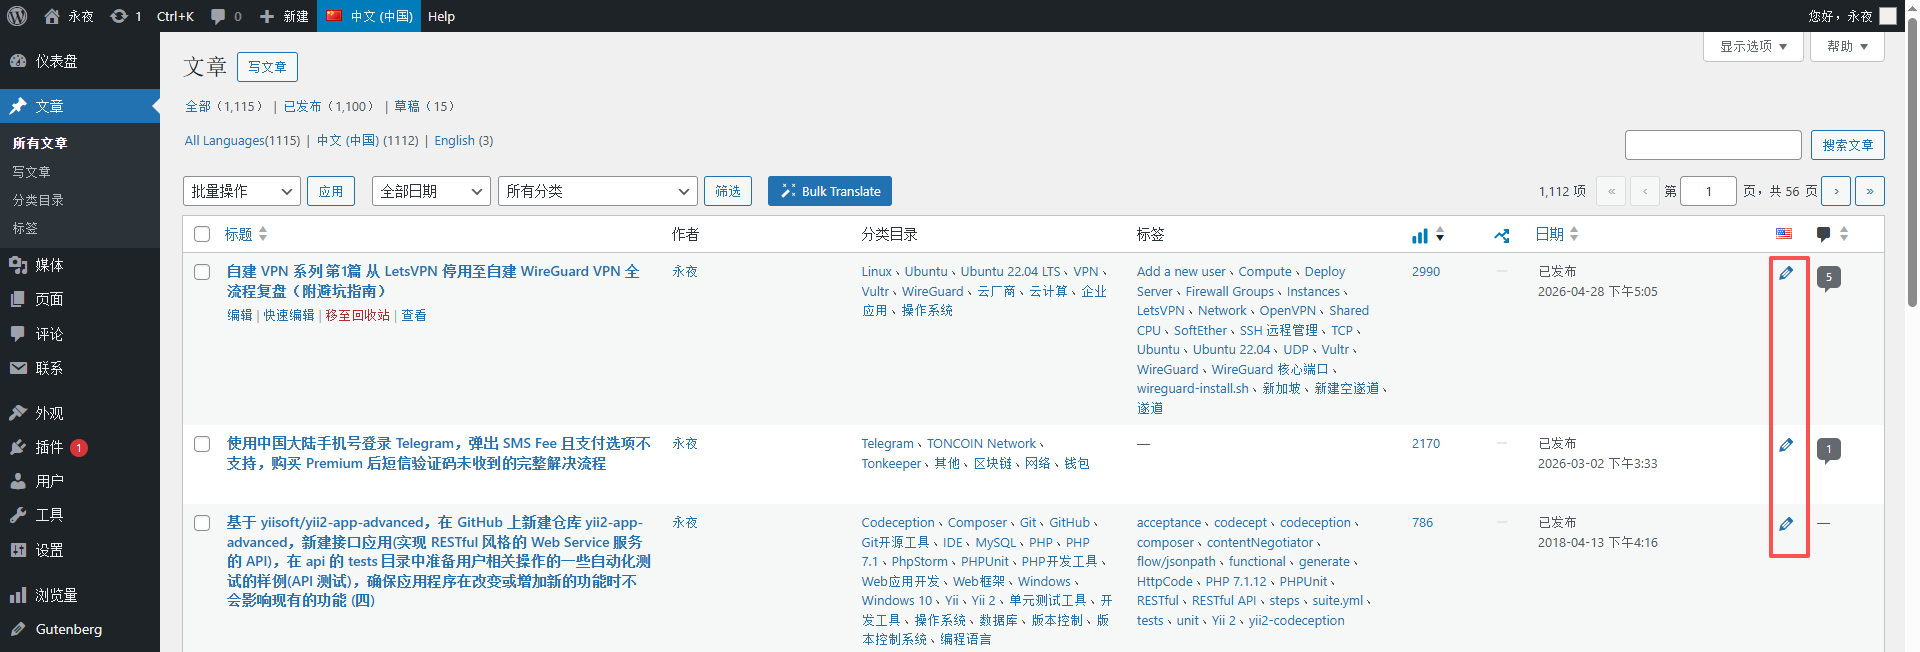
As shown in Figure 8, the corresponding scenario: the article list page, after sorting by pageviews, the high-traffic articles are ranked in the front, and I choose the first article to be translated (as I am) As an example, the recently translated ‘Self-built VPN Series Part 1’), click the article title, enter the Chinese article editing page, and prepare a new English translation.
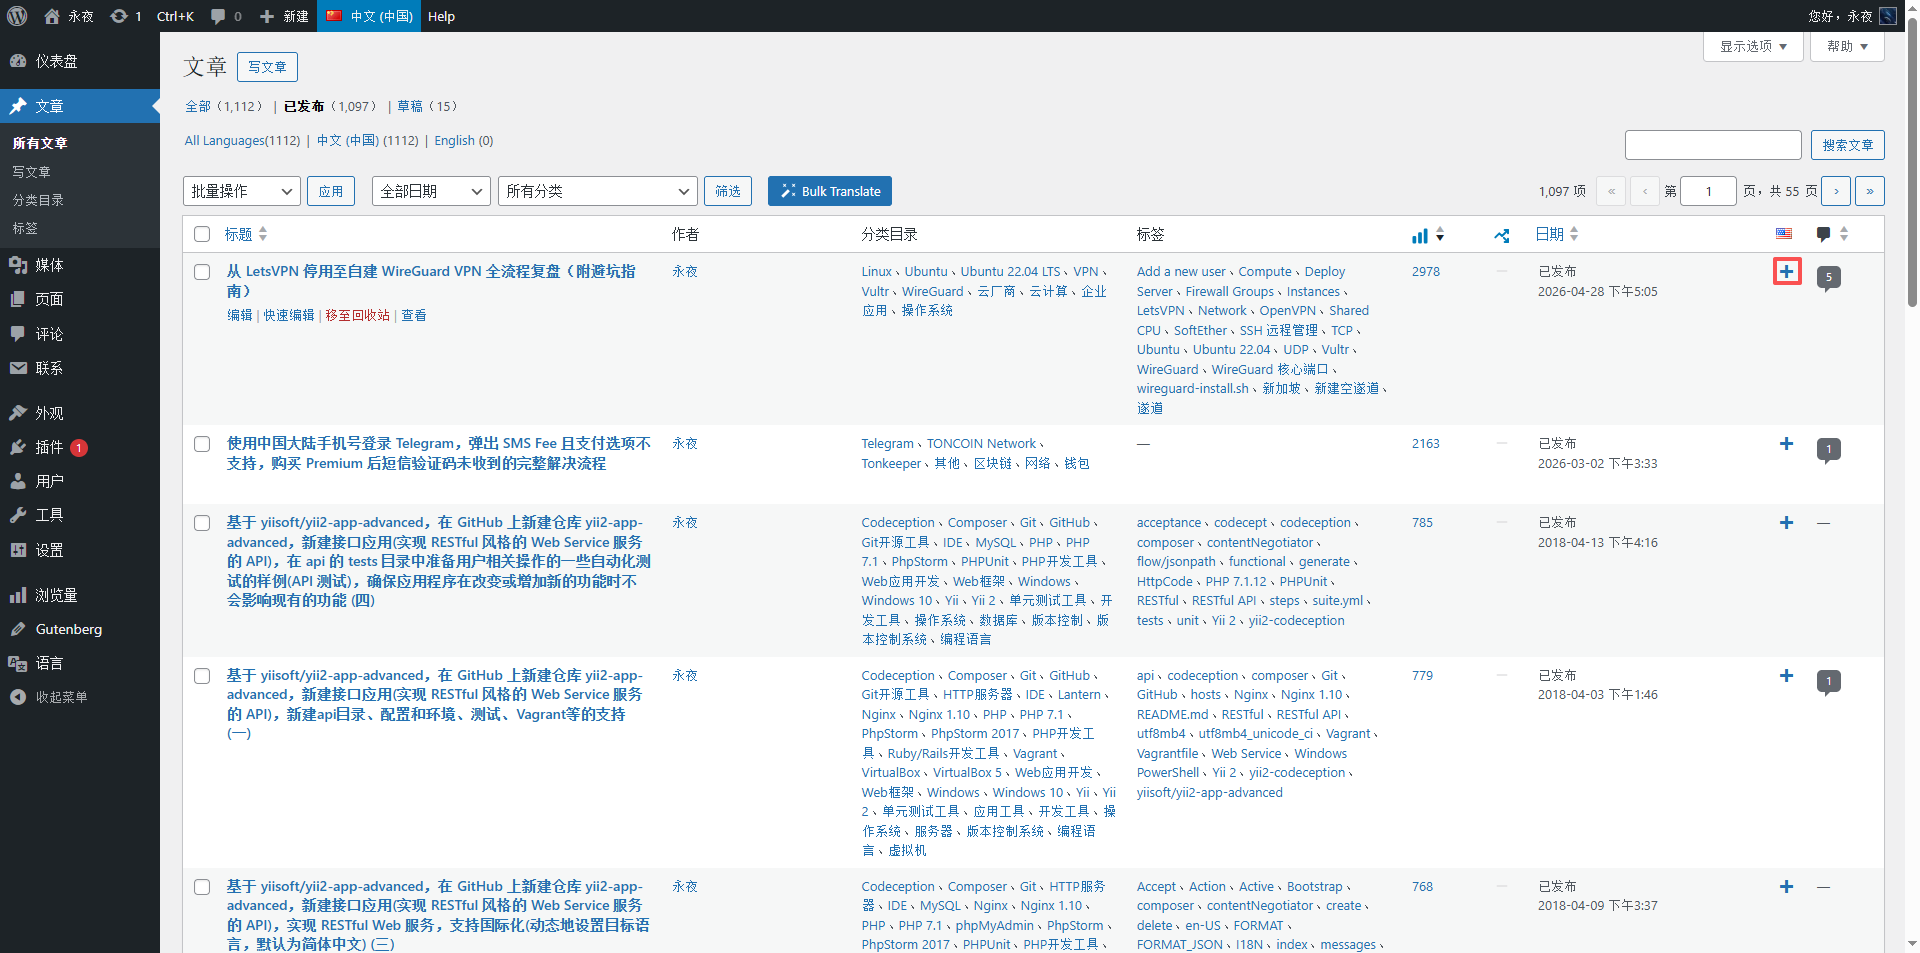
Tips: You can mark the articles to be translated in batches on the article list page to avoid repeated translations or omissions. I currently plan to translate in batches, 10 articles each time, and gradually complete the translation of 1000+ articles.
2.2 New English translation
Operation path: Chinese article editing page → ‘Language’ module on the right → Click the ‘+’ sign after English (new translation).
As shown in Figure 6, the corresponding scenario: the right side of the Chinese article editing page, the language module displays ‘Chinese (released)’ and ‘English (not translated)’, click the ‘+’ number after English, and jump to the English article editing page, At this time, the system will automatically copy all the metadata of Chinese articles (release date, classification, label, featured pictures, etc.), without manual addition – this is the function of the pre-sync setting, polylang By default, all metadata will be copied when a new translation is created. No matter whether the synchronization is checked or not, the new one will be copied once, and the synchronization settings will only affect the two-way synchronization of subsequent edits.
Key reminder: You must click the ‘+’ number to create an English translation from the Chinese article editing page. Do not create English articles from the ‘Article → New’ page and then associate Chinese, otherwise the metadata cannot be automatically inherited.
2.3 AI translation
I use chrome build-in AI for translation, no manual input is required, the efficiency is extremely high, and the operation steps are simple, as follows:
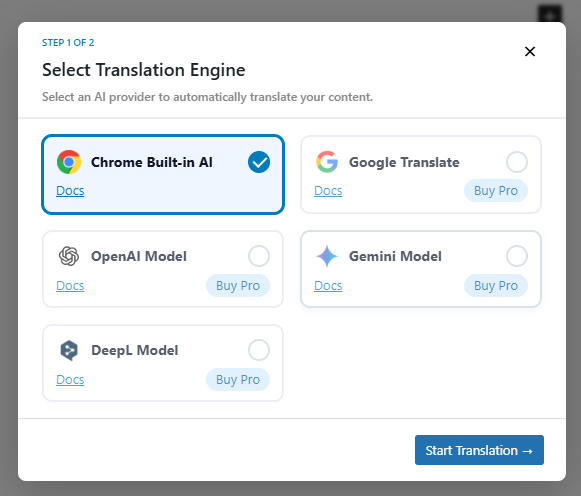
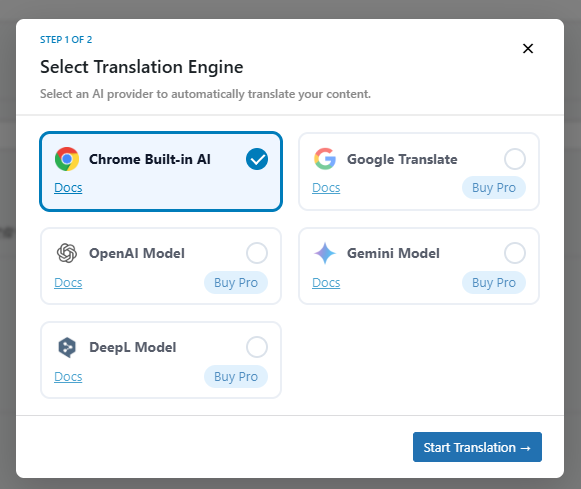
Operation path: Click ‘Translate Now’ → select ‘Chrome Built-in AI’ → wait for the automatic translation to complete.
As shown in Figure 10, the corresponding scenario: English article editing page, click the ‘Translate Now’ button, the translation option will pop up, and select Chrome Built-in AI (no need to install additional plug-ins, the Chrome browser comes with it, and the translation accuracy is high, which is suitable for technical articles).
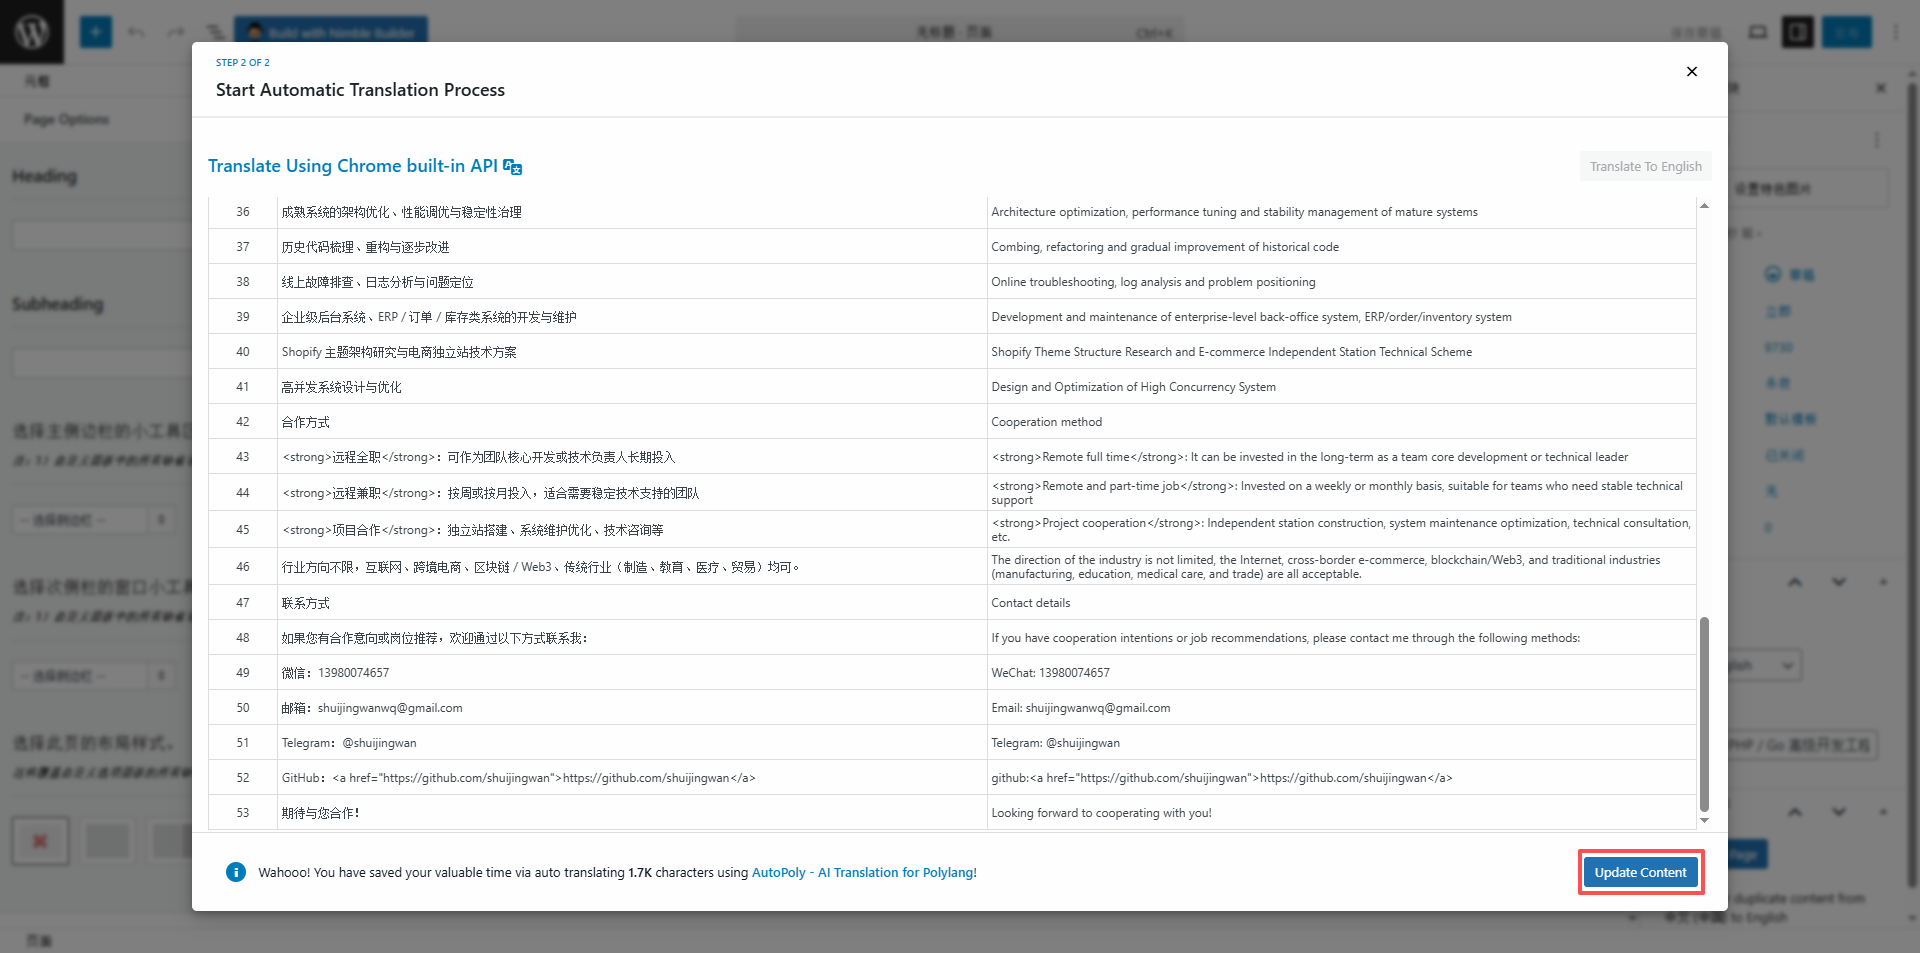
As shown in Figure 12, the corresponding scene: After the translation is completed, the title, body and paragraph format of the English article have been automatically translated, and the AI will automatically retain the original text. Paragraph structure, code block, image reference, etc., no need to manually adjust the format – here I would like to thank the AutoPoly plugin for the adaptation, it can be perfectly matched Polylang, realize the automatic copying and translation of titles, content, pictures and other elements, reducing the workload by 90%.
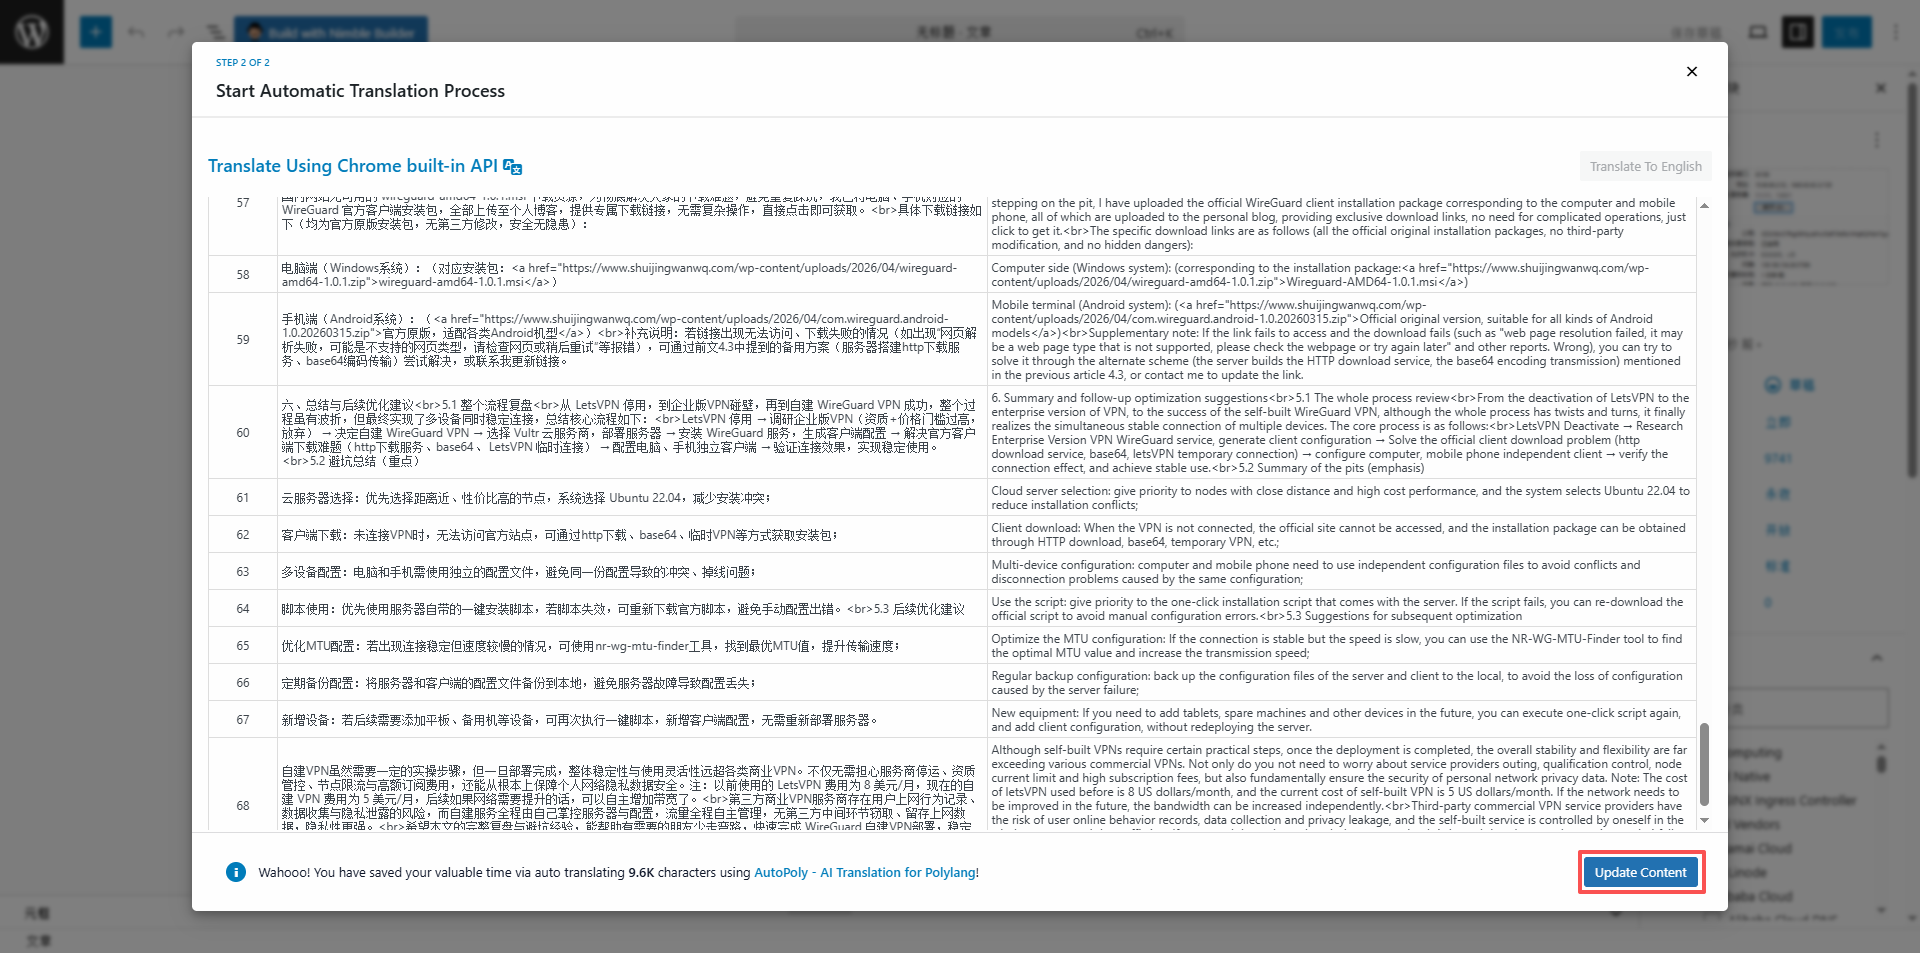
Small details: After the translation is completed, it is recommended to browse it quickly, focusing on checking the translation accuracy of technical terms (such as ‘wireguard’ ‘vult Technical terms such as r’ and ‘ssh’, AI usually translates accurately without modification), and whether the punctuation and paragraph line breaks are correct to ensure the quality of translation.
2.4 Details check and adjustment
After the translation is completed, there is no need to make a lot of modifications, and focus on checking 3 core details to ensure that the English article is displayed normally and corresponds to the Chinese version:
As shown in Figure 14 corresponding scenario: check the release date and metadata, confirm that the release date is the same as the Chinese original, the classification, label, and featured pictures are all synchronized correctly, no leftover Missing or error; if necessary, you can modify the English title (to make it more suitable for English audience habits), but I choose to keep it in the same way as the Chinese title, which is convenient for users to identify.
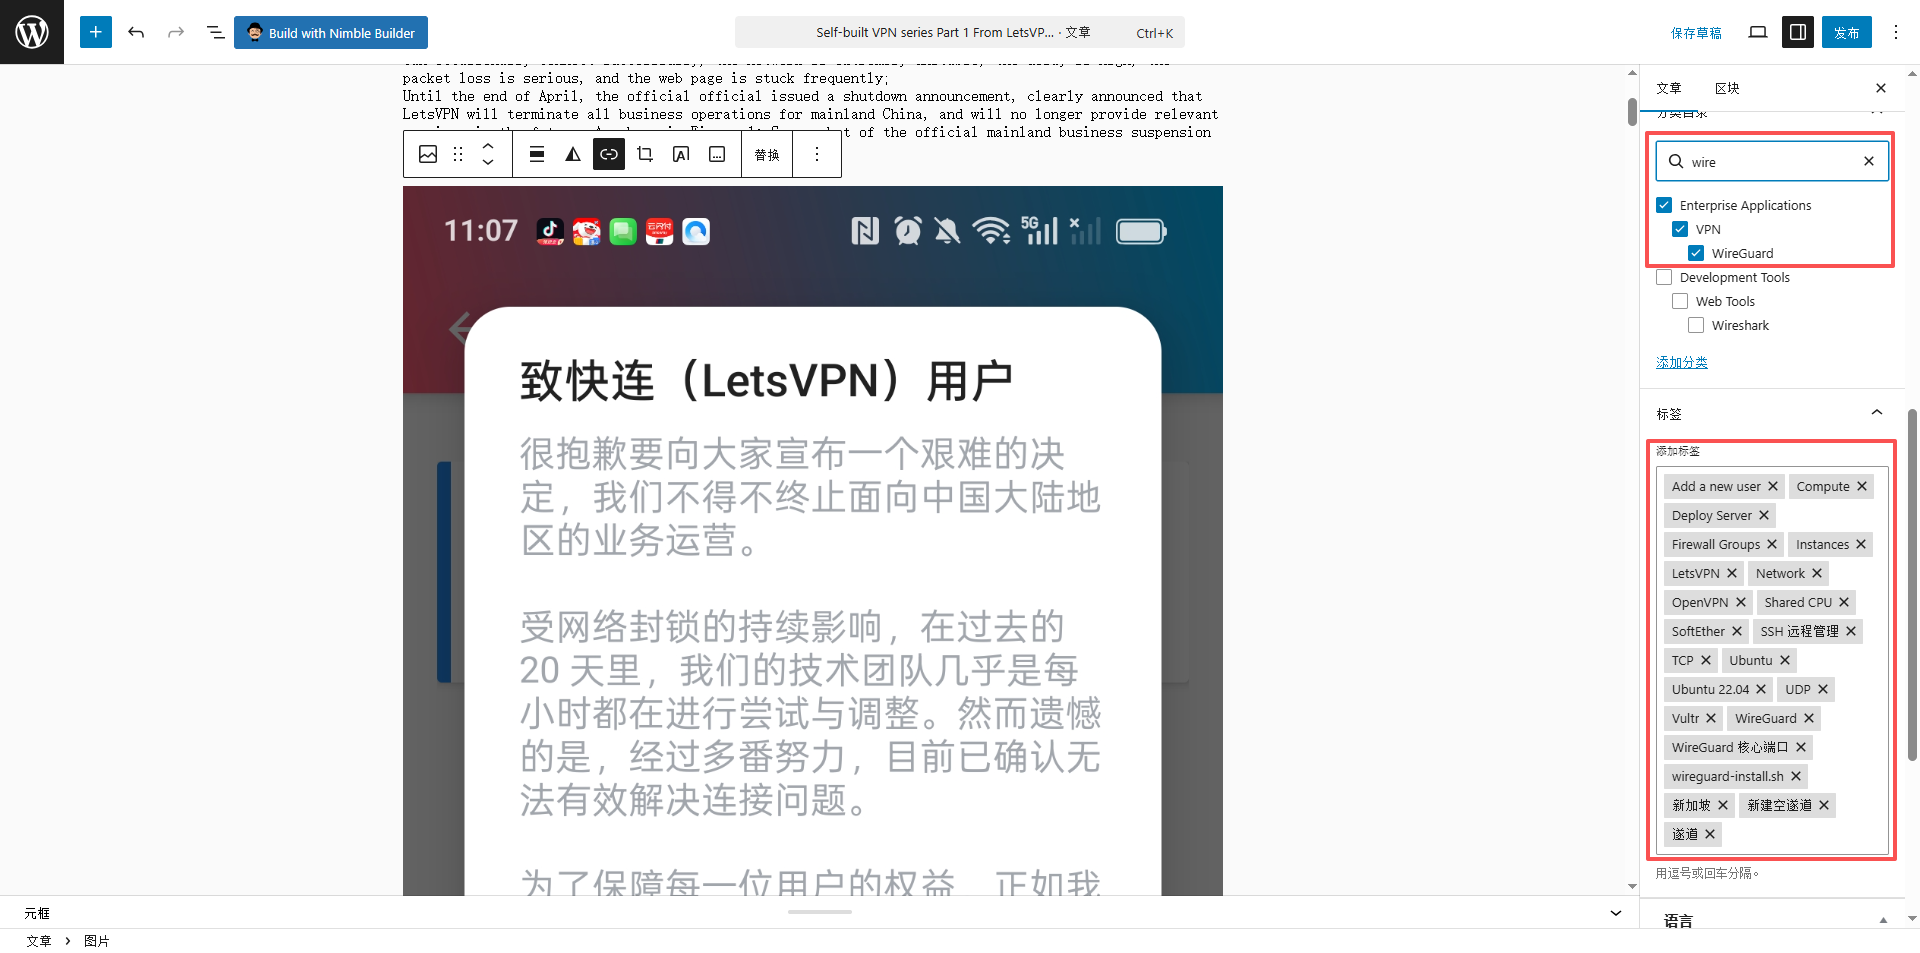
As shown in Figure 13, the corresponding scene: check the format of the article, focus on the code block, picture, reference and other elements, to ensure that the format is not disordered after translation (for example, the code block in Chinese articles , the code format is still maintained after the translation, and there is no need to re-edit); at the same time, check the link of the article to ensure that the internal links in the text have been automatically synchronized to the English version (Polylang) It will automatically associate Chinese and English article links, no need to manually modify).
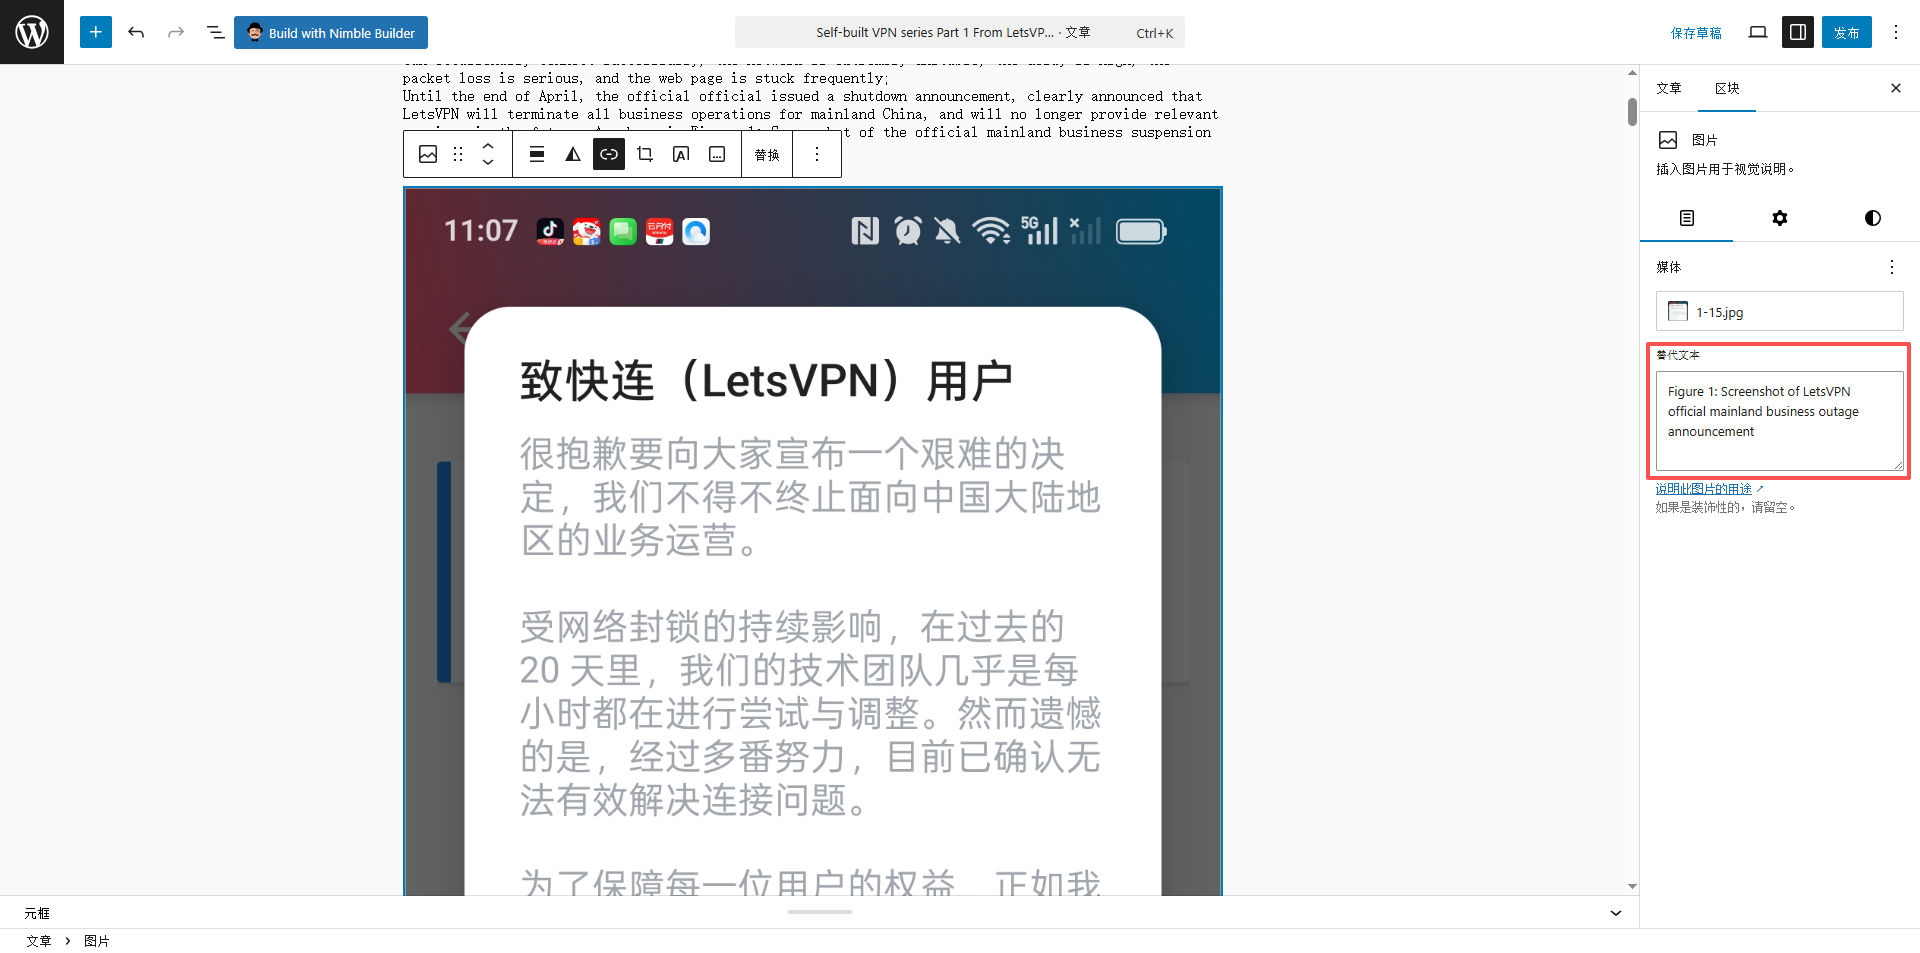
Supplement: If the format is disordered after translation, you can click ‘Block’ in the editor to manually adjust the paragraph alignment and code block format. Usually, AI translation will not have such problems, unless the original format is not standardized.
2.5 Publish English translation articles
Operation path: English article editing page → ‘Publish’ module on the right → Click the ‘Publish’ button
As shown in Figure 18, the corresponding scenario: the final inspection before release, after confirming that all the details are correct, click the ‘Publish’ button, the system will prompt ‘The article has been published’, and the English article is officially launched at this time.
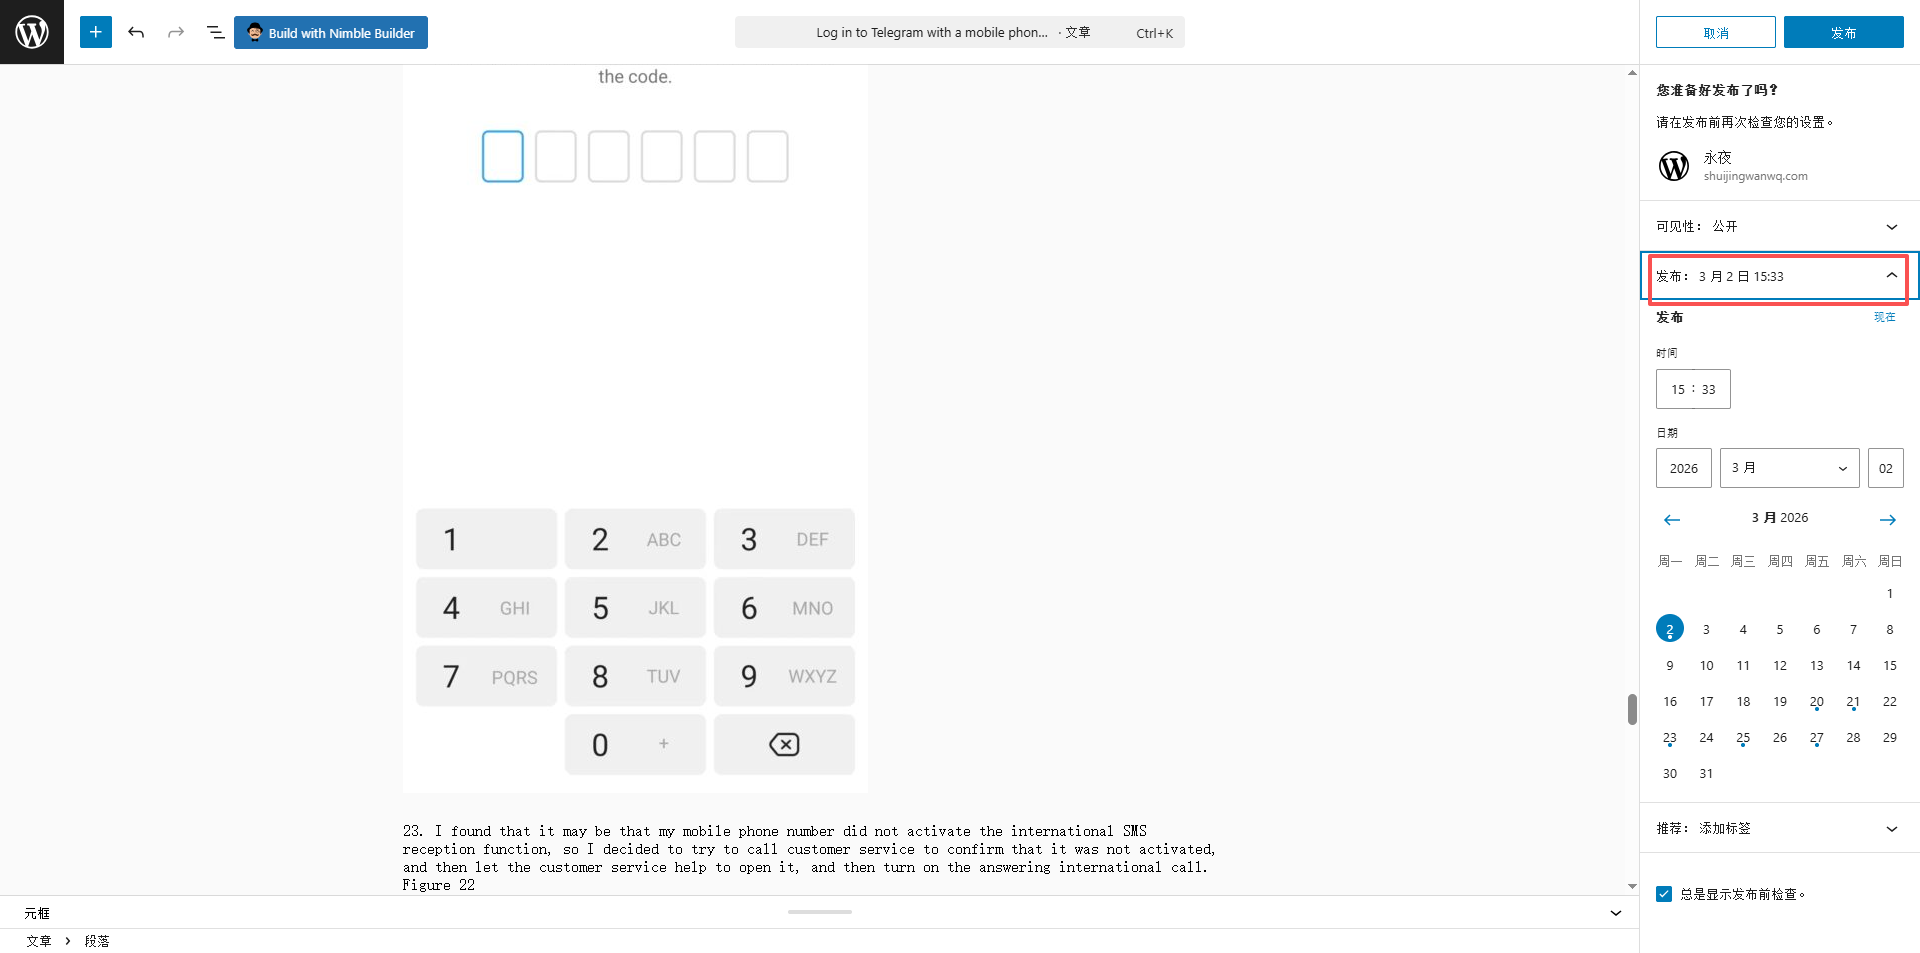
As shown in Figure 19, the corresponding scenario: After publishing, return to the Chinese article editing page, the language module on the right displays ‘English (released)’, click the title of the English article, you can directly jump to the English article details page to view the final effect; at the same time, the UR of the English article l The path is ‘xxx.com/en/2026/04/28/9741/’, and the Chinese article path is ‘xxx.com/2026/04/28/9601/’, the path corresponds to the correct path, and the language switch is normal.
3. Supplementary practice: page translation process
In addition to article translation, website pages (such as homepage, about pages, classification pages, etc.) also need to be translated. The process is similar to article translation, but there are some small details that need to be paid attention to.
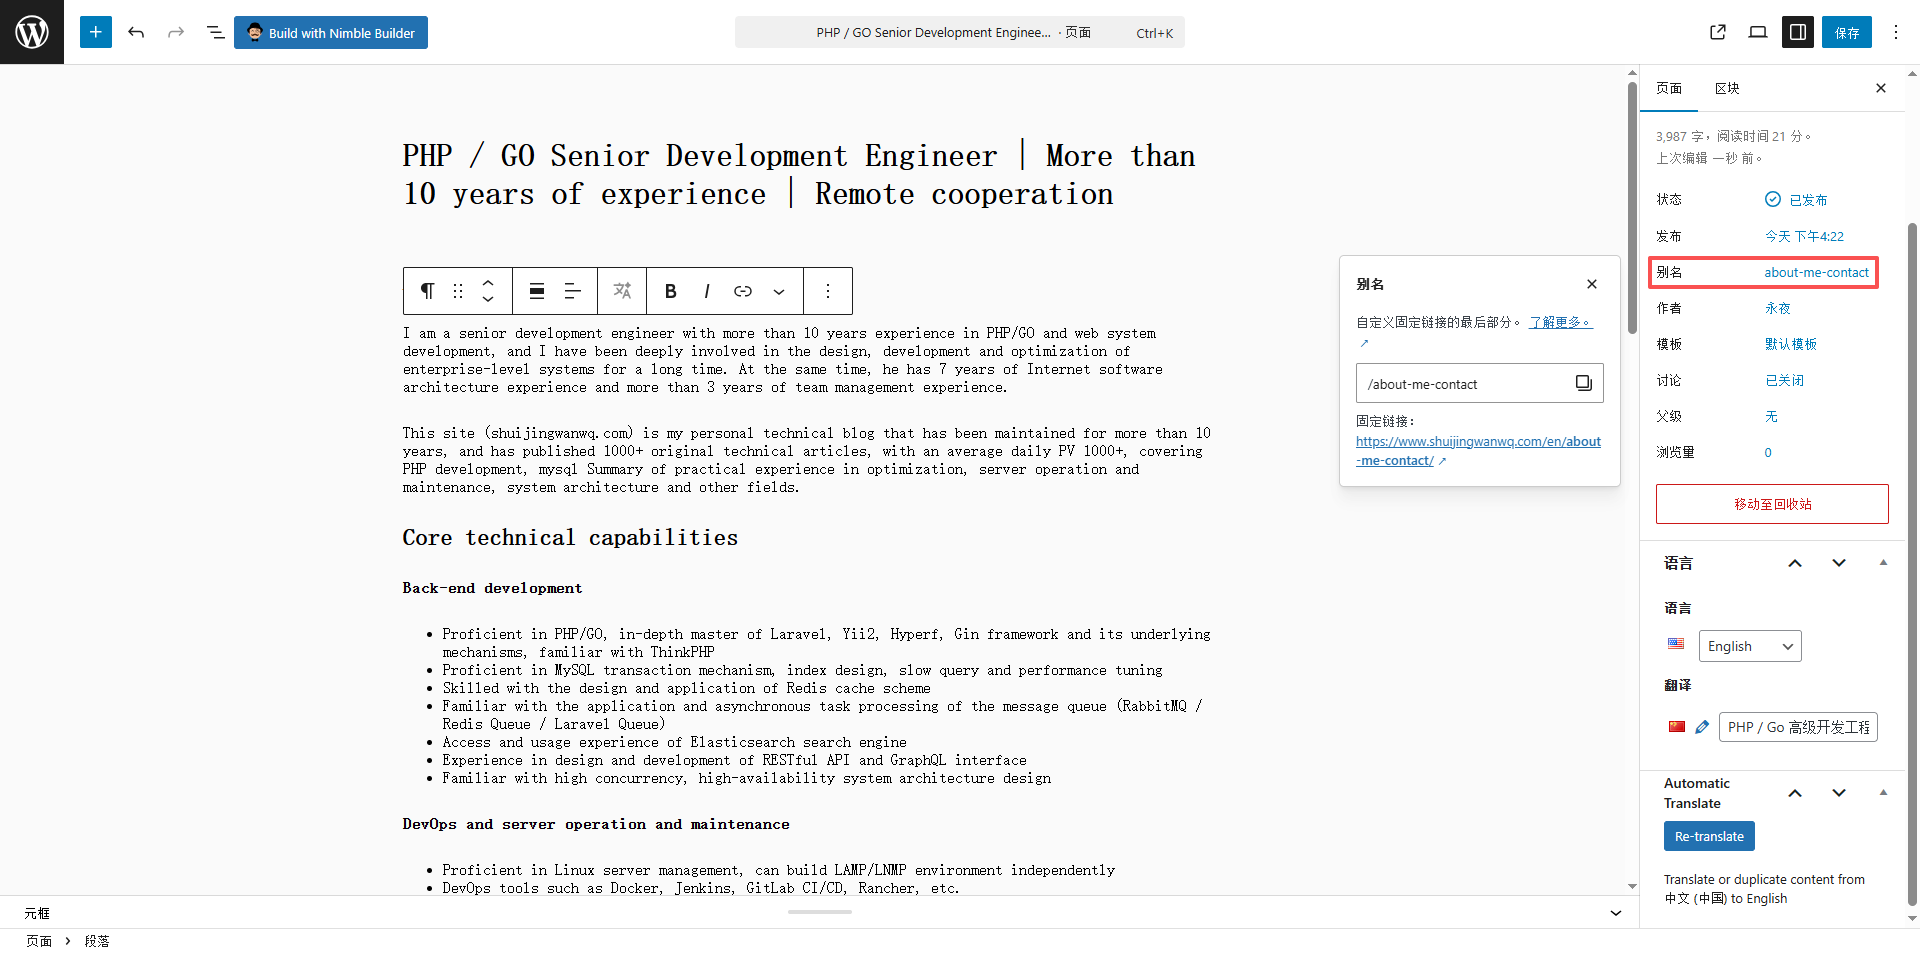
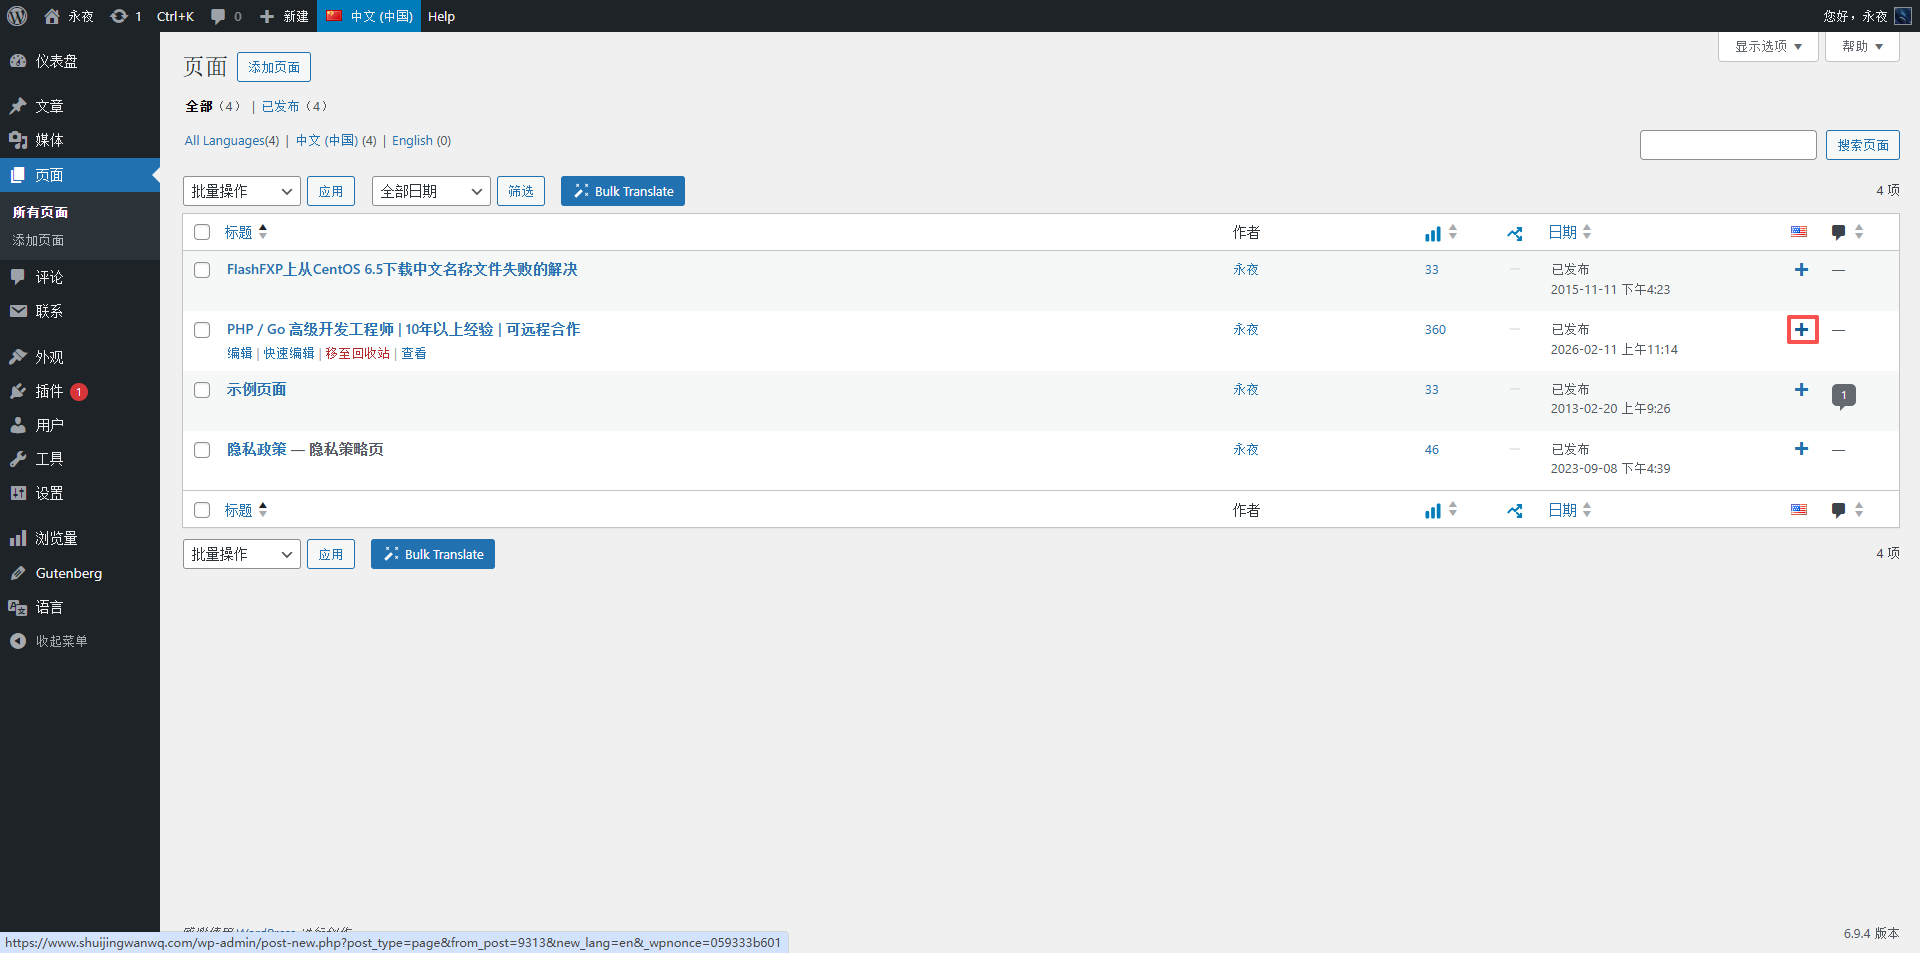
Operation path: background → page → all pages → select the page to be translated (such as the ‘About me’ page) → enter the page editing page → the language module on the right → click the English ‘+’ number → create a new English translation → AI translation → Check → Publish.
As shown in Figure 1, the corresponding scenario: the page list page, the language module on the right, click the English ‘+’ sign, and create a new English page translation.
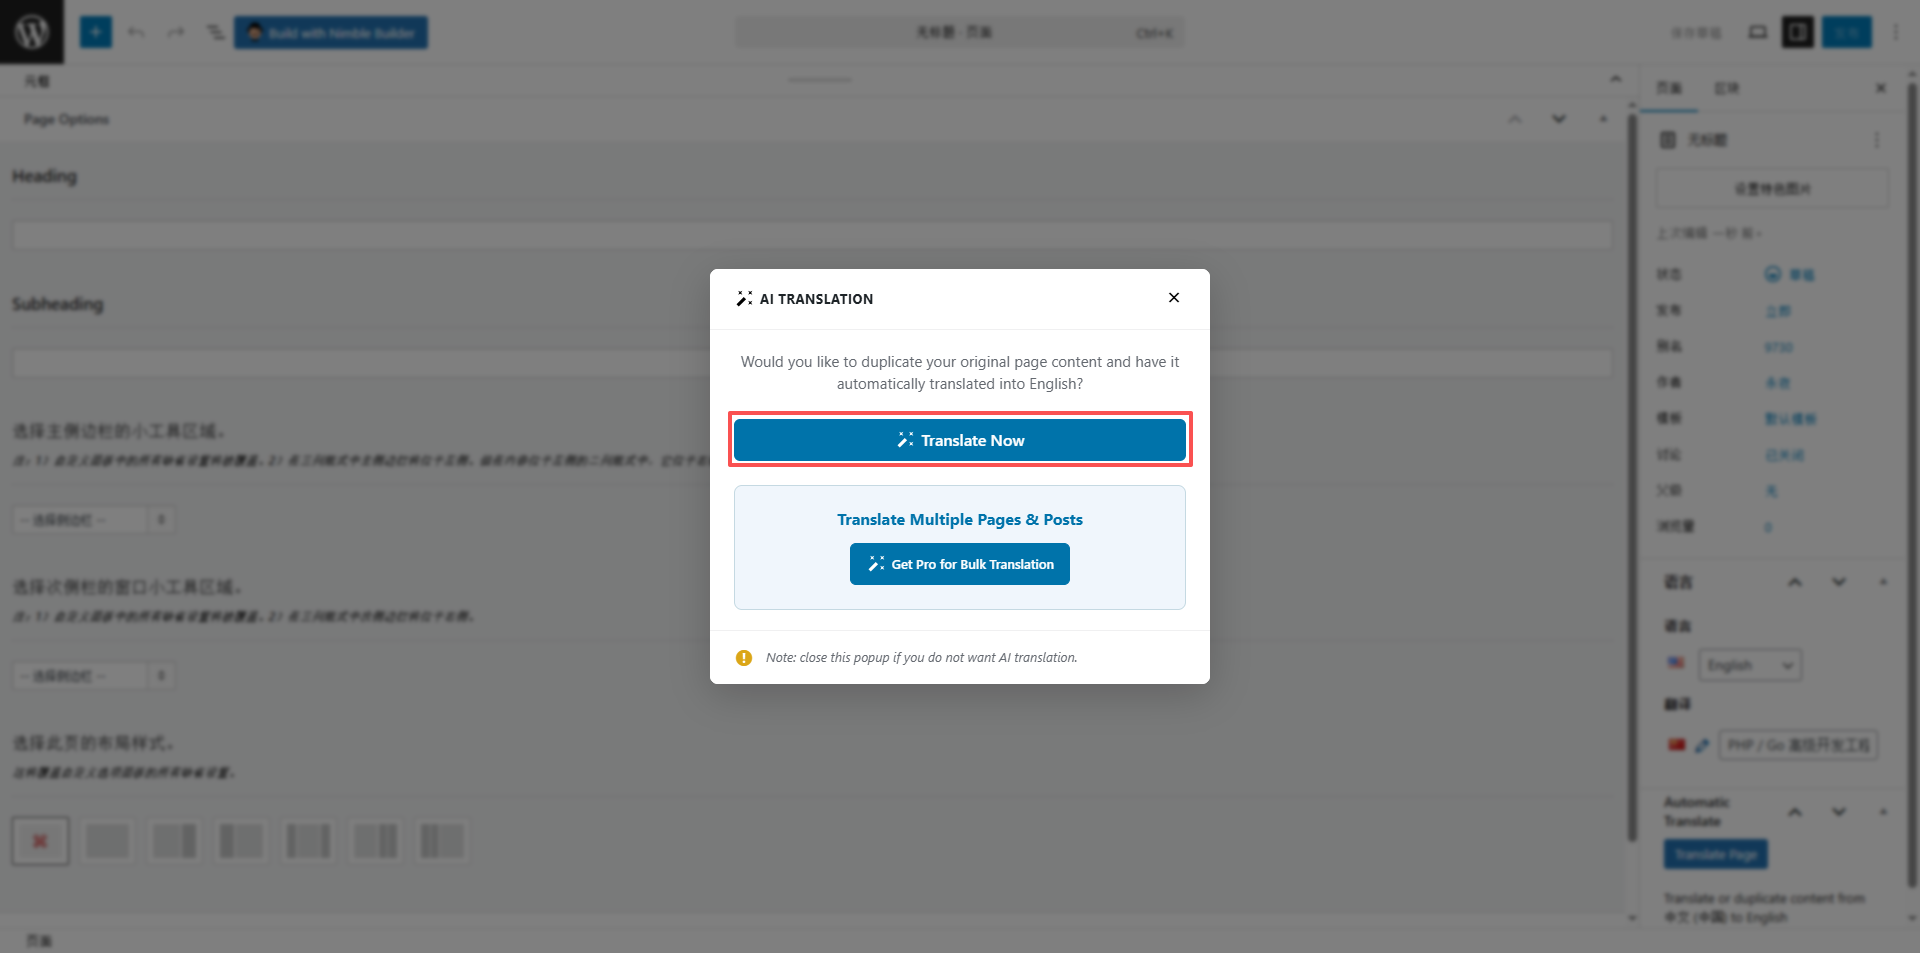
As shown in Figure 2. As shown in Figure 3, the corresponding scenario: the AI translation process of the English page, the same as the translation operation of the article, click ‘Translate Now’ → select Chrome Built-in AI, wait for the translation to be completed, and keep the layout, pictures, links and other elements of the Chinese page after translation.
As shown in Figure 5, as shown in Figure 6 corresponding to the scene: after the page translation is completed, check whether the page layout is disordered, whether the link is normal, and whether the content is accurate, and confirm that it is correct. Then click ‘Publish’; after the release, the page language switch is normal, the user clicks the language switch, and can freely switch between Chinese and English pages, and the layout is consistent.
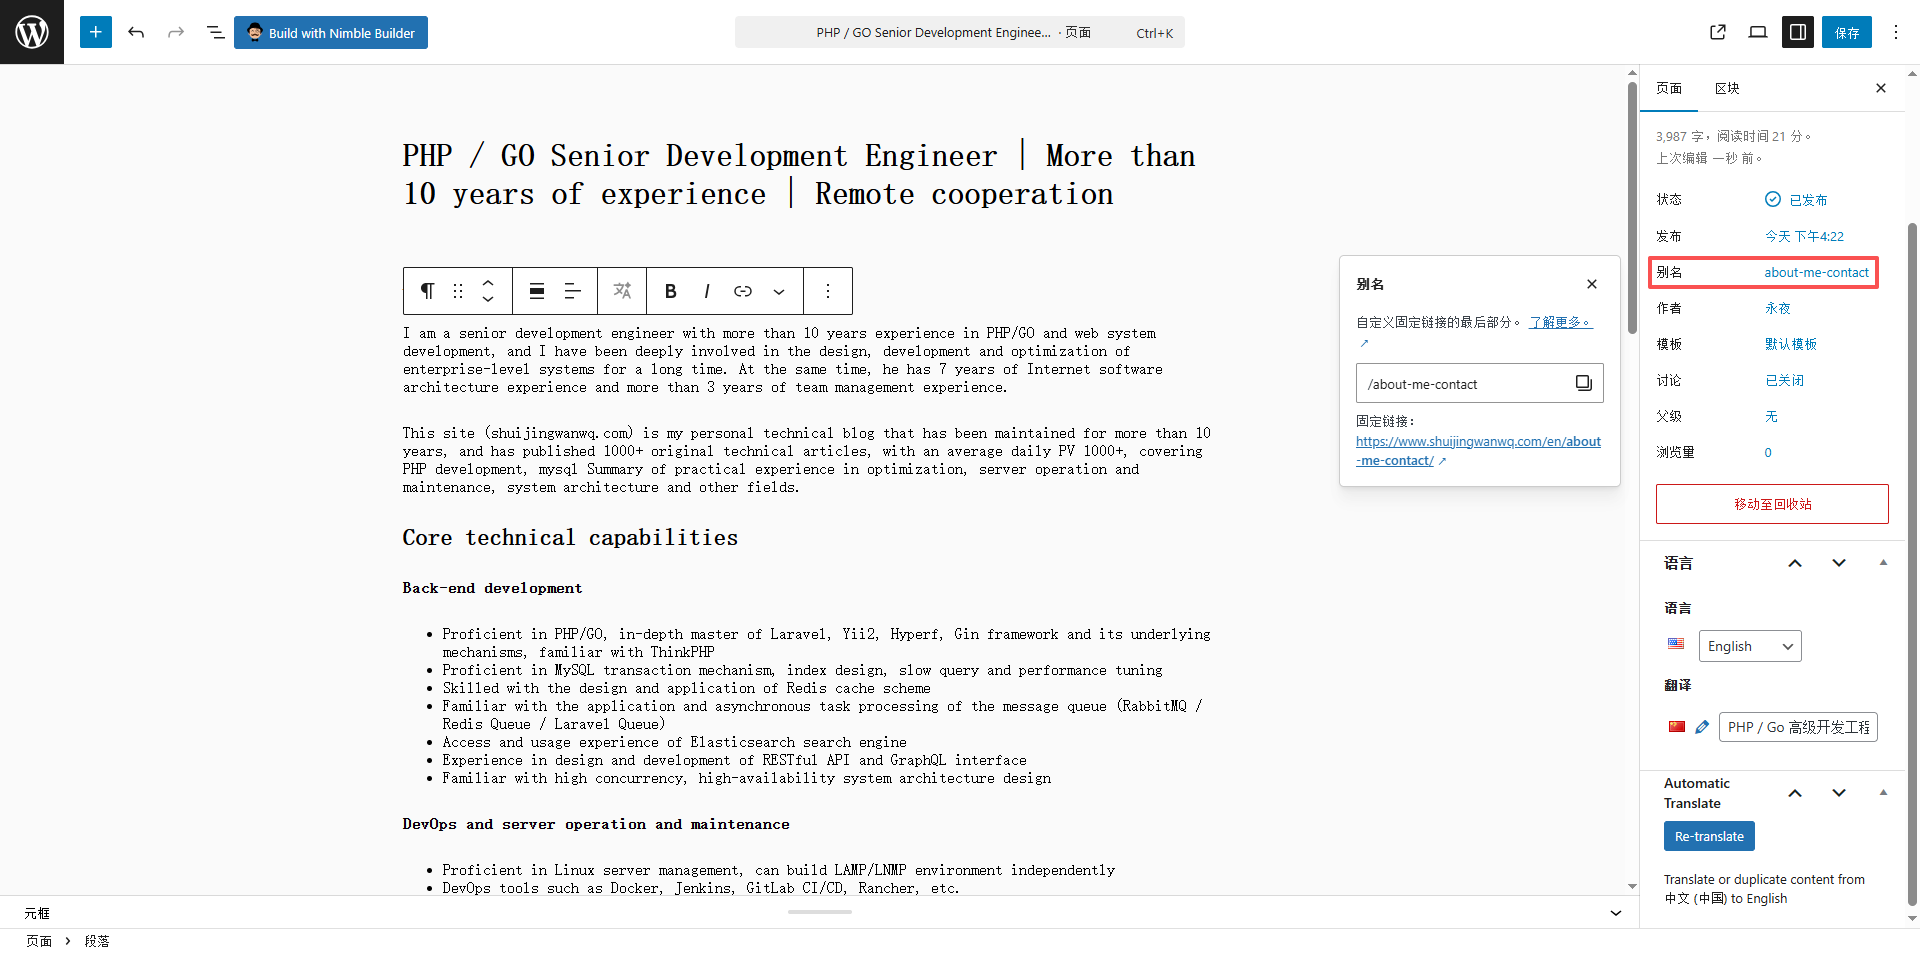
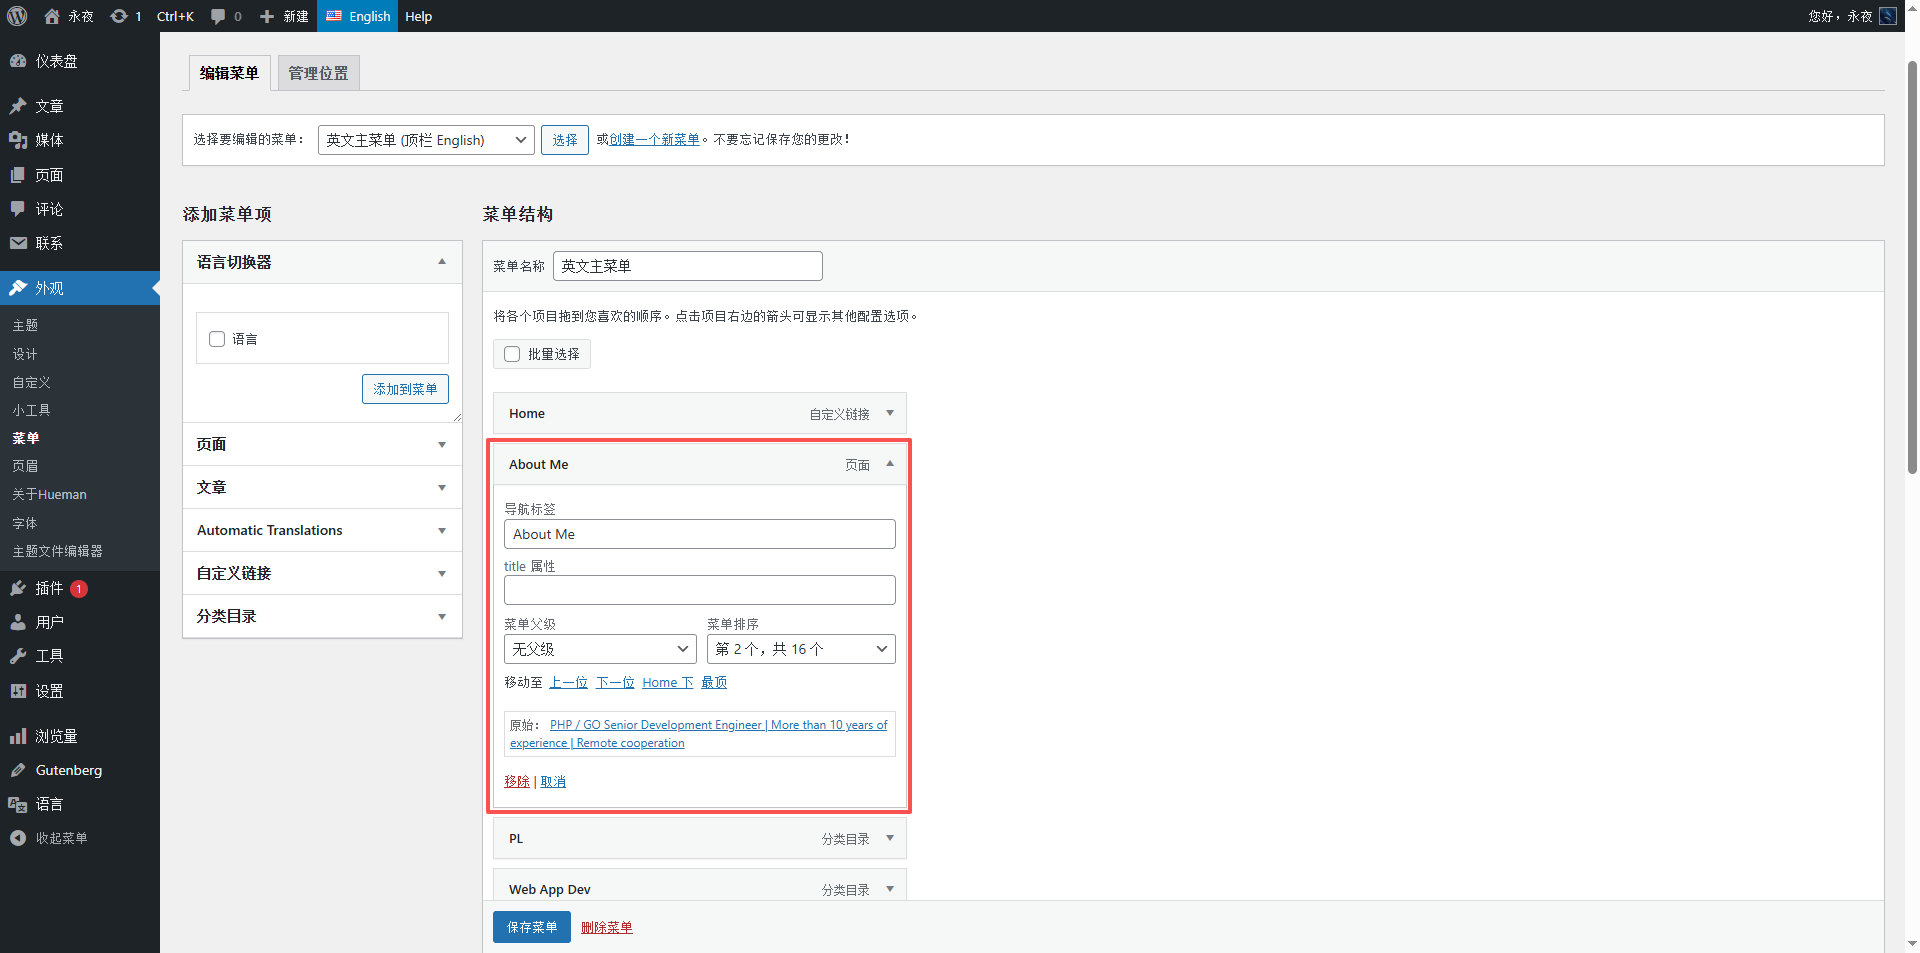
Key details (as shown in Figure 7): After the page is translated, you need to check the page link in the navigation menu to ensure that the Chinese and English menus are correct (Polylang) It will automatically synchronize the menu link, no need to modify it manually), avoid the problem of ‘click the English menu to jump to the Chinese page’.
Four, effect verification and pit guide
4.1 Final effect verification
As shown in Figure 20, the corresponding scenario: the front desk effect of the website, the top language switcher (Chinese/English), after clicking English, the overall website is switched to the English version, and the article list is arranged in reverse order (same as Chinese articles). The order is consistent), click any English article, you can view it normally, and the language switching is smooth; at the same time, the release time, classification, and label of English articles are completely corresponding to the original Chinese text, the URL path is standardized, and SEO is friendly.
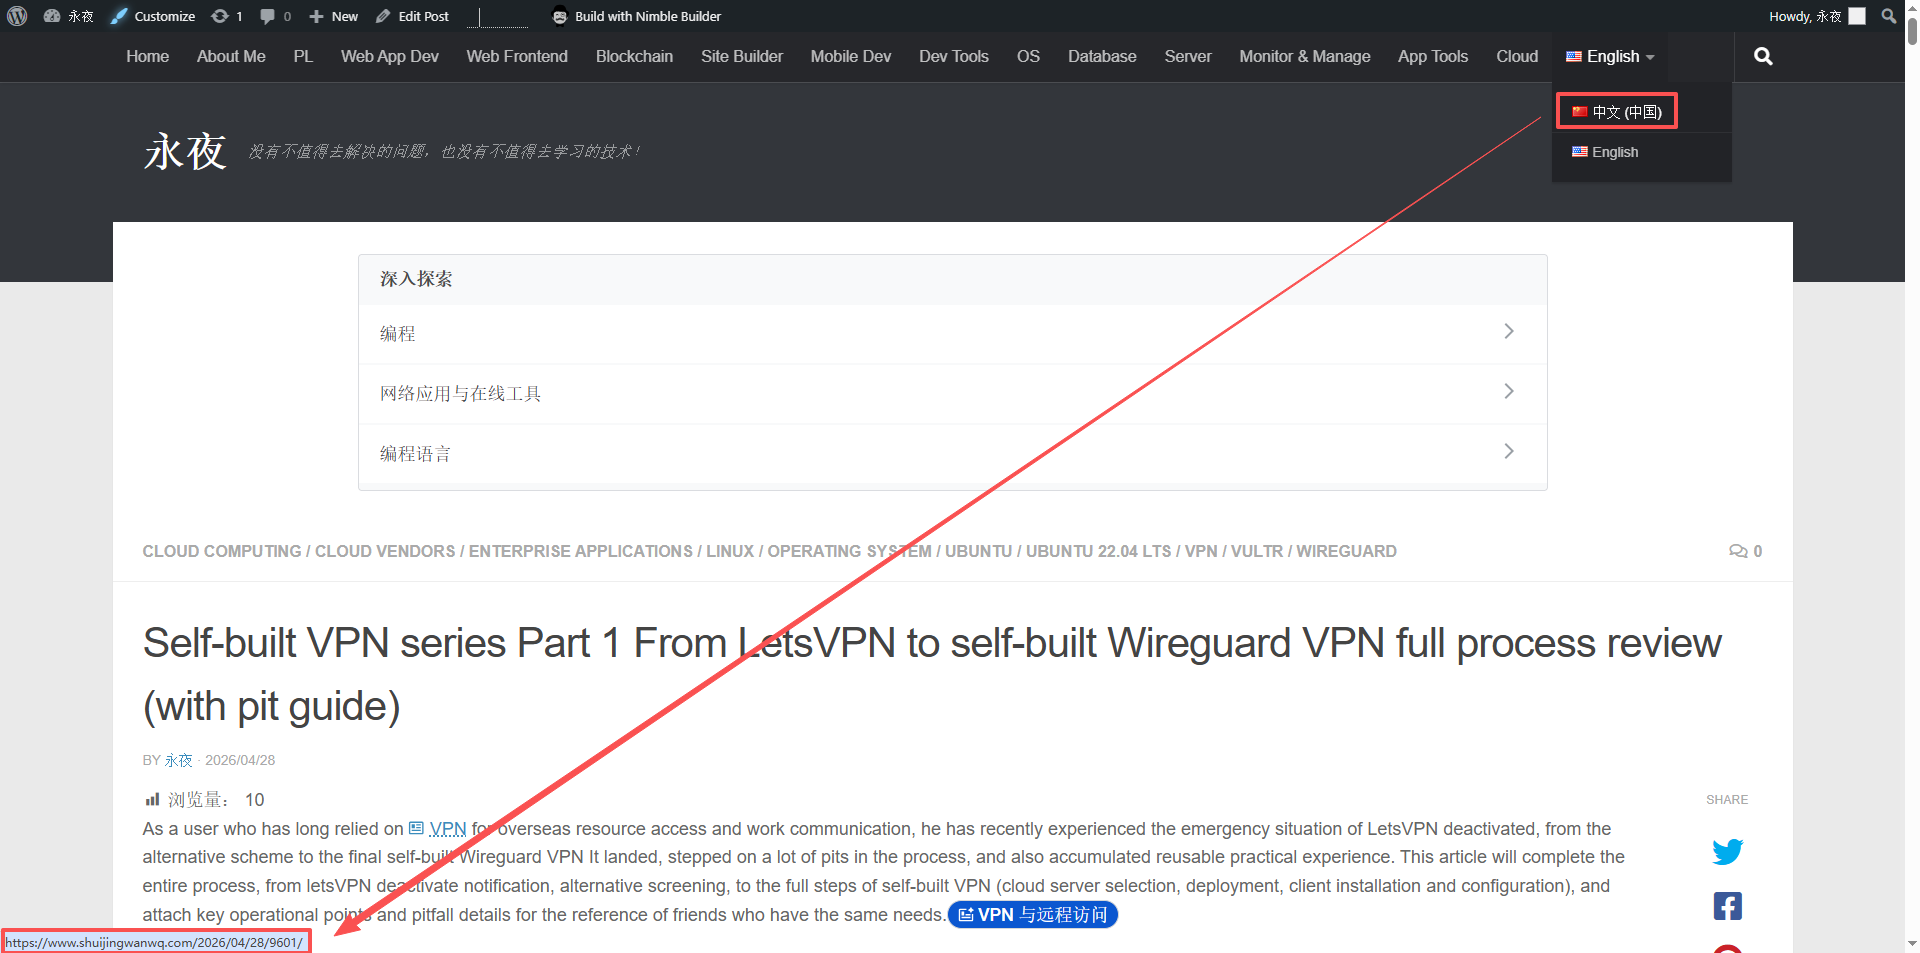
Validation points:
- Language switching: Click the language switch, the Chinese and English versions are smooth, and there is no stuttering and no jump errors.
- Sorting problems: The English article list is in reverse order of release time, which is consistent with Chinese articles, which is in line with expectations.
- Link correspondence: The URL path of Chinese and English articles is correct, click the language switch of the Chinese article, you can directly jump to the corresponding English article, and vice versa.
- Metadata synchronization: Release date, classification, label, featured picture, etc. are all correctly synchronized, without omission or error.
4.2 Pit Avoidance Guide (Key! Measured Pits)
Combined with my practical experience, I have sorted out 5 of the easiest pits to step on, and novices must avoid them and save time:
- Pit 1: The synchronization setting is improper, resulting in the release time cannot be inherited. In the early days, I did not check the ‘Release Date’ synchronization. When a new English translation is created, the release time is ‘now’ by default, and then the synchronization settings are adjusted, and ‘Release date’ is permanently checked.
- Pit 2: Create a new translation path error and cannot inherit metadata. If you create an English article from the ‘New Article’ page, and then associate the Chinese article, you cannot automatically inherit the metadata such as the publishing date, classification, etc., you must click the ‘+’ number to create a new translation from the Chinese article editing page, which is the default copy logic of Polylang.
- Pit 3: Forgot to check technical terms after translation, resulting in translation errors. In the technical article, terms such as ‘wireguard’, ‘ssh’ and ‘vultr’, AI will usually translate accurately, but still need to quickly browse and check to avoid translation deviations (such as ‘translation of ‘Ubuntu 22.04 LTS’ errors).
5. Practical summary and follow-up plan
After many articles and page translation practices, the combination of Polylang plugin + Chrome Built-in AI fully meets the multi-language translation needs of personal blogs, simple operation, high efficiency, and no additional fee, suitable for novice bloggers. Combined with my usage scenarios (only new and not edited), the core points are summarized:
- Synchronized settings: Permanently check ‘Release Date’, the rest are checked as required, no need to tick in and out, worry-free and efficient;
- Translation path: Always click the ‘+’ sign to create a new English translation from the Chinese article/page editing page to ensure that all metadata is automatically inherited;
- Translation tool: Chrome Built-in AI has high translation accuracy. With the AutoPoly plug-in, it can automatically copy formats, pictures and other elements to reduce manual operations;
- Effect verification: For each article/page translated, check the language switch, sorting, link, etc. after publishing to ensure that there is no problem.
Follow-up plan: continue to sort by pages, translate the remaining 1000+ Chinese articles in batches, and regularly check the display effect of the translated articles to ensure that the Chinese and English versions are synchronized normally; if you need to add a new language (such as Japanese and Korean), you can directly Added in Polylang, the operation logic is the same as adding English, and there is no need to reconfigure the synchronization settings.
WordPress Maintenance, Performance Optimization & Blog Growth Consulting
I have been running my personal technology blog for more than 10 years and have published over 1,000 original articles. My long-term practice covers WordPress website maintenance, CDN / Cloudflare configuration, caching optimization, Google SEO, ad monetization, and multilingual website operations.
If your WordPress website is slow, unstable, affected by plugin conflicts, showing caching issues, having AdSense display problems, or facing CDN / Cloudflare / DNS configuration uncertainty, feel free to contact me for remote troubleshooting.
Ideal For:
✅ Personal blog owners
✅ WordPress website operators
✅ Independent developers and content creators
✅ SaaS website owners
✅ Website owners who want better speed and stability
What I Offer:
✅ WordPress performance optimization
✅ Cloudflare / CDN / caching configuration checks
✅ Plugin conflict and layout issue troubleshooting
✅ AdSense display issue troubleshooting
✅ Basic SEO structure review
✅ Blog growth and monetization consulting
If you would like to discuss your website, please contact me and mention: WordPress Maintenance Consultation.
Contact Me:
Telegram: @shuijingwan
WeChat: 13980074657
Email: shuijingwanwq@gmail.com
Leave a Reply